The catastrophic failure of a wet room on a timber floor is almost never a single event, but a chain reaction starting with invisible floor movement.
- Structural deflection (floor bounce) is the primary enemy, causing cracks that compromise the entire waterproofing system.
- Waterproofing is a complete system; mixing brands or skipping reinforcement at junctions is the most common installation error.
Recommendation: Before any waterproofing is considered, your first action must be to test and, if necessary, reinforce your timber joists to exceed standard building regulations.
The image of a dark, damp stain spreading across a kitchen ceiling is the single greatest fear for any homeowner considering a wet room, especially in a property with timber floors. You’ve heard the horror stories of catastrophic leaks, rotten joists, and repair bills that spiral into the thousands. This fear is valid, but it’s often misdirected. Most people focus on the final layer—the tiles and the grout—or assume a good “wet room kit” is a magic bullet.
The common advice revolves around applying a waterproof membrane and ensuring good drainage. While true, this is dangerously simplistic. It’s like telling a pilot to “fly upwards” without explaining aerodynamics. The reality is that the vast majority of wet room failures on wooden subfloors are not caused by a faulty product, but by a fundamental misunderstanding of how a timber structure behaves under load and over time. These failures are predictable and, more importantly, entirely preventable.
But what if the secret to a permanently leak-proof wet room wasn’t just about applying a membrane, but about first creating a completely monolithic, movement-free foundation? This guide departs from generic instructions. We will dissect the chain of events that leads to a leak, starting from the joists up. As a specialist obsessed with tanking and drainage, I will show you how to think about your wet room not as a collection of parts, but as a single, integrated system where every component, from the subfloor to the extractor fan, plays a critical role in its long-term integrity.
We will explore the physics of floor movement, the correct application of modern waterproofing systems, the critical choice between trays and screeds, and the subtle but vital details of drainage and ventilation that are so often overlooked. By the end, you will understand the principles of failure and be equipped to ensure your installation is built to last a lifetime.
Summary: A Specialist’s Guide to Bulletproof Wet Room Installation
- Why Timber Floors Move and How That Cracks Grout
- How to Apply Liquid Waterproofing Membrane Correctly
- Pre-Formed Trays vs Screeding by Hand: Which Is Safer?
- The Trap Mistake That Causes Slow Draining Showers
- How to Choose Glass Screens to Minimize Water Splash
- The Extractor Fan Error That Leads to Peeling Paint
- Why Porcelain Resists Stains Better Than Natural Stone
- Porcelain Tiles: The Best Choice for High-Traffic Family Kitchens?
Why Timber Floors Move and How That Cracks Grout
The original sin of almost every leaking wet room on a timber floor is structural deflection. A wooden floor, by its very nature, is designed to have a degree of “bounce” or flex. In a bedroom or living room, this is unnoticeable. In a wet room, it is a ticking time bomb. Every time someone walks in the shower, the floor joists bend by a minuscule amount. This movement is transferred up through the subfloor, the tile adhesive, the tiles, and critically, the grout lines and waterproof membrane.
Over hundreds of cycles, this flexing creates hairline cracks in the rigid grout and puts immense stress on the waterproofing layer, especially at joints and corners. Once a micro-crack appears, water ingress begins. It may take months or even years, but failure is inevitable. Standard residential floor construction aims for a deflection limit of L/360 (the span divided by 360). For a wet room, this is grossly inadequate. Professional standards indicate that a much stricter L/720 standard reduces floor deflection by 50%, effectively creating a rigid, monolithic base that is essential for the longevity of tile and membrane systems.
Before a single tile is purchased, the floor’s rigidity must be assessed and, most likely, improved. This usually involves adding “noggins” (horizontal braces) between the joists, or “doubling up” the joists themselves to increase their stiffness. Over this, a robust subfloor, typically a minimum of 18mm marine-grade plywood, must be screwed down securely. This isn’t an optional upgrade; it is the fundamental price of admission for a successful wet room on a timber structure.
Your Action Plan: The Floor Deflection Audit
- Measure the Span: Determine the unsupported length of your floor joists in inches. This is your ‘L’ value.
- Calculate Max Deflection: Divide the span (L) by 720. The result is the absolute maximum bend, in inches, that is acceptable for your wet room floor.
- Perform a Load Test: Place a straight edge or laser level across the joists. Have a person stand or place a heavy weight in the middle of the span and measure the amount of sag.
- Reinforce if Necessary: If the measured deflection exceeds your L/720 calculation, you must reinforce the floor. Add noggins every 400mm or sister the joists with new timber.
- Install a Rigid Subfloor: Once the joists are stiffened, install a minimum 18mm WBP or Marine Plywood subfloor, screwing it to the joists at 150mm centres for maximum rigidity.
Only by eliminating movement at the structural level can you create a stable foundation upon which the subsequent layers of waterproofing and tile can safely depend.
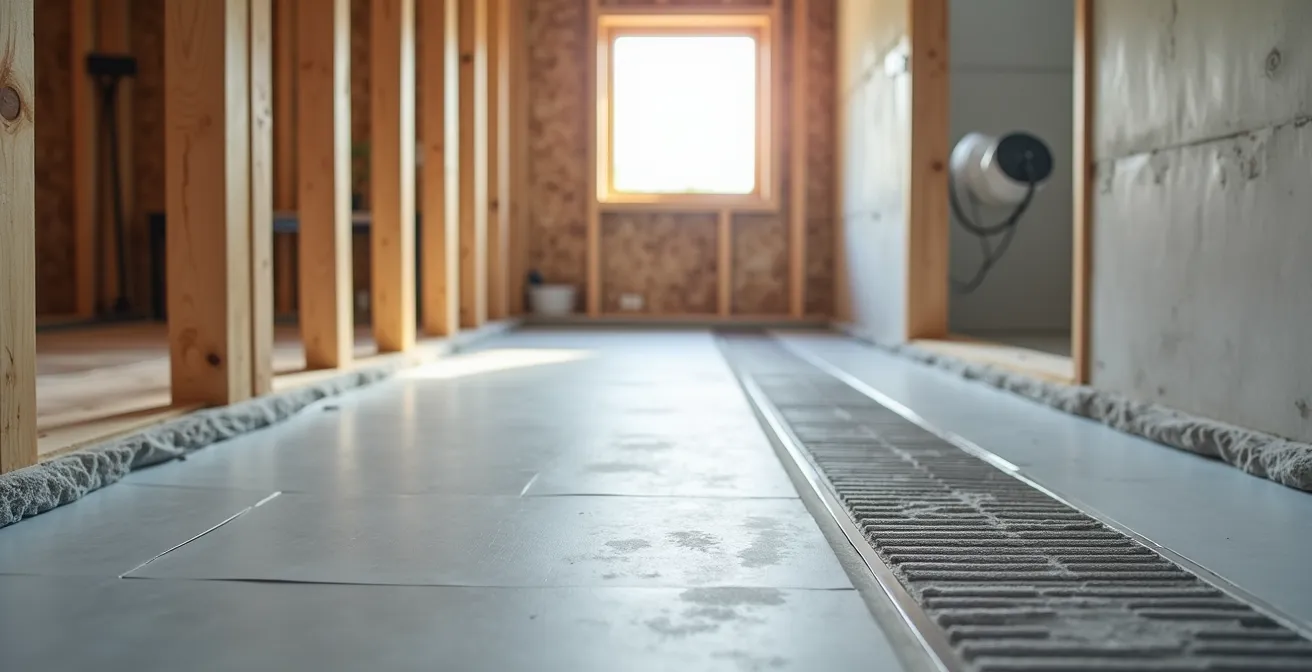
How to Apply Liquid Waterproofing Membrane Correctly
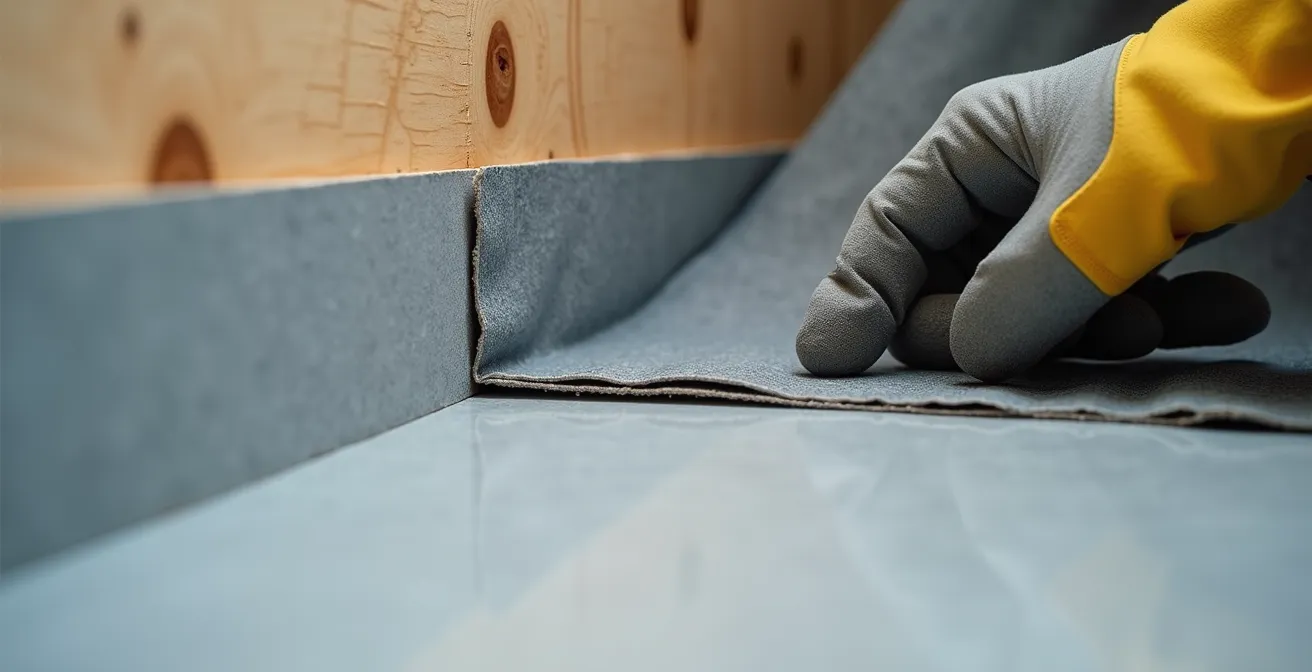
Once you have a rock-solid, deflection-free subfloor, the next critical defence is the tanking, or waterproofing membrane. This is the layer that creates a 100% impervious barrier, ensuring not a single drop of water can reach the timber structure below. However, the biggest mistake homeowners and inexperienced installers make is treating the membrane like a simple coat of paint. It is a complete system, and its integrity depends entirely on how its weakest points are handled.
Indeed, sobering research into waterproofing failures shows that over 90% of wet room leaks occur not in the middle of a floor or wall, but at the critical junctions: internal corners, where walls meet the floor, and around pipe penetrations. Applying a liquid membrane with just a roller in these areas is a guaranteed future failure. These high-stress points require special reinforcement tapes and pre-formed corner pieces that are embedded into the first coat of the liquid membrane, before the second coat is applied. This creates a flexible, yet incredibly strong, bridge that can accommodate any minute building shifts without tearing.
Furthermore, the concept of system integrity is non-negotiable. Using a primer from one brand, a membrane from another, and tape from a third is a false economy that voids warranties and introduces chemical incompatibilities. Always use a complete, single-manufacturer system.
Case Study: The 8-Year Failure
A wet room installed on a timber floor in 2014 began to leak in 2022. Analysis revealed the installer had used waterproofing products from different manufacturers and had failed to adequately reinforce the subfloor. The slight but persistent floor movement caused the tiles to de-bond from the substrate, which in turn tore the improperly reinforced membrane at the wall/floor junction. Experts concluded that using a single manufacturer’s system and correctly stiffening the floor would have prevented the failure. The case also highlighted that the waterproofing must extend a minimum of 1.2 metres up the walls in the shower area to contain splashback.
This attention to detail at the junctions is what separates a professional, long-lasting installation from a costly disaster waiting to happen.
Pre-Formed Trays vs Screeding by Hand: Which Is Safer?
Creating the perfect slope, or “fall,” to the drain is the next challenge. The floor must guide every drop of water towards the trap without leaving puddles. On a timber floor, you have two primary options for achieving this: a traditional sand and cement screed, or a modern pre-formed shower tray. For a timber subfloor, the choice has significant implications for safety and longevity.
A hand-laid screed allows for custom shapes, but it carries two major risks on a wooden structure. Firstly, it is incredibly heavy. As an analysis of wet room construction shows, a typical screed adds a dead load of 50-70kg/m², a substantial weight that timber joists may not be designed to support without further reinforcement. Secondly, the accuracy of the fall is entirely dependent on the skill of the installer. An imperfect gradient can lead to pooling, which puts constant pressure on grout lines and the membrane. As the technical team at CCL Wetrooms notes, a solid foundation is paramount.
A minimum of 18mm ply should be installed between the joists, finishing flush with the top of the joists
– CCL Wetrooms Technical Team, Wet Room Construction Details Guide
A pre-formed shower tray, made from a high-density foam core with a factory-applied waterproof coating, is almost always the safer and superior choice for timber floors. These trays are extremely lightweight (around 20-30kg/m²) and come with a factory-guaranteed, perfectly engineered gradient of 1-2%. This eliminates the risk of human error in creating the fall and significantly reduces the load on the joists. While they come in standard sizes, their installation is faster, cleaner, and drastically lowers the risk of pooling.
This comparative analysis of construction methods clearly shows the advantages of a pre-formed tray on a suspended timber floor.
| Factor | Pre-Formed Tray | Hand Screeding |
|---|---|---|
| Weight Load | 20-30kg/m² (lightweight foam core) | 50-70kg/m² (sand/cement) |
| Gradient Accuracy | Factory-guaranteed 1-2% | Installer-dependent |
| Installation Time | Half day | 2-3 days including drying |
| Structural Reinforcement | Rarely required | Often necessary |
| Risk of Pooling | Minimal | Moderate to High |
For a timber floor installation where weight and precision are paramount, a pre-formed tray is the professional’s choice for a reliable, leak-proof result.
The Trap Mistake That Causes Slow Draining Showers
A shower that drains slowly is more than just an annoyance; it’s a sign of a critical design flaw that can lead to leaks. When water backs up, it creates a shallow pool that submerges grout lines and the wall-floor junction, putting the entire waterproofing system under constant hydrostatic pressure. The most common cause of this is a fundamental flow rate mismatch between the shower head and the waste trap.
Modern high-performance and rainfall shower heads can output a huge volume of water—often 20-30 litres per minute or more. The waste trap installed beneath the floor must be able to handle this volume with capacity to spare. If the trap’s flow rate is lower than the shower’s output, water will inevitably back up. It’s a simple matter of physics: what comes in must go out faster. As a rule of thumb, official drainage specifications confirm that the trap flow rate must be a minimum of 50% higher than the showerhead’s maximum output.
This means if your shower produces 20 litres/minute, you need a trap rated for at least 30 litres/minute. Always check the specifications for both components before purchase. Beyond the trap itself, the waste pipe connecting it to the main soil stack must also have a consistent and adequate fall. A common standard is the 1:40 rule, which dictates a 2.5cm drop for every 1 metre of horizontal pipe run. A trap with a high flow rate is useless if the connecting pipe is too flat, causing water to slow down and back up within the pipework. This secondary fall must be carefully planned and installed before the floor is closed up.
Getting this calculation right ensures water is evacuated instantly, keeping the shower floor as dry as possible and placing minimal stress on the waterproofing system.
How to Choose Glass Screens to Minimize Water Splash
While a true “open” wet room is appealing, the practicalities of water splash on a timber-floored property mean a well-chosen glass screen is a crucial part of the system. Its job is to contain the majority of water within the primary showering zone, minimising the amount of water that needs to be managed by the rest of the floor. The goal is not to create a sealed enclosure, but to strategically manage splash and airflow.
The key to success with a walk-in screen is placement and size. A common mistake is placing the screen too close to the shower head or making it too short. A minimum distance of 75cm should be maintained between the centre of the shower head and the edge of the glass screen. This prevents the “Venturi effect,” where the spray of water can actually draw air—and water droplets—out of the opening. The screen should be long enough to catch the majority of direct and ricochet spray, typically at least 120cm for a standard setup.
The type of shower head also dictates the screen’s required height. A gentle rainfall shower head can be managed with a standard 1.9m high screen. However, powerful, high-pressure body jets create far more upward and ricocheting spray. For these systems, a taller screen of at least 2m in height, often with a small return panel, is essential to prevent water from spraying over the top and onto the unprotected areas of the bathroom. The choice of screen is not just aesthetic; it’s a functional part of your water containment strategy.
By carefully considering shower type, pressure, and placement, you can select a screen that effectively contains water while maintaining an open, minimalist feel.
The Extractor Fan Error That Leads to Peeling Paint
Water damage isn’t always from leaks; it can also come from the air. A wet room generates a massive amount of water vapour, which, if not removed quickly, will condense on colder surfaces like walls, ceilings, and window frames. This persistent dampness leads to peeling paint, mildew, and eventually, the degradation of plaster and timber. Simply installing any old extractor fan is not enough; it must be powerful enough for the specific demands of a wet room.
Ventilation performance is measured in “Air Changes per Hour” (ACH). This is the number of times the fan can replace the entire volume of air in the room within one hour. For a standard bathroom, 5-10 ACH might suffice. However, because of the high steam output, ventilation standards specify that a minimum of 15-20 ACH is required for proper wet room ventilation. Undersizing the fan is a critical error that leads directly to condensation problems.
Calculating the required fan capacity is straightforward:
- Calculate Room Volume: Measure the room’s Length x Width x Height in metres to get the volume in cubic metres (m³).
- Apply the ACH Multiplier: Multiply the room volume by 20 (the upper end for wet rooms).
- Determine Fan Capacity: The result is the minimum fan capacity you need, measured in m³/hour. For example, a 2m x 3m x 2.4m room has a volume of 14.4m³. Multiplied by 20, this requires a fan rated for at least 288 m³/hour.
Finally, a fan cannot extract air if replacement air cannot get in. There must be a source of “makeup air,” which is typically achieved by leaving a 10-15mm gap under the bathroom door. Without this gap, the fan will struggle to work efficiently, no matter how powerful it is. An appropriately sized fan with a clear air path is an essential part of your wet room’s defensive system against water damage.
This ensures the room dries out quickly after use, protecting the building fabric and preventing the long-term, creeping damage caused by condensation.
Why Porcelain Resists Stains Better Than Natural Stone
The final layer of your wet room system is the tile. While aesthetics are important, in a wet room, technical performance is paramount. The choice between natural stone (like marble, travertine, or slate) and porcelain is a critical one. While natural stone offers undeniable beauty, it is a fundamentally porous material. This porosity is its greatest weakness in a wet environment.
Natural stone will absorb water. Even when sealed, the sealant requires regular maintenance and can wear away, allowing water, soap scum, and minerals to penetrate the stone’s surface, leading to staining and discoloration. Porcelain, on the other hand, is a ceramic material that has been fired at extremely high temperatures. This process, called vitrification, melts the clay and minerals into a glass-like, non-porous structure.
The technical measure for this is the water absorption rate. For a tile to be classified as porcelain, it must have a water absorption rate of 0.5% or less. This means it is virtually impervious to water. It doesn’t rely on a temporary surface sealant for its protection; its water resistance is an inherent property of the material itself. This makes it exceptionally resistant to staining from water, dyes in shampoos, or cleaning products. It will not harbour mould or mildew within its structure, making it far more hygienic and easier to maintain over the long term.
While stone can be used with a rigorous sealing and maintenance schedule, porcelain’s built-in impermeability makes it the superior technical choice for a trouble-free wet room floor.
Key Takeaways
- A leak-proof wet room on timber is a system; its strength is defined by its weakest point.
- Structural rigidity (eliminating floor ‘bounce’) is the non-negotiable first step, more important than the waterproofing itself.
- Always use a complete, single-manufacturer waterproofing system, paying obsessive attention to reinforcing corners and junctions.
Porcelain Tiles: The Best Choice for High-Traffic Family Kitchens?
The title might mention kitchens, but the properties that make porcelain an excellent choice for a high-traffic commercial area are precisely what make it the ultimate failsafe for a wet room floor on a timber structure. A family kitchen endures dropped pans, spills, and constant foot traffic. A wet room floor endures a constant assault from water. Porcelain is engineered to withstand both.
Its incredible hardness and density, a result of the vitrification process, mean it has superior structural strength. While the total dead load for a porcelain tile installation is significant, at around 25-35kg per m², this is still considerably less than a thick stone tile or a sand-cement screed. When combined with a lightweight pre-formed tray, it creates a robust yet manageable system for a reinforced timber floor. Its strength means it won’t crack under point loads and will contribute to the overall rigidity of the floor assembly.
More importantly, its near-zero water absorption rate makes it the final, impenetrable barrier in your defence system. If, in a worst-case scenario decades down the line, a grout line were to fail, the porcelain tile itself would not allow water to pass through to the membrane below. It provides a level of redundancy that porous natural stone simply cannot offer. It is the belt-and-braces choice, a surface that is not only waterproof but also highly slip-resistant (when an R11-rated texture is chosen), easy to clean, and immune to chemical attack from bathroom products.
To ensure a lifetime of leak-free use, the next logical step is to have your floor structure professionally assessed before any work begins, guaranteeing the entire system is built on solid ground.
Frequently Asked Questions on Wet Room Glass Screens
What’s the minimum safe distance between the shower head and the walk-in opening?
Maintain at least 75cm between the shower head center and the screen opening edge to prevent the Venturi effect drawing water out of the showering area.
How does floor tile texture affect screen requirements?
Highly textured, R11-rated slip-resistant tiles have more surface area and grip water droplets more effectively. This reduces how far water can travel across the surface, potentially allowing for slightly smaller screens compared to a smooth tile.
Should screen height vary based on shower type?
Yes, absolutely. Gentle rainfall-style heads can typically be contained with a standard 1.9m high screen. However, high-pressure, multi-jet shower systems require taller screens of 2m or more, often with a hinged return panel, to effectively contain the more aggressive and ricocheting water spray.