In summary:
- Embrace the floor’s history; “honest imperfection” is more authentic than a flawless, new look.
- Fill gaps with custom-cut pine slivers for a seamless, durable, and traditional finish that moves with the wood.
- Choose a hard wax oil over polyurethane to protect the floor while preserving the natural texture and feel of the timber.
- Always sand along the grain and use progressively finer grits to avoid permanently gouging the soft pine wood.
- Solve draughts and noise by sealing gaps effectively, which also improves energy efficiency.
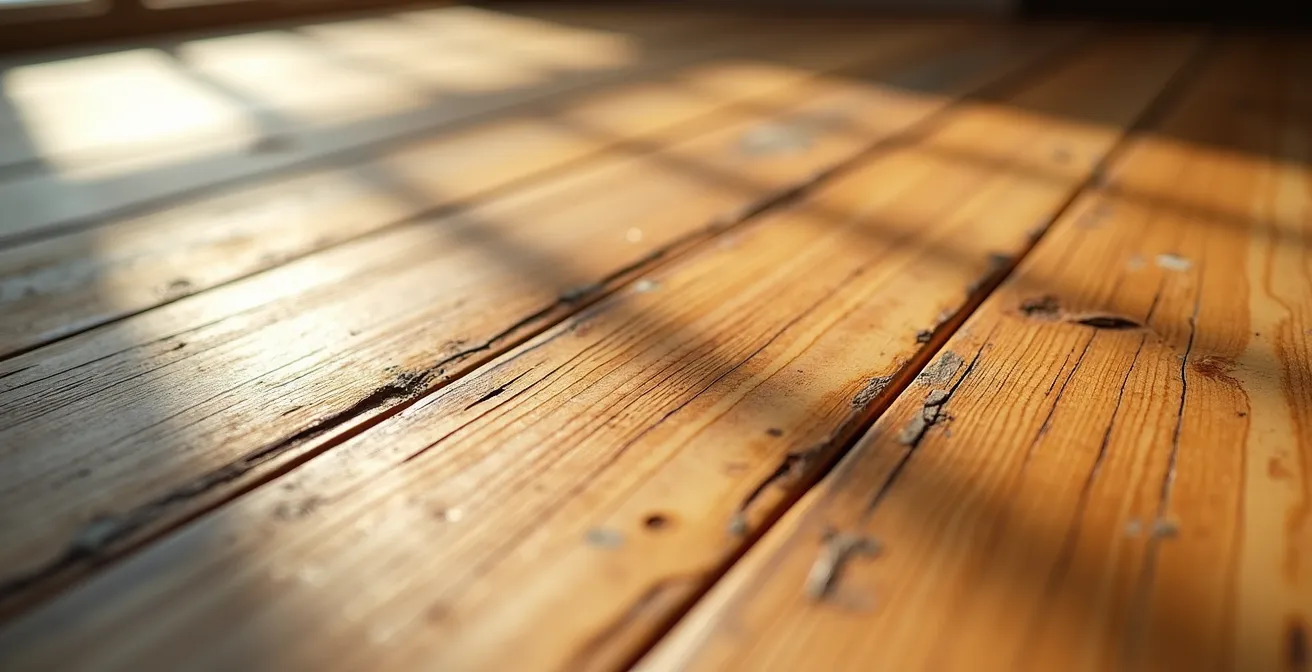
There’s a unique moment of both excitement and dread for any owner of a Victorian or Edwardian home: pulling back an old carpet to discover original pine floorboards. The excitement comes from the potential for authentic, character-rich flooring. The dread? It stems from the sight of wide, dark gaps, uneven boards, and the undeniable draught that snakes up from the subfloor. The common advice is often to fill them with a generic filler and slap on a thick, glossy varnish. This approach treats the floor like a problem to be covered up, not a feature to be celebrated.
But what if the goal wasn’t to create a perfect, homogenous surface like laminate? What if we approached it with a sense of architectural empathy? These floors were never designed to be the final decorative surface; they were a structural necessity. Understanding this changes everything. It reframes the challenge from ‘erasing flaws’ to ‘enhancing history’. This guide moves beyond the superficial fixes. We will explore how to solve the practical problems of gaps and draughts using methods that respect the material’s integrity, ensuring the floor is not just beautiful, but comfortable and true to the home’s soul.
This article will guide you through the philosophy and practice of authentic restoration. We will cover why these boards have such unique character, the correct way to fill gaps for a seamless finish, how to choose a finish that protects without looking plastic, and how to avoid the critical mistakes that can permanently damage your historic floor. You’ll learn to see the imperfections not as flaws, but as part of a story worth preserving.
Summary: A Homeowner’s Guide to Authentic Floorboard Revival
- Why Original Pine Boards Add Character That Laminate Cannot Match
- How to Fill Gaps with Pine Slivers for a Seamless Look
- Hard Wax Oil vs Polyurethane Varnish: Which Looks More Natural?
- The Drum Sander Mistake That Gouges Your Floor Permanently
- How to Reduce Impact Noise on Exposed Timber Floors
- Paint or Wallpaper: Which Best Highlights Original Cornicing?
- The Acclimatization Error That Causes Parquet to Buckle
- Herringbone vs Chevron: Which Parquet Style Suits a Modern Extension?
Why Original Pine Boards Add Character That Laminate Cannot Match
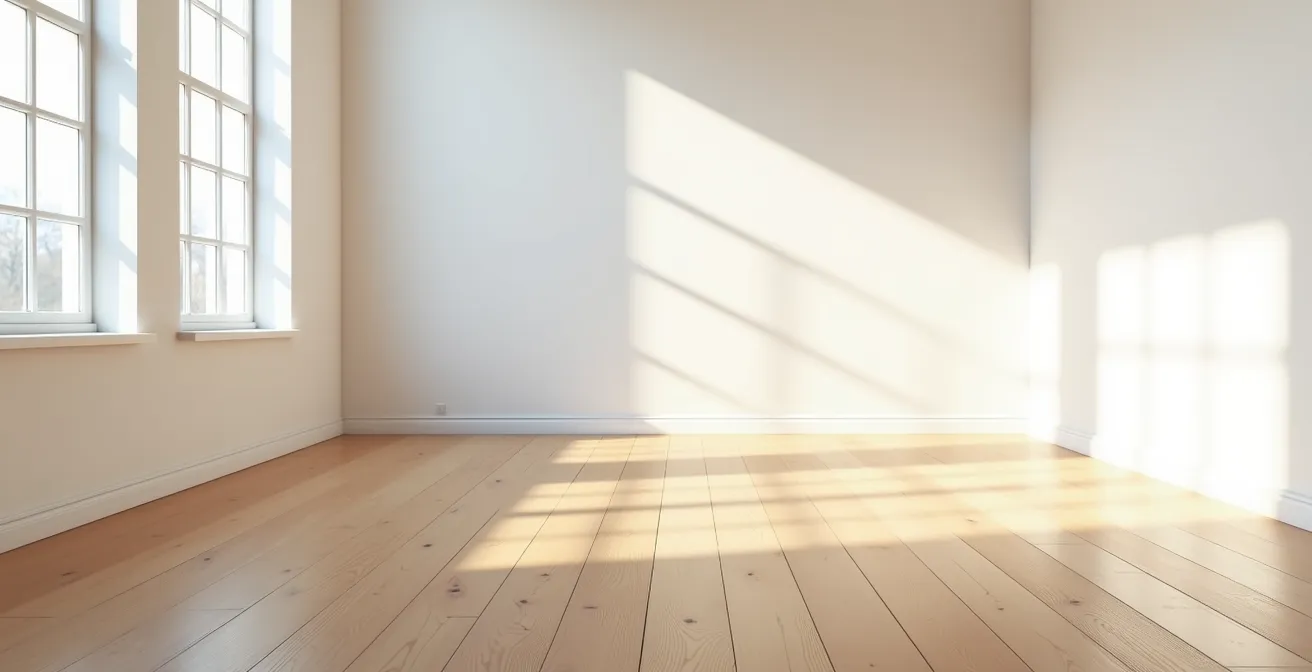
Laminate flooring is an image of wood printed on plastic. Original pine floorboards are a historical document of the house itself. Every scuff, dent, and slight colour variation tells a story. This concept of honest imperfection is what gives a restored pine floor its soul. As one restoration project noted, the goal is a “reclaimed rustic look,” where some staining or discolouration remains, giving the floor its unique character. Unlike a sterile, uniform factory finish, a properly restored pine floor has depth and warmth that cannot be replicated.
It’s crucial to understand the original context of these floors. As experts at Finwood UK point out, “These floors were never intended to be on show” and were simply an economical structural material. This is why they have gaps and are not perfectly uniform. Appreciating this fact is the first step in a successful restoration. You are not correcting a mistake; you are adapting a historical feature for modern living. Embracing this mindset allows you to work *with* the wood’s character, not against it.
Beyond the aesthetics, there’s a tangible benefit. Restoring these floors is not just about looks; it’s about making your home more comfortable and efficient. Gaps between boards create significant draughts. By properly sealing them, you are not only improving comfort but also saving money. The Energy Saving Trust estimates that filling draughty floorboards can save a household up to £40.00 per room per year on energy bills. This turns a character feature into a smart, functional asset.
How to Fill Gaps with Pine Slivers for a Seamless Look
When faced with gaps in old floorboards, the instinct is often to reach for a tub of generic wood filler or a resin mix. This is usually a mistake. These fillers don’t move with the wood, leading to cracking and falling out as the seasons change. The professional, and most authentic, method is to use pine slivers—thin, wedge-shaped strips of reclaimed pine. This technique provides a seamless integration that is both visually and structurally superior because the sliver becomes part of the floor itself.
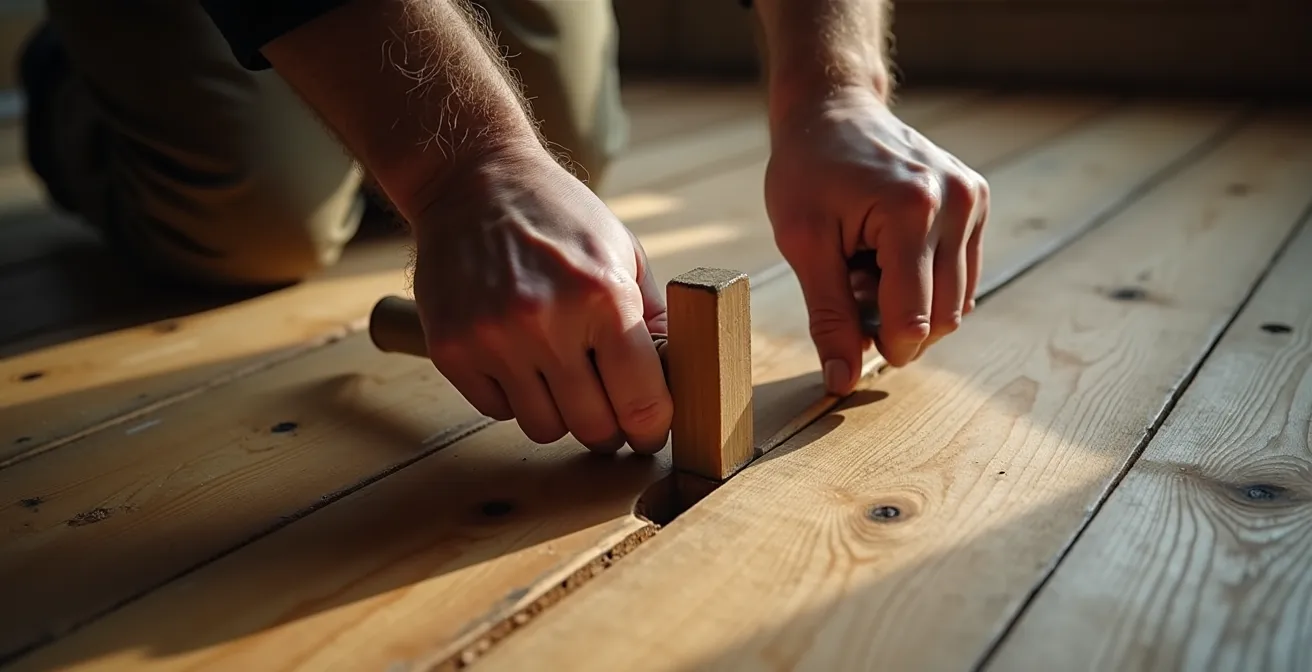
The process is methodical but immensely satisfying. First, clean out any debris from the gaps. Then, apply a quality wood adhesive to both sides of the pine sliver. Gently tap the sliver into the gap with a hammer or mallet until it’s snug. The key is to use a sliver slightly wider than the gap so it fits tightly. Once the glue has completely dried, you use a sharp chisel or plane to cut the excess flush with the floorboards. The result is a solid, filled gap that is almost invisible after sanding and finishing.
While time-consuming, the sliver method is by far the best for the large, visible gaps common in Victorian homes. Other methods have their place, but they come with compromises.
| Method | Pros | Cons | Best For |
|---|---|---|---|
| Wood Slivers | Maintains natural appearance, seamless finish | Time-consuming, requires precision cutting | Large visible gaps |
| Resin & Sawdust | Easy to apply, cost-effective | Can crack over time | Small gaps |
| Flexible Fillers | Expand and contract with movement, excellent durability | May not provide same natural appearance | Areas with significant seasonal movement |
Hard Wax Oil vs Polyurethane Varnish: Which Looks More Natural?
After the hard work of sanding and filling, the choice of finish will define the final look and feel of your floor. The debate largely comes down to two philosophies: hard wax oil and polyurethane varnish. For a floor specialist who loves the feel of real wood, the choice is clear. Hard wax oil is superior for achieving a natural, authentic finish. It works by penetrating the wood fibres and hardening within them, protecting the floor from the inside out while leaving the grain and texture palpable underfoot. It typically gives a matte, non-reflective finish that feels organic and warm.
Polyurethane, on the other hand, is a plastic film that sits on top of the wood. While it offers excellent durability, it creates a barrier that can make the floor look and feel synthetic. It encapsulates the wood, obscuring its natural texture. A common issue with finishing pine is the dreaded “pumpkin orange” effect. Modern finishing systems can avoid this. For example, a case study using water-based, low VOC products from Bona’s professional line resulted in beautifully finished pine floors without any hint of orange. This shows that with the right product, you can achieve a modern, sophisticated tone.
The differences are stark, especially when it comes to maintenance and environmental impact. A scratch on a polyurethane floor often requires the entire floor to be sanded and refinished. With hard wax oil, you can often perform a simple spot repair by lightly sanding the affected area and reapplying a small amount of oil. This makes long-term maintenance far easier. Furthermore, hard wax oils generally have much lower VOC (Volatile Organic Compound) content, making them a healthier choice for your home.
To make the decision clearer, here’s a direct comparison based on a detailed analysis of wood finishes:
| Aspect | Hardwax Oil | Polyurethane |
|---|---|---|
| Appearance | Matte finish that keeps natural look and feel of wood | Varying sheen levels from glossy to matte, reduces wood texture |
| Protection | Hard wearing protective barrier against water, heat, daily wear. Does not protect against chemicals as effectively | Creates synthetic layers of film above wood surface |
| Repair | Scratches can often be repaired with spot application | Requires full refinishing when damaged |
| VOCs | Lowest VOC content, safest, most eco-friendly, least toxic | Higher VOC content |
The Drum Sander Mistake That Gouges Your Floor Permanently
Sanding is the most transformative—and most dangerous—stage of floor restoration. The single biggest mistake a DIY restorer can make is being too aggressive with a drum sander. It’s essential to remember that, as noted by the experts at Chauncey’s Timber Flooring, “Pine is softer than oak, so be careful with the sanding.” A powerful drum sander in inexperienced hands can create deep, irreparable gouges, chatter marks, and dips in the floor in a matter of seconds. This can weaken the boards and ruin the flat, even surface you’re trying to achieve.
The key to safe and effective sanding is to work methodically, never letting the sander stay in one place, and always keeping it moving at a steady pace. Crucially, you must sand along the grain of the wood. Sanding across the grain will leave deep scratches that are almost impossible to remove later. You must also work through the grits progressively. Starting with a coarse grit (like 40-grit) is necessary to remove the old finish and level the boards, but you must then move sequentially through medium grits (60, 80) to a fine grit (100 or 120) to remove the scratches from the previous pass.
Skipping a grit level is a false economy; it just means the finer paper has to work much harder and will leave behind visible scratches from the coarser paper. The final sanding pass with a fine-grit paper is what produces that perfectly smooth, silky surface ready for your chosen finish. Rushing this stage is the difference between a professional result and a DIY disaster.
Action Plan: Safe Sanding for Pine Floors
- Initial Cut: Begin with a coarse-grit sandpaper on a drum or orbital sander to remove the old finish and any major imperfections.
- Directional Control: Always sand along the grain of the wood. Never sand across it, as this will cause deep, permanent scratches.
- Progressive Grits: Gradually move to finer grits (e.g., from 40 to 60 to 80 grit) to smooth the surface and remove scratches from the previous pass.
- Edge and Detail Work: Use an edger sander for the perimeter of the room and a detail sander for corners where the main machine cannot reach.
- Final Polish: After all gaps are filled, perform a final sanding pass with a fine-grit sandpaper (100 or 120 grit) to ensure a perfectly smooth surface for the finish to adhere to.
How to Reduce Impact Noise on Exposed Timber Floors
Once your floorboards are beautifully restored, a new reality can set in: noise. Without carpets to absorb sound, footsteps, dropped items, and general movement can create significant impact noise, especially for rooms below. Furthermore, those small gaps you didn’t fill can contribute to more than just draughts; they also allow airborne sound to travel between floors. The scale of the draught problem alone is startling; it’s estimated that in a standard room, the cumulative gaps in the floorboards can be equivalent to leaving a small window open all year round.
Solving this requires a two-pronged approach: sealing air gaps and dampening vibrations. For air gaps, a flexible sealant is ideal. Products like DraughtEx are specifically designed for this purpose. It’s a soft, compressible sealant that you push into the gaps using a special applicator. Its “Shadow” colour mimics the natural look of a shadow between boards, making it visually unobtrusive. Because it is flexible, it mimics the movement pattern of the timber, expanding and contracting with the seasons without cracking or falling out, thus retaining its insulating and sound-dampening properties.
For impact noise, the solutions are more structural. If you have access to the subfloor from below, you can install acoustic insulation between the joists. This is highly effective. If not, the best solution is on the surface. Using large, thick rugs with high-quality underlay in high-traffic areas is the simplest and most effective way to dampen footfall noise. This approach provides a practical compromise, allowing you to enjoy the beauty of your exposed boards while controlling noise in key areas, ensuring your character-filled floor doesn’t come at the cost of peace and quiet.
Paint or Wallpaper: Which Best Highlights Original Cornicing?
Just as with floorboards, the goal when treating original cornicing is to enhance, not overwhelm. The choice between paint and wallpaper hinges on one question: do you want the cornicing to be a distinct feature or an integrated part of the wall’s texture? To make the cornicing stand out as a sharp, architectural detail, paint is the superior choice. Painting the walls a contrasting colour to the ceiling and cornicing (which are often painted the same shade of white) creates crisp lines that draw the eye to the intricate plasterwork. A classic approach is a subtle colour on the walls with brilliant white for the ceiling and cornice, which makes the ceiling feel higher and the room more formal.
For a bolder look, you can paint the walls a deep, rich colour. This makes the white cornicing “pop” dramatically, turning it into a sculptural element. The key is to use a paint with a matte or eggshell finish on the walls to avoid reflections that might distract from the cornicing’s form. A high-quality, precise paint job is essential here; any sloppy cutting-in will ruin the effect.
Wallpaper, on the other hand, tends to integrate the cornicing into a broader decorative scheme. A patterned wallpaper running right up to the edge of the cornice can sometimes obscure its delicate profile, especially if the pattern is busy or large-scale. However, a wallpaper with a subtle, small-scale pattern or a simple texture can provide a beautiful backdrop that adds warmth and softness. If you choose wallpaper, consider using one that complements the period of the house. The most effective way to use wallpaper and still highlight the cornice is to install a picture rail a short distance below it, painting the area between the rail and the cornice the same colour as the ceiling. This frames both the wallpaper and the cornicing beautifully.
The Acclimatization Error That Causes Parquet to Buckle
Whether it’s new parquet or wide pine planks, wood is a natural, hygroscopic material. This means it absorbs and releases moisture from the air, causing it to expand and contract. As experts often state, this natural “movement can cause gaps, especially between floorboards.” The single most critical error when installing any new wood flooring, especially intricate parquet, is failing to let it acclimatize properly to the room where it will be laid. Bringing wood from a cold, damp warehouse straight into a warm, dry house and installing it immediately is a recipe for disaster.
The wood will rapidly lose moisture, shrink, and cause unsightly gaps to appear between the blocks. A poignant case study involved a homeowner who installed a pine floor with boards that were not dry enough. The subsequent shrinkage left gaps as wide as a quarter of an inch. The reverse is also true: if you install bone-dry wood in a humid room (or fill gaps tightly during a dry winter), the wood will expand in the humid summer months. With nowhere to go, the pressure will cause the floor to “pop” or buckle, creating a dangerous and expensive-to-fix bulge.
To avoid this, all wood flooring must be left in the room where it will be installed for a period of time before installation—typically at least 7 to 14 days. The packs should be opened and the boards or blocks stacked with spacers between them to allow air to circulate freely around all surfaces. This allows the moisture content of the wood to equalize with the ambient humidity of the room. It is a simple, non-negotiable step that protects your investment and ensures the long-term stability and beauty of your floor.
Key takeaways
- Restoration is about enhancing history, not creating sterile perfection. The floor’s character is its main asset.
- Use pine slivers for gaps; they provide a structurally sound and visually seamless solution that lasts.
- A hard wax oil finish protects the wood while preserving its natural texture, unlike a plastic-like polyurethane varnish.
Herringbone vs Chevron: Which Parquet Style Suits a Modern Extension?
When blending the character of a Victorian home with a modern extension, the flooring choice is critical for creating a cohesive flow. Parquet is an excellent option, offering timeless geometry that bridges old and new. The two most popular styles are Herringbone and Chevron, and their suitability depends on the desired effect. Herringbone, where rectangular blocks meet at a 90-degree angle, creates a broken zigzag pattern. It has a classic, traditional feel with a rich texture and sense of movement. This makes it an excellent choice for sympathetically blending with an older property, creating a floor that feels established and substantial.
Chevron, by contrast, consists of blocks cut at an angle (usually 45 degrees). When laid, they form a true point, creating a continuous “V” shape that runs down the room. This pattern produces strong directional lines, making a space feel longer and more streamlined. Its clean, uniform geometry often feels more contemporary and formal than herringbone, making it a perfect fit for a modern extension where clean lines and a sense of space are paramount. A study of floor restoration projects shows a deep understanding is needed to harmonize original boards with new additions, and the choice of pattern is central to this.
The finish also plays a role. A modern extension might have different humidity levels, especially with underfloor heating. Finishes that allow the wood to breathe are beneficial. It’s been shown that certain hardwax oil finishes allow more stability with wider planks due to better vapor transmission control. This technical consideration can influence which style and board size is most stable for the new environment. Ultimately, herringbone offers texture and tradition, while chevron provides direction and modern elegance. The best choice is the one that best serves the architectural language of your extension and its connection to the original home.
With this knowledge, you can approach your floors not with dread, but with a clear plan. The next step is to carefully assess your own floorboards, identify the specific challenges they present, and decide on a restoration strategy that honours your home’s unique history while making it a comfortable, beautiful place to live.