Choosing a wall finish for a Victorian home isn’t about style; it’s about building science. Most modern paints and wallpapers actively trap moisture, causing the very damp problems they’re meant to hide.
- Modern materials like vinyl and gypsum create a “moisture sandwich,” trapping damp that leads to crumbling, blown plaster.
- True breathability comes from traditional lime-based products that ‘cure’ chemically, not just ‘dry’ by evaporation, allowing walls to manage moisture naturally.
Recommendation: Prioritize vapor-permeable materials like lime wash or clay paint and always prepare surfaces by controlling suction with water, not sealing them with PVA.
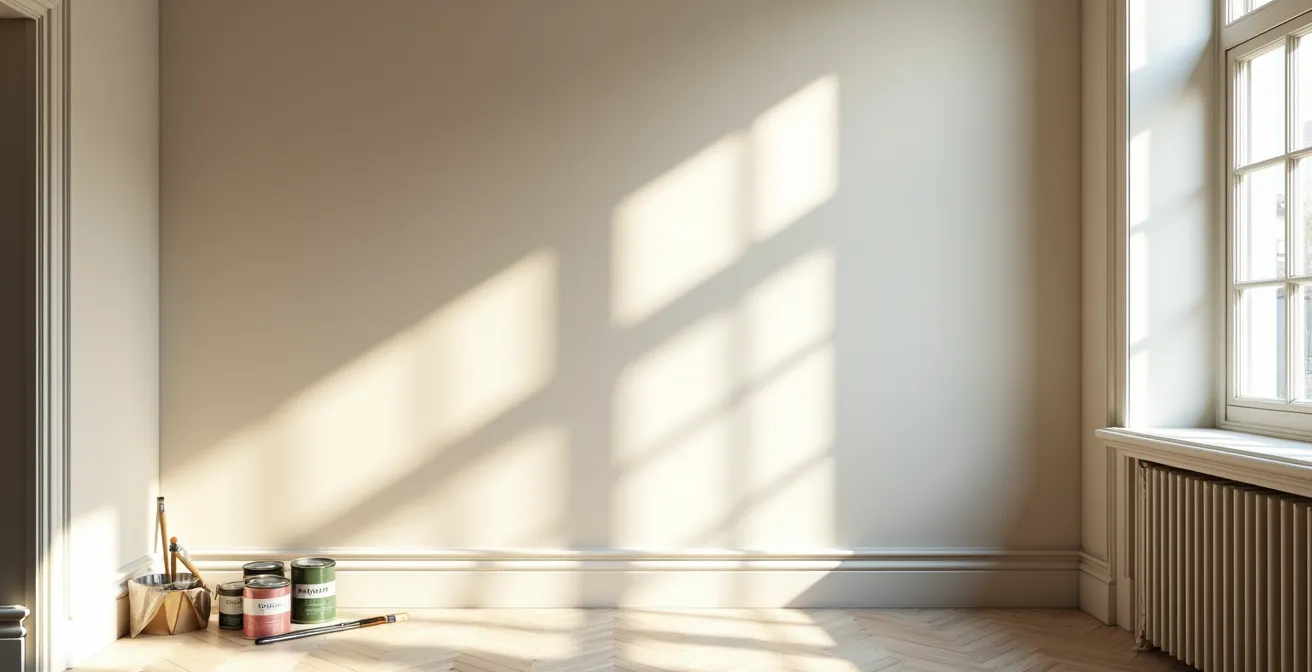
The charm of a Victorian property often lies in its solid walls, original plasterwork, and the sense of history they hold. Yet, many owners find themselves in a frustrating cycle of peeling paint, musty smells, and crumbling plaster. The common response is to reach for a modern solution: a thick coat of vinyl emulsion or a heavy-duty wallpaper to cover the problem. This approach, however, often exacerbates the issue, turning a minor flaw into a major structural concern. The fundamental mistake is treating a heritage building like a modern one, ignoring the essential physics of how it was designed to function.
Unlike modern cavity walls, solid Victorian walls are designed to manage moisture. They absorb ambient humidity from the air and release it as conditions change—a process often described as “breathing.” When we apply non-permeable modern finishes, we effectively wrap the house in plastic, trapping this moisture inside the wall structure. This trapped damp is the primary culprit behind the most common defects seen in older homes. The key to preserving these properties lies not in sealing them from the elements, but in working with their original design by using materials that allow for this crucial process of vapor permeability.
But if the solution isn’t modern paint, what is? The answer lies in rediscovering the building science our ancestors understood intuitively. This guide moves beyond aesthetics to explore the principles of wall health. We will deconstruct why popular modern finishes cause damage, introduce the correct, breathable alternatives for everything from skimming to waterproofing, and reveal the proper techniques that ensure your finishes bond permanently without compromising the health of your home. It’s time to stop fighting your walls and start helping them breathe.
To navigate this essential topic, we will explore the critical mistakes and correct solutions for maintaining the health of your heritage walls. This summary provides a clear roadmap to understanding each crucial aspect of period property decoration.
Summary: Plaster vs. Paint: A Guide to Breathable Victorian Walls
- Why Modern Vinyl Wallpaper Causes Blown Plaster in Old Homes
- How to Skim Over Artex Without Risking Asbestos Exposure
- Tadelakt vs Microcement: Which Is Best for Waterproofing?
- The PVA Mistake That Stops Plaster From Bonding
- How to Reduce Echo in High-Ceilinged Rooms with Textured Paper
- Paint or Wallpaper: Which Best Highlights Original Cornicing?
- Why Lime Wash Needs to ‘Cure’ Rather Than Just Dry
- How to Apply Lime Wash to Fresh Plaster Without It Chalking?
Why Modern Vinyl Wallpaper Causes Blown Plaster in Old Homes
The allure of a quick-fix wallpaper to hide imperfect plaster is strong, but in a Victorian home, it’s a recipe for disaster. Modern wallpapers, particularly those with a vinyl or plasticized coating, act as an impermeable barrier. While this makes them “wipeable” and durable, it also prevents the wall from breathing. Solid walls naturally absorb and release moisture; when you cover them with a non-breathable layer, you create a one-way system where moisture can get in (from the room or the building fabric) but cannot escape. This trapped moisture saturates the plaster, causing it to lose its strength and eventually detach from the brickwork beneath—a phenomenon known as “blown” plaster.
Research confirms this is not a minor issue; a study on heritage buildings found that up to 90% of damp damage in pre-1920s buildings is caused by the application of inappropriate modern materials. The visual evidence of this process is often subtle at first. You might notice a fine white powder, known as efflorescence, which are salts carried out of the brickwork by moisture that crystallize on the surface. Tapping the wall might produce a hollow sound, indicating the plaster has delaminated. Over time, these areas can bulge and feel soft or ‘puffy’ to the touch.
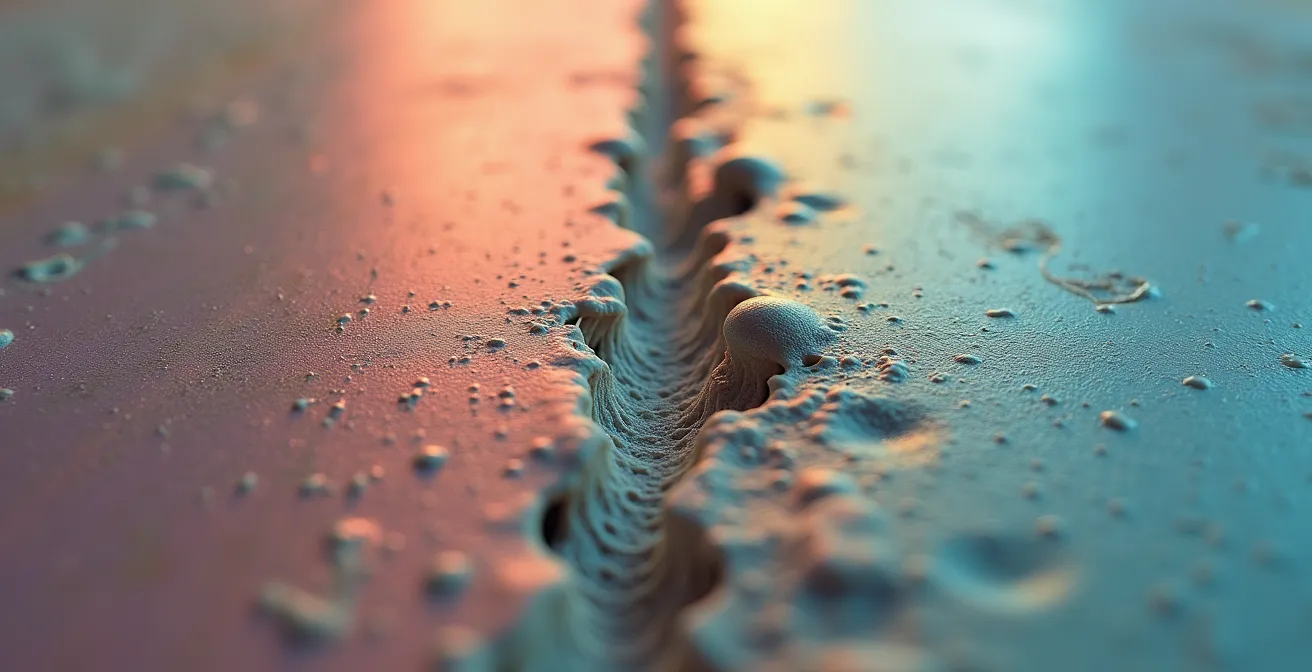
The illustration above perfectly captures this hidden problem, showing the microscopic “moisture sandwich” that forms between the impervious vinyl and the porous plaster. To avoid this, you must choose wall coverings that share the same vapor-permeable qualities as the lime plaster itself. This includes traditional pulp-based papers and breathable paints, which allow moisture to pass through, maintaining the wall’s equilibrium and preventing long-term decay.
How to Skim Over Artex Without Risking Asbestos Exposure
Covering textured finishes like Artex is a common renovation task, but in period properties, the method is critical. The standard modern practice of applying a gypsum-based skim coat is highly problematic. Firstly, any Artex applied before 2000 may contain asbestos, and disturbing it is hazardous. Encapsulating it seems safe, but using a non-breathable material like gypsum creates the same “moisture sandwich” effect seen with vinyl wallpaper. Moisture moving through the wall gets trapped between the original lime plaster and the new gypsum skim, leading to failure of both layers.
The Wisconsin Historical Society’s preservation work provides a powerful case study. In their research, they found that adding modern, non-breathable layers over original plaster was a primary cause of structural damage and paint failure in historic houses. The solution they advocate is the exclusive use of vapor-permeable materials. When skimming over a surface like Artex (after testing it to be asbestos-free or deciding on safe encapsulation), the choice of skimming material is paramount. A lime-based topcoat or a specialized renovation plaster maintains the wall’s ability to breathe, preventing moisture buildup.
The choice between breathable and non-breathable options has significant implications for the long-term health of a period property’s walls. This table outlines the key differences between common skimming materials, highlighting their compatibility with heritage structures.
| Material Type | Vapor Permeability | Heritage Compatibility | Application Method |
|---|---|---|---|
| Lime-based topcoat | High (breathable) | Excellent | Multiple thin coats |
| Renovation plasters | Medium-High | Good | Standard plastering |
| Gypsum skim | Low (non-breathable) | Poor | Single coat possible |
| Wood wool boards | High (breathable) | Excellent | Mechanical fixing required |
Ultimately, while a gypsum skim might be faster and cheaper, it’s a false economy. It compromises the fundamental building science of a solid-walled home. Opting for a breathable lime plaster or wood wool board system ensures that you are working with the building, not against it, preserving its integrity for the future.
Tadelakt vs Microcement: Which Is Best for Waterproofing?
When it comes to waterproofing in a period property, such as in a bathroom or kitchen, the challenge is to prevent liquid water penetration without trapping water vapor. This is where specialized finishes like Tadelakt and microcement come in. As the experts at Domingue Architectural Finishes note, traditional materials offer unique benefits. As they state in expert advice featured by Remodelista:
Lime plaster is a natural material that allows walls to breathe and prevents moisture buildup. It is also durable, fire-resistant, and has a unique texture that adds character to a space.
– Domingue Architectural Finishes, Remodelista Expert Advice
Tadelakt, a traditional Moroccan lime plaster, perfectly embodies this principle. It is polished with soap, which reacts with the lime to create a surface that is hydrophobic (repels liquid water) but remains highly vapor-permeable. This means it’s an ideal choice for solid Victorian walls, as it won’t trap internal moisture. It actively helps manage humidity in a room, making it feel more comfortable.
Microcement, on the other hand, is a modern, cement-based polymer coating. It creates a completely waterproof and seamless surface that is very hard-wearing and low-maintenance. However, it is almost entirely non-breathable. Using microcement on a solid wall is equivalent to covering it in a sheet of plastic. While it will stop shower water, it will also trap any moisture trying to escape from the wall’s structure, potentially pushing the damp problem to adjacent, more breathable walls. Therefore, the choice depends on your building’s construction:
- For solid walls that need to breathe: Tadelakt is the superior choice, as it manages both liquid water and water vapor.
- For modern stud walls or areas where breathability is not a concern: Microcement is a durable and effective waterproofing solution.
Choosing incorrectly can have serious consequences. Applying a non-breathable finish like microcement to a single wall in an otherwise breathable room can concentrate moisture problems elsewhere, leading to damp patches and decay in unexpected places.
The PVA Mistake That Stops Plaster From Bonding
One of the most pervasive and damaging myths in modern plastering is the use of PVA (Polyvinyl Acetate) glue as a sealer or bonding agent on old walls. The logic seems sound: seal the dusty, porous surface to give the new plaster something to stick to. In reality, you are creating a film of plastic that prevents a proper bond. Lime plaster doesn’t stick; it bonds through a combination of mechanical key (gripping the rough surface) and suction (the background drawing moisture from the new plaster to initiate a chemical bond). PVA eliminates both.
By creating a smooth, non-absorbent surface, PVA forces the new plaster to dry out through evaporation alone, rather than being drawn into the wall. This leads to a weak, brittle finish that is prone to cracking and delamination. As detailed by The Organic & Natural Paint Company, professional plasterers working with traditional materials unanimously agree that PVA is counterproductive. Their experience shows it often results in a poor finish and can interfere with the breathability of the entire wall system. The correct approach is to control the natural suction of the wall, not to eliminate it.
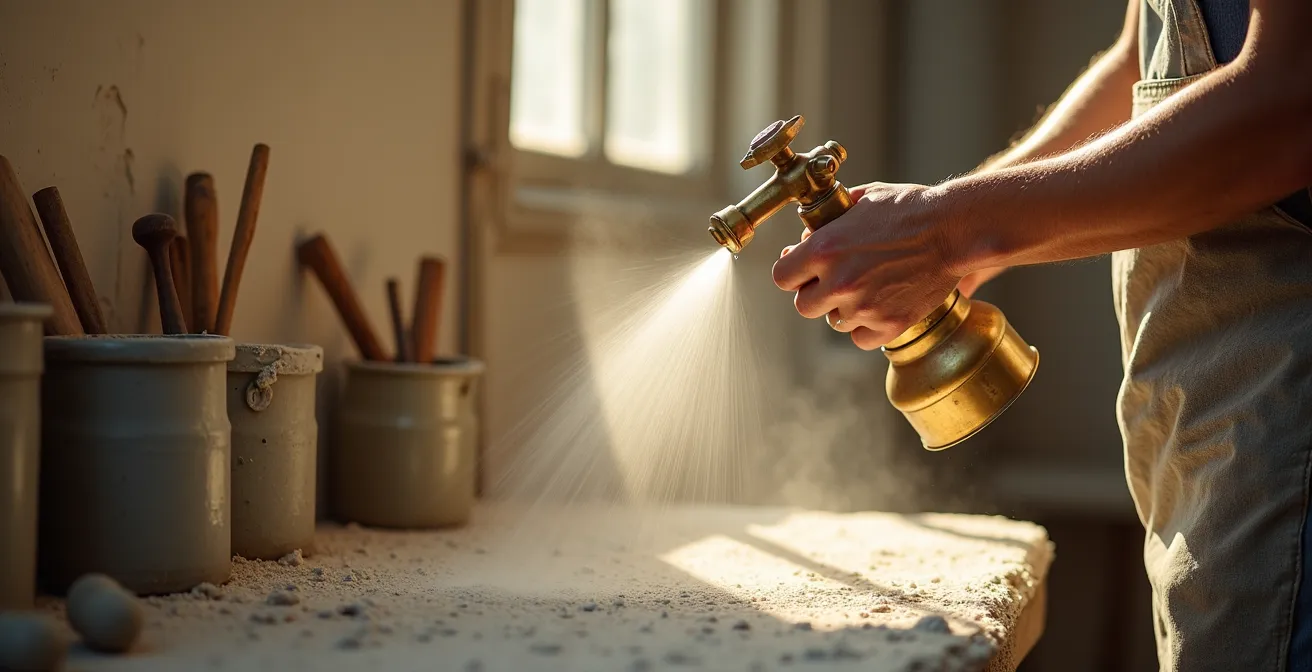
This involves dampening the background with water just before plastering. A very porous or dry wall might need several passes of water, allowing it to absorb without becoming saturated. This traditional technique ensures the wall has enough suction to form a strong bond but not so much that it dries the new plaster too quickly. This method is the cornerstone of working with lime and ensures a durable, long-lasting finish that becomes part of the wall, rather than just sitting on top of it.
Your Action Plan: Traditional Suction Control Methods Without PVA
- Dampen dry backgrounds with clean water using a brush or a fine mist spray bottle just before application.
- For a perfect key, apply a “scrim coat” of the same plaster material, thinned down to a slurry consistency.
- Create a stronger mechanical key for difficult surfaces with a “harling coat” (a wet dash technique of flicking a gritty plaster mix onto the wall).
- On very dry, porous walls (like old brick), apply multiple passes of water, allowing each to partially absorb before the next.
- Test the suction before you start: splash a small amount of water onto the wall. It should darken the surface evenly and absorb steadily, not bead up or run off immediately.
How to Reduce Echo in High-Ceilinged Rooms with Textured Paper
High ceilings are a coveted feature of Victorian architecture, but they can create acoustic challenges, leading to echo and a cold, cavernous feel. While soft furnishings like rugs and curtains are the first line of defence, wall finishes play a surprisingly significant role. Modern, smooth walls finished with hard gypsum plaster and vinyl paint reflect sound waves, amplifying the problem. Conversely, traditional materials offer inherent acoustic benefits.
Lime plaster, with its slightly uneven, matte surface, is naturally better at diffusing sound than modern drywall. As an analysis by Woemmel Plastering notes, plaster offers superior soundproofing, dampening noise more effectively than flat, uniform drywall surfaces. This sound-breaking quality can be further enhanced by using textured wall coverings. However, it is crucial to select coverings that do not compromise the wall’s breathability. This rules out modern “acoustic” panels made from foam or vinyl-coated papers, which would trap moisture.
The solution lies in traditional, breathable textured papers.
- Relief Papers: Classic choices like Lincrusta (made from a linseed oil putty) or Anaglypta (pulp-based) provide significant texture that breaks up sound waves. They are fully breathable and can be painted.
- Woodchip Paper: While it fell out of fashion, traditional woodchip is a highly effective, breathable, and inexpensive way to add sound-absorbing texture.
- Fabric Wall Hangings: Installing fabric panels or even traditional tapestries on battens (creating a small air gap behind) is an excellent, period-appropriate way to absorb sound without sealing the wall.
When painting these textured surfaces, it’s vital to use a breathable paint like claypaint or natural emulsion. A thick coat of modern acrylic paint would fill the texture and seal the surface, negating both the acoustic and vapor-permeable benefits. By combining these breathable, textured solutions, you can significantly reduce echo while maintaining the health of your walls.
Paint or Wallpaper: Which Best Highlights Original Cornicing?
Original cornicing is the crown jewel of a Victorian room, but decades of inappropriate decoration can obscure its intricate details. The choice between paint and wallpaper is not just aesthetic; it’s a decision that can either preserve or further damage these delicate features. The primary enemy of crisp plaster detail is the buildup of thick, non-breathable modern paints. Each new coat of vinyl emulsion fills the delicate reliefs, softening the edges and turning sharp details into rounded lumps.
The Victorian Project’s restoration of their living room is a case in point. They documented the painstaking process of stripping back layers of modern paint that had completely clogged the original cornicing. Their key finding was that using breathable, lime-based products was essential for both the walls and the plasterwork. By choosing thin, high-quality natural paints, they were able to achieve a clean, modern look while preserving every detail and ensuring the entire room could breathe. Wallpaper is generally a poor choice for cornicing itself, as cutting it to fit complex profiles is nearly impossible and looks clumsy. However, a carefully chosen wallpaper below the cornice can create a beautiful contrast that makes the plasterwork stand out.
When selecting paint for cornicing, the type and sheen are critical. A breathable, matte finish will absorb light and show off the shadows and highlights of the plasterwork far better than a paint with a high sheen, which can create glare and flatten the appearance of the details. The following table, based on data from specialists like Edward Bulmer Natural Paint, compares options:
| Paint Type | Breathability Factor | Detail Preservation | Sheen Level |
|---|---|---|---|
| Natural Emulsion | 20x more than acrylic | Excellent – thin layers | 2% low sheen |
| Limewash | Fully breathable | Good – requires skill | Matte chalky |
| Clay Paint | Highly breathable | Excellent – masks cracks | Ultra-flat matte |
| Modern Vinyl | Non-breathable | Poor – builds thickness | Variable 5-25% |
For maximum detail preservation and breathability, a natural emulsion or a clay paint is the ideal choice. They apply in thin coats, have an ultra-flat finish that enhances texture, and won’t harm the delicate lime plaster beneath.
Why Lime Wash Needs to ‘Cure’ Rather Than Just Dry
A common point of confusion when first using traditional paints is the difference between drying and curing. Modern acrylic paints simply “dry”—the water in them evaporates, leaving a plastic film behind. Lime wash, however, undergoes a chemical process called carbonation. This is the secret to its unique appearance and durability. When applied, the calcium hydroxide in the lime wash reacts with carbon dioxide in the air to turn back into calcium carbonate, or limestone. In essence, you are creating a thin, breathable layer of stone on your wall.
This process is much slower than simple evaporation and is why the appearance of lime wash changes dramatically over time. As noted by experts at Bauwerk Colour, you must be patient. A freshly applied coat will look streaky, watery, and far darker than the final color. Panicking and trying to apply a thick second coat to cover it is the biggest mistake a beginner can make. The opacity and true color only develop as the carbonation process progresses over several days or even weeks.
Understanding this timeline is crucial for a successful application and for managing expectations:
- Day 1: The wall will look transparent and uneven. This is completely normal and expected.
- Days 2-3: As water evaporates, the color will lighten, but it will still appear darker than the final shade and may look patchy.
- Days 4-7: The carbonation process begins in earnest. The surface starts to harden, and opacity builds, revealing a more uniform color.
- Days 7-14+: The true, soft, and slightly varied color emerges as the surface fully cures. A gentle rub should leave minimal chalky residue on your fingers.
This curing process is what gives lime wash its characteristic soft, luminous patina and exceptional longevity. Unlike a film of paint that sits on the surface and can peel, a cured lime wash becomes an integral part of the plaster. It is a living finish that evolves with the light and the seasons.
Key Takeaways
- Solid Victorian walls must breathe; non-permeable layers like vinyl wallpaper trap moisture and cause plaster to fail.
- Never seal old plaster with PVA. Control suction with water for a proper bond with new lime-based finishes.
- Lime wash doesn’t just “dry”—it “cures” through carbonation, a chemical process that requires time and gives it its unique, durable finish.
How to Apply Lime Wash to Fresh Plaster Without It Chalking?
Applying lime wash successfully is more about technique than effort. The goal is to build up several thin, almost transparent layers that cure together, rather than one or two thick, paint-like coats. The most common failure, a perpetually chalky surface that rubs off on everything, is almost always caused by applying the wash too thickly or onto a surface that is too dry or sealed. To avoid this, follow the professional method.
The ideal time to apply lime wash is when the new lime plaster is “green hard”—firm to the touch but still dark with moisture and not fully cured. This provides the perfect amount of suction. Always use a long-haired masonry brush, never a roller, which applies the wash too thickly and evenly. The technique is to use soft, feathery, cross-hatch strokes to create a slightly varied, cloudy effect. The first coat will look disappointing, as noted in Jenna Sue Design’s well-documented project where the first coat looked “like a hot mess” but the second brought it all together. This is normal; the magic happens in the subsequent coats.
The key steps to a perfect, non-chalking finish are:
- Apply 3-5 watery coats: Your mix should be the consistency of skim milk. Each layer contributes to the carbonation and opacity.
- Maintain a wet edge: Work quickly around a wall section, always brushing back into the wet paint to avoid hard, dark lines where overlaps have dried.
- Allow for curing time: Wait at least a few hours between coats, but a full day is often better to let the carbonation begin.
- Add a binder (if needed): For high-traffic areas or if you are concerned about chalking, adding a very small amount of a binder like casein or linseed oil can improve durability without significantly reducing breathability.
By following this method, you are working with the chemical nature of lime, allowing it to form a hard, durable, and beautifully luminous surface that becomes one with the wall.
By embracing these principles of building science, you can make informed choices that not only beautify your home but also preserve its structural integrity for generations to come. The next step is to assess your own walls and begin the journey toward a healthier, breathing home.