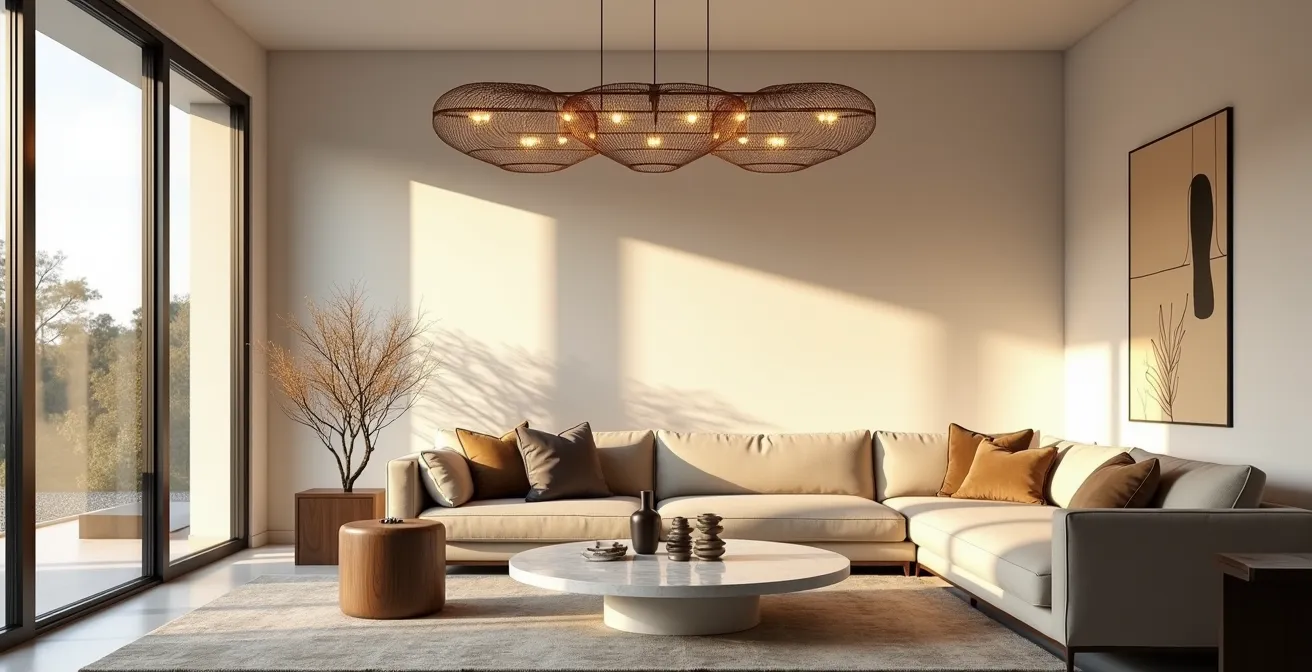
Dramatic, sculptural lighting is achievable even with standard 2.4m ceilings; the secret is in the technical details, not just the fixture type.
- Master cable management to transform excess length into an intentional design feature.
- Use high-CRI, warm-toned LEDs with the correct dimmer to preserve the aesthetic and avoid flickering.
Recommendation: Focus on how the light interacts with the room—its shadows, colour rendering, and ambience—as much as the physical fixture itself.
For homeowners with standard 2.4-metre (or 8-foot) ceilings, the desire for a dramatic, sculptural light fixture often clashes with conventional design wisdom. You crave the character and artistry of a beautiful pendant or chandelier, but you’re told to stick to safe, unobtrusive flush-mount or semi-flush-mount options to avoid head-banging hazards and a feeling of confinement. This practical advice, while well-intentioned, can lead to spaces that feel functional but lack a central, eye-catching feature—the kind of piece that elevates a room from merely furnished to truly designed.
This dilemma forces a false choice: style or headroom? But what if the entire debate is framed incorrectly? The key to successfully incorporating statement lighting in a low-ceilinged room isn’t about the binary choice between a pendant and a chandelier, or even whether to have one at all. It’s about a more nuanced, artistic approach. It’s about understanding that a light fixture is not just an object but a source of ambience, shadow, and colour. The secret lies in mastering the technical details of its integration, treating the light as the “jewellery” of the room that complements the architecture rather than overwhelming it.
This guide will walk you through the professional considerations that allow you to break the rules with confidence. We’ll explore how to manage cables aesthetically, select the right colour temperature to enhance materials like brass, avoid common shadow mistakes, and ensure your high-end fixture performs flawlessly. By focusing on these expert techniques, you can transform a perceived constraint into an opportunity for sophisticated and impactful design.
To navigate these artistic and technical decisions, this article breaks down the essential elements for choosing and installing the perfect statement light. Here is a guide to what you will discover.
Contents: A Guide to Choosing Dramatic Lighting for Low Ceilings
- Why Lighting Is the ‘Jewellery’ of the Room
- How to Shorten Pendant Cables Without Ruining the Aesthetic
- Warm White vs Cool White: What Works for Brass Fixtures?
- The Shadow Mistake That Makes Sculptural Lights Impractical
- How to Dim LEDs Without Flickering or Buzzing
- How to Brighten a North-Facing Hallway with Mirrors and Paint
- Why Shadow Gaps Crack and How to Reinforce Them
- How to Design Shadow Gap Lighting for a Minimalist Ceiling?
Why Lighting Is the ‘Jewellery’ of the Room
In interior design, functional elements that also serve an aesthetic purpose hold the most power. Lighting is perhaps the ultimate example of this principle. Beyond its primary role of illumination, a well-chosen fixture acts as a piece of sculpture, a focal point, and the finishing touch that ties a room together. This is why lighting is often referred to as the “jewellery” of the home. Like a necklace or a pair of earrings can define an outfit, a statement light fixture can define the entire character of a space, adding personality, drama, and a sense of luxury.
In rooms with lower ceilings, this concept becomes even more critical. While a grand, sweeping chandelier might be out of the question, the right pendant or sculptural piece can draw the eye upward, creating an illusion of height and focus. It provides a deliberate point of interest that distracts from the room’s vertical limitations. The goal is to select a fixture that has significant visual mass without overwhelming physical mass, commanding attention through its form, material, or the quality of its light rather than its sheer size.
As lighting experts point out, the transformative power of these pieces is immediate. As noted by the experts at Lightology in their design guide:
If lighting is jewelry for the home, chandeliers and pendants are the showstoppers that instantly catch the eye. They can immediately transform a space and change the mood.
– Lightology Design Experts, Lightology Chandelier and Pendant Lighting Guide
Ultimately, choosing a light fixture for a low ceiling isn’t about finding something that disappears. It’s about selecting a beautiful object that you want people to notice—a piece of jewellery that completes the room’s aesthetic and makes an intentional design statement.
How to Shorten Pendant Cables Without Ruining the Aesthetic
One of the most significant challenges when installing a pendant in a room with a standard ceiling is managing the excess cable. A dangling cord that has been crudely cut and rewired can cheapen the look of even the most expensive fixture. The professional approach is to treat the cable not as a problem to be hidden, but as a potential design element. This is the concept of “intentional swag.” Instead of a direct vertical drop, the cable can be artfully draped across the ceiling using decorative hooks, creating elegant lines and a custom, sculptural feel.
Another sophisticated solution lies in the hardware. Opting for fixtures with an extra-wide, slimline canopy allows an electrician to hide multiple connection points and excess cable within the housing, resulting in a clean finish. For those seeking ultimate control, modular lighting systems with customisable rod lengths offer a precise alternative to flexible cables, allowing for a perfect drop height without any excess.
This image illustrates how a simple hook can turn a long cable into a graceful, deliberate design feature.
Of course, placement is also key. When a pendant is positioned directly over a piece of furniture like a dining table, coffee table, or bedside stand, it can be hung much lower without becoming a hazard. A clearance of 45-60cm (18-24 inches) above the furniture surface is a good rule of thumb, allowing the fixture to create an intimate focal point while remaining out of the way. Many manufacturers also offer fixtures with easily adjustable cord lengths, designed for this exact purpose.
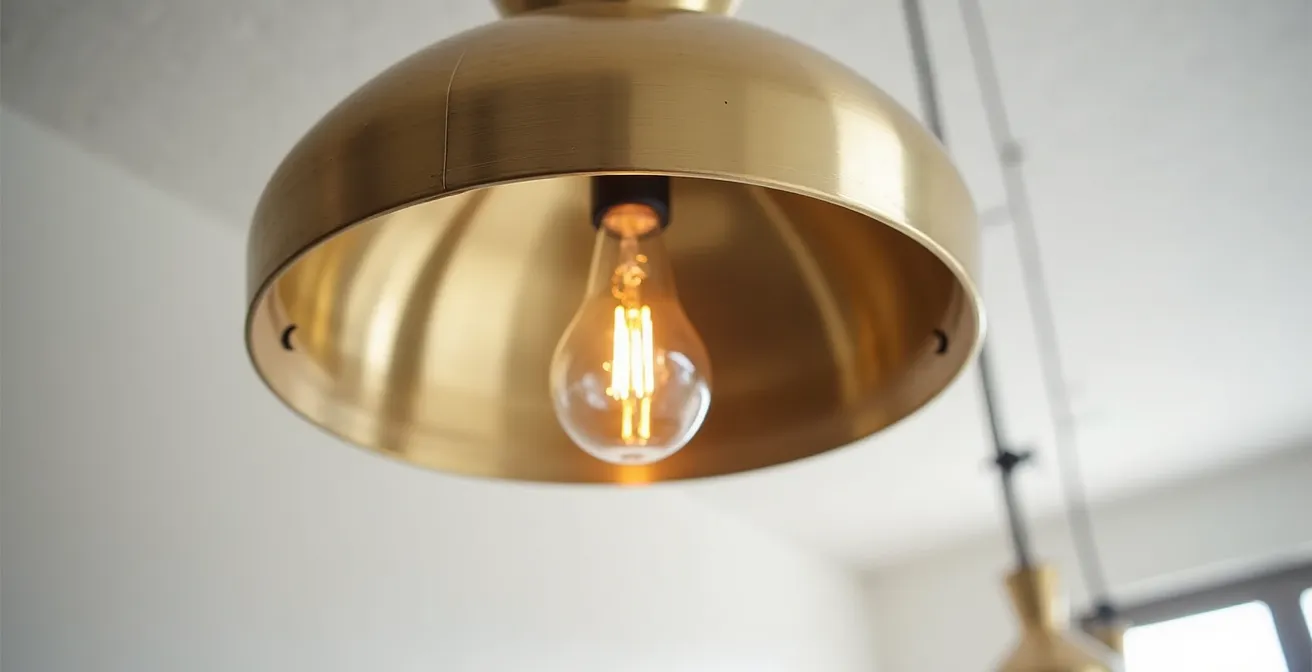
Warm White vs Cool White: What Works for Brass Fixtures?
The material of your light fixture is only half of the story; the type of light bulb you put inside it is the other. The “colour temperature” of a light source, measured in Kelvin (K), dramatically affects how we perceive the fixture and the room itself. For a sculptural piece, especially one made from a warm metal like brass, this choice is crucial. A warm white light (2200K-3000K) will accentuate the rich, golden tones of brass, giving it a deep, heritage feel. In contrast, a cooler, neutral white (3500K-4000K) will make the same brass fixture appear crisper, more modern, and more purely sculptural, highlighting its form over its colour.
Beyond Kelvin, the Color Rendering Index (CRI) is a vital, often overlooked specification. CRI measures how accurately a light source reveals the true colours of objects. For an artistic fixture where material finish is paramount, a low CRI bulb can make beautiful unlacquered brass look dull and lifeless. An analysis of professional lighting standards indicates a CRI of 90+ is essential to ensure that the material’s texture, patina, and colour are rendered beautifully and accurately.
The following table, based on principles outlined in lighting guides, breaks down how different color temperatures interact with various brass finishes, helping you match the light to your desired aesthetic.
| Color Temperature | Brass Finish Type | Visual Effect | Best Application |
|---|---|---|---|
| 2200K-2700K (Very Warm) | Antique/Unlacquered | Deep, rich tones with heritage feel | Traditional dining rooms, bedrooms |
| 3000K (Neutral White) | Polished/Satin | Crisp, modern, sculptural appearance | Contemporary kitchens, bathrooms |
| 3500K-4000K (Cool White) | Brushed/Matte | Clean, minimalist aesthetic | Modern offices, galleries |
Choosing the right light quality is as important as choosing the fixture itself. It determines whether your brass “jewellery” glows with inviting warmth or stands out with sharp, contemporary confidence.
The Shadow Mistake That Makes Sculptural Lights Impractical
When selecting a statement light, we often focus on the object itself. However, in a room with a low ceiling, the shadows it casts are equally, if not more, important. A common mistake is choosing a complex, open-form fixture—such as a wire-frame or cage-like design—without considering its shadow pattern. While these can look stunning in a showroom or a double-height space, in a standard room they can create what designers call the “Chaotic Ceiling” effect. The intricate, overlapping shadows make the ceiling look cluttered and visually lower, defeating the purpose of creating a clean, artistic focal point.
The solution is not to avoid sculptural forms, but to choose those that control their light distribution. Fixtures with opaque or frosted glass shades are ideal. They direct the majority of their light downwards or upwards, washing the walls or illuminating the task area below, while keeping the ceiling plane relatively clear and uncluttered. This creates a sense of focused drama without the visual noise. The fixture is still a beautiful object, but its light is purposefully directed to enhance the space rather than complicate it.
Case Study: The ‘Chaotic Ceiling’ Effect
A design analysis of lighting for low ceilings shows that wire-frame and cage-like fixtures in rooms with ceilings under 8 feet often backfire. Instead of adding sophisticated style, the complex shadow patterns they cast across the ceiling make spaces feel cluttered, busy, and visually lower. The recommended solution is to opt for fixtures with opaque or frosted glass shades. These designs contain and direct the light, typically downward for task or accent lighting, which keeps the ceiling area clean and helps the space feel more open and organized.
Your Pre-Purchase Fixture Audit: 5 Points to Check
- Light Direction: Does the fixture cast light primarily up, down, or in all directions? For low ceilings, down or up-lighting is often safer.
- Shade Material: Is the shade opaque, frosted, or a complex open-frame? Opaque shades prevent ceiling clutter.
- Shadow Projection: Imagine the fixture in your room. Will it create a few simple, elegant shadows or a chaotic, web-like pattern on the ceiling?
- Proportionality: Assess its visual mass versus its physical footprint. Does it look light and airy or heavy and dense?
- Technical Specifications: Is it dimmable? What type of LED and driver does it use? This will impact the final experience.
By thinking about the light and shadow as much as the fixture, you can ensure your sculptural piece enhances your room’s atmosphere instead of detracting from it.
How to Dim LEDs Without Flickering or Buzzing
Installing a beautiful, sculptural LED fixture is only the first step. To truly control the mood and create a high-end experience, effective dimming is non-negotiable. However, this is where many installations fall short, resulting in frustrating flickering, an audible buzz, or a limited dimming range. This immediately cheapens the aesthetic, regardless of how much the fixture cost. The problem almost always lies in a mismatch between the fixture, the driver, and the dimmer switch.
High-quality sculptural LED fixtures are sensitive instruments. Most require modern trailing-edge (ELV – Electronic Low Voltage) dimmers for smooth, silent performance. Older, more common leading-edge dimmers were designed for incandescent bulbs and are often incompatible with the sophisticated electronics of modern LEDs, causing the tell-tale flicker and buzz. Ensuring compatibility between the dimmer and the fixture’s specific LED driver is the most critical factor for a luxury lighting experience.
This image captures the essence of seamless control—a minimalist dimmer that provides a smooth gradient of light, enhancing the room’s atmosphere without any technical flaws.
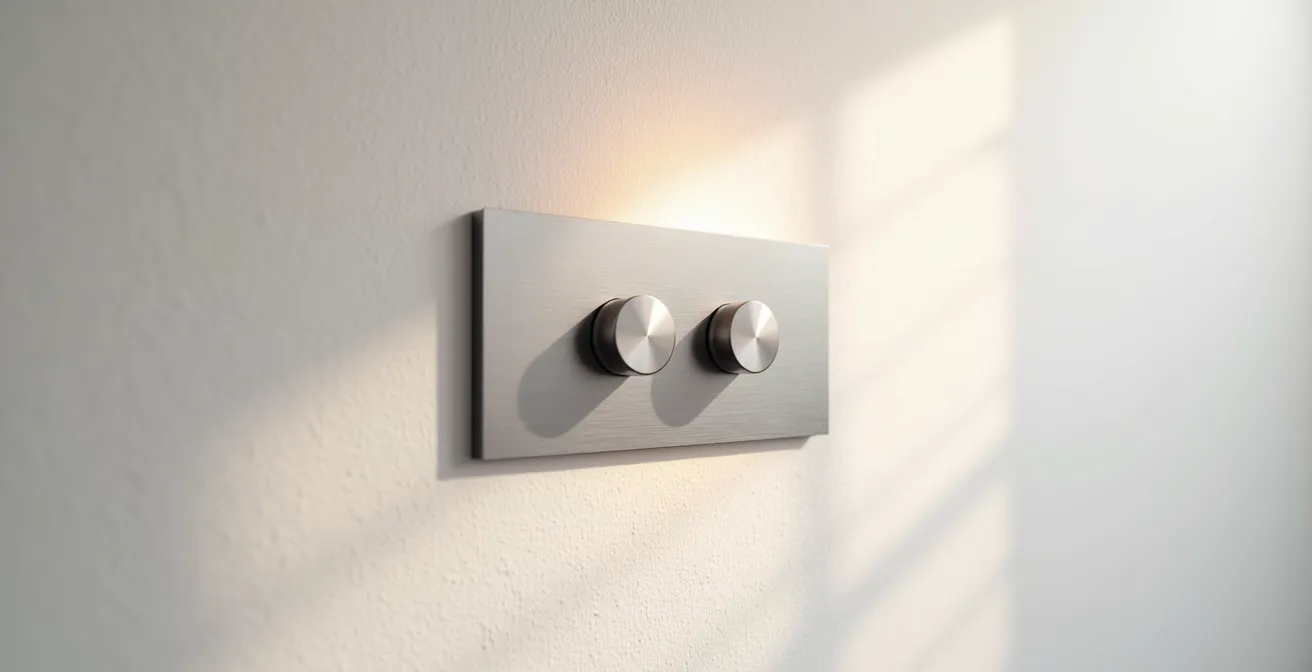
Another common issue arises from the dimmer’s minimum load requirement. Some dimmers need a certain amount of wattage to function correctly. A single, highly efficient low-wattage LED fixture may not meet this threshold, leading to poor performance. The solution is either to choose a dimmer specifically designed for low loads or to consult an electrician about installing a load resistor to ensure the circuit meets the dimmer’s requirements. Investing in the correct dimming technology is as important as investing in the fixture itself; it’s the final, crucial detail that ensures your “jewellery” can truly shine, from a bright glow to a subtle glimmer.
How to Brighten a North-Facing Hallway with Mirrors and Paint
Low ceilings are often compounded by another common architectural challenge: a lack of natural light, particularly in north-facing rooms or long hallways. In these spaces, your lighting strategy must work harder, not just to illuminate but to create a sense of brightness and space. The key is to turn your walls and ceiling into reflective surfaces that amplify your chosen fixture’s output. Using a satin or semi-gloss paint finish on the ceiling is a classic designer trick. Unlike matte paint, which absorbs light, a glossier finish will bounce the light from your fixtures around the room, making the entire space feel brighter and the ceiling appear higher.
Mirrors are the other essential tool in your arsenal. A large mirror placed directly opposite a light fixture can effectively double its visual impact and a surprising amount of its light output. In a long, narrow hallway, placing mirrors at either end can create an “infinity effect,” a clever illusion that makes the corridor feel endless and much more expansive. This strategy draws attention away from the low ceiling and focuses it on the elongated perspective.
For these applications, the fixture choice should support this strategy of light amplification. Fixtures that cast light both upwards towards the reflective ceiling and horizontally across the walls are particularly effective. In long corridors, instead of one central pendant, a series of repeating flush-mount or semi-flush-mount fixtures can create a beautiful rhythm and ensure even, consistent illumination from end to end. This combination of reflective surfaces and strategic fixture placement can transform a dark, confined space into one that feels open and inviting.
Strategic Techniques for Maximizing Light
- Apply satin or semi-gloss finish paint on the ceiling to reflect light from fixtures.
- Position a large mirror directly opposite the main light fixture to double its visual impact.
- Create an “infinity effect” by placing mirrors at both ends of a long hallway.
- Use a repetition of multiple flush-mounted fixtures to evenly light long corridors.
- Choose fixtures that are designed to cast light both up towards the ceiling and horizontally.
Why Shadow Gaps Crack and How to Reinforce Them
For those pursuing a truly minimalist aesthetic, integrating lighting directly into the architecture is the ultimate expression of sophisticated design. One such technique is the shadow gap, a small recess between the wall and ceiling that can be used to hide an LED strip, creating a seamless “floating ceiling” effect. However, this beautiful detail is notoriously prone to developing hairline cracks over time, ruining the clean, architectural look. Understanding why this happens is the key to preventing it.
Cracks typically form due to the natural movement of different building materials. The drywall of the wall and ceiling expands and contracts at a different rate than the wood or metal framing behind it. When a shadow gap is created simply by holding the ceiling plasterboard back from the wall, this differential movement puts stress on the unsupported plasterboard edge, inevitably leading to cracks. While industry standards recommend gap sizes between 15-30mm for a clean look, the construction method is far more important than the dimension.
The professional solution is to use dedicated hardware that isolates the different materials from each other and provides a solid, stable edge. This ensures the minimalist design remains flawless for years.
Professional Technique: Preventing Shadow Gap Cracks
According to an analysis from specialist building product manufacturers like Trim-Tex, the most effective way to prevent shadow gap cracks is to use a metal or PVC reveal bead. Products like their Architectural Z Shadow Bead create a crisp, finished edge that is mechanically separate from the wall framing. This allows for minor structural movement without transferring stress to the plasterboard edge. Furthermore, experts report that the lighting channel itself should always be mounted to solid framing (studs or joists), not to the “floating” drywall. This prevents the weight and heat of the lighting from causing sagging and stress cracks.
By investing in the correct structural components from the start, you ensure that this elegant architectural lighting feature remains a point of pride, not a recurring maintenance issue.
Key Takeaways
- Treat excess pendant cables as a design opportunity for “intentional swag” rather than a problem to hide.
- Match the light bulb’s color temperature (Kelvin) and rendering (CRI) to your fixture’s material and ensure you use a compatible dimmer (e.g., ELV) to avoid a cheapened aesthetic.
- Consider the shadows a fixture casts as much as the light it emits; avoid “chaotic ceiling” effects by choosing fixtures that direct light purposefully.
How to Design Shadow Gap Lighting for a Minimalist Ceiling?
Once you have a structurally sound shadow gap, the design possibilities open up. The lighting effect you create depends entirely on the placement of the LED strip within the gap. The two primary techniques used by lighting designers are “wall washing” and “wall grazing.” Though they sound similar, they produce dramatically different aesthetic results and are chosen based on the texture and finish of your walls. This is where the lighting designer’s artistry truly comes into play.
Wall washing involves placing the light source further from the wall (typically 30-50mm), creating a smooth, even, and diffuse layer of illumination. This technique is perfect for minimalist interiors with smooth, untextured walls. It minimizes imperfections and creates a serene, open feeling, making the space perceive larger than it is. It’s a subtle effect that enhances the architecture without drawing attention to the light source itself.
In contrast, wall grazing places the light source very close to the wall (10-20mm). This creates a high-contrast light that rakes across the surface, dramatically highlighting any texture—such as brick, stone, or textured wallpaper. It creates strong shadows and a rich, dynamic effect. This is a bold choice used to turn a feature wall into a true centrepiece. To avoid a monotonous, “airport runway” look, designers often use an asymmetrical design, lighting only one or two walls in a room to create a more sophisticated and layered architectural statement.
This comparative table clarifies the key differences, helping you choose the right technique for your desired outcome.
| Technique | Light Distance from Wall | Effect | Best For |
|---|---|---|---|
| Wall Washing | 30-50mm from wall | Smooth, even illumination | Clean minimalist look, enhancing space perception |
| Wall Grazing | 10-20mm from wall | Highlights texture, creates dramatic shadows | Textured surfaces, architectural features |
| Asymmetrical Design | Varies by wall | Sophisticated architectural effect | Avoiding commercial ‘airport runway’ look |
The final choice between these techniques defines the personality of your minimalist space, determining whether it feels calm and ethereal or dramatic and tactile.
To apply these principles effectively, begin by evaluating your space not for its limitations, but for its unique artistic potential and architectural character.
Frequently Asked Questions About Sculptural LED Lighting
What type of dimmer do sculptural LED fixtures require?
High-quality sculptural LED fixtures almost always require modern trailing-edge (ELV) dimmers for smooth, silent performance without flickering.
What causes LED flickering when dimmed?
Single low-wattage LED fixtures may not meet the dimmer’s minimum load requirement. Solutions include using an appropriate low-load dimmer or consulting an electrician about installing a load resistor.
How does dimmer type affect the aesthetic experience?
Using incorrect dimmers (leading-edge with LEDs) causes buzzing and flickering that immediately cheapens the aesthetic, regardless of fixture quality. Proper trailing-edge dimmers preserve the luxury feel.