Installing a walk-in shower in a small British bathroom is less about style and more about smart structural engineering.
- Prioritise reinforcing timber floors to prevent the deflection that cracks grout and causes leaks.
- Use wall-hung fixtures and recessed “invisible” storage to reclaim critical floor space from the start.
Recommendation: Your project’s success hinges on a detailed plan that addresses vapour management and structural integrity before a single tile is chosen.
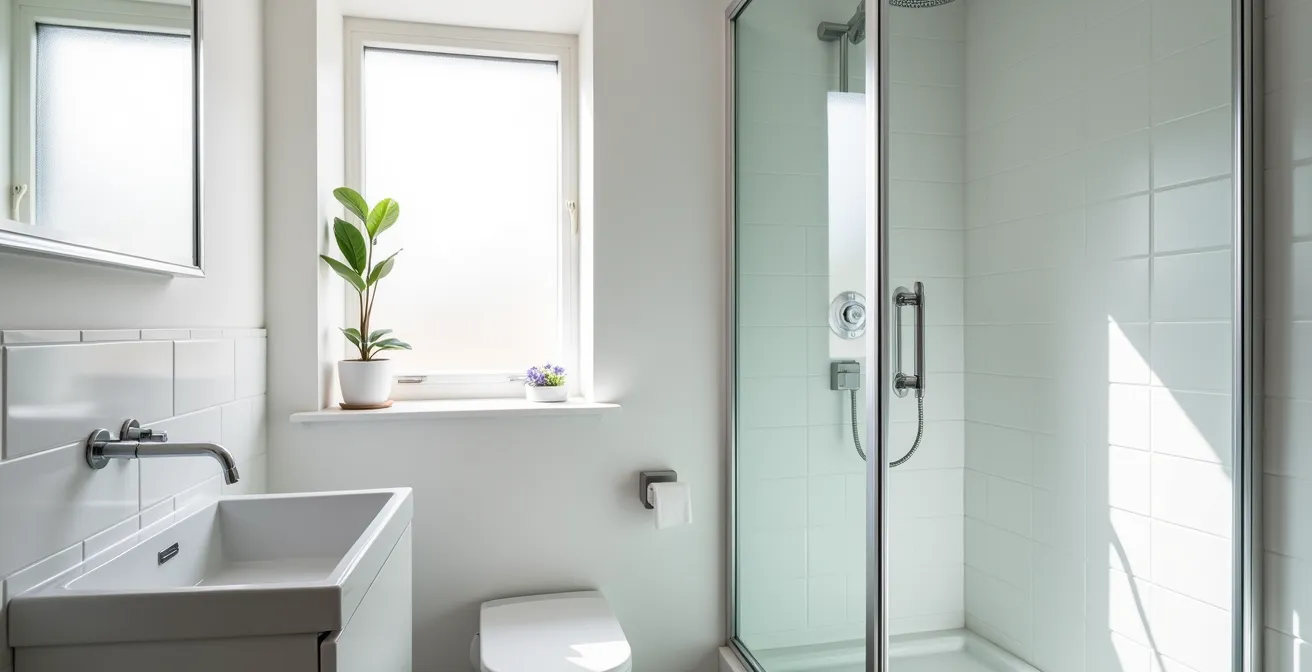
The dream of a spacious, luxurious walk-in shower often collides with the reality of the characteristically compact British bathroom. For many homeowners in terraced houses, flats, or new-builds, the standard 2×2 metre space is dominated by a bathtub that’s more obstacle than oasis. While Pinterest is filled with images of minimalist glass screens and rainfall showerheads, these visuals rarely tell the full story. They omit the critical planning and structural work required to prevent a stylish upgrade from turning into a costly disaster of leaks, cracked tiles, and peeling paint.
Most advice focuses on aesthetic tricks: using large-format tiles or a clear glass panel to create an illusion of space. These are valid points, but they are merely the finishing touches. The real challenge, and the key to a successful conversion, lies beneath the surface. It involves understanding how to manage the intense humidity in a small, enclosed area, how to reclaim every possible centimetre of usable space with clever fixtures, and, most crucially, how to ensure the building’s structure—particularly traditional timber floors—can handle the new installation without failing.
This guide moves beyond the superficial. It adopts the pragmatic perspective of a bathroom planner, focusing on the technical trade-offs and structural must-dos. We will explore why removing a bath might not devalue your home if done correctly, how to plan clearances with millimetre precision, and the unseen errors in ventilation and waterproofing that can undermine your entire project. This is not just about making a small bathroom look bigger; it’s about engineering it to be better, safer, and more functional for the long term.
To navigate this complex process, we have broken down the essential considerations into a clear, logical sequence. This article provides a step-by-step framework, from initial planning and structural checks to the final details of material selection and leak prevention, ensuring you have the expert knowledge to make informed decisions.
Summary: A Planner’s Guide to Small Bathroom Shower Conversions
- Why Removing the Bath Might Devalue Your Family Home
- How to Plan Clearances for Shower Doors in Tight Spaces
- Wall-Hung vs Floor-Mounted Toilets: Which Saves More Space?
- The Extractor Fan Error That Leads to Peeling Paint
- How to Recess Shelves into Stud Walls for ‘Invisible’ Storage
- Why Timber Floors Move and How That Cracks Grout
- Wood-Effect Porcelain vs Real Wood: Can You Tell the Difference?
- Wet Room Installation: How to Avoid Leaks on Timber Floors?
Why Removing the Bath Might Devalue Your Family Home
The single greatest fear for homeowners considering a bath-to-shower conversion is the potential impact on property value. The long-standing advice has been that a family home *must* have at least one bathtub. While this holds some truth for properties aimed at families with young children, the market is evolving. A poorly designed bathroom with a cramped, unusable bath that makes the room feel tiny can be more of a liability than an asset. The key is not the presence of a bath, but the quality and functionality of the space.
In many urban UK properties, where the average bathroom is just 1.7m x 2.0m, removing a bulky tub can transform a claustrophobic room into a spacious and desirable feature. The focus is shifting towards accessibility and luxury. Indeed, 44% of homeowners are now choosing low-curb or level-access designs, indicating a strong demand for showers that are easier and safer to use for all ages. If it is the only bathroom in the house, a high-quality, generously sized walk-in shower is often more appealing to buyers than a bath that is rarely used.
The financial equation changes if the property has a second bathroom or a downstairs cloakroom with potential for a small shower room. In that scenario, retaining one bathtub in the main family bathroom remains the safest bet for maintaining broad market appeal. However, for a single-bathroom home, the modern consensus is clear: a well-executed, spacious, and accessible walk-in shower adds more practical and perceived value than a cramped, outdated bath-and-shower combination. The “devaluation” argument is only valid if the replacement is a cheap or poorly planned compromise.
How to Plan Clearances for Shower Doors in Tight Spaces
Once you’ve committed to the conversion, the next stage is a game of centimetres. In a compact UK bathroom, every element’s placement is critical. The biggest mistake is choosing a shower enclosure and door without first mapping out the “arc of movement” for both the shower door and the main bathroom door. A beautiful new pivot shower door is useless if it collides with the toilet or prevents the bathroom door from opening fully.
Start by drawing a to-scale floor plan. Mark the position of the toilet, basin, and any radiators. Now, consider your shower door options and their spatial footprint. A pivot or hinged door requires a clear, unobstructed swing area in front of it. A bi-fold door concertinas in on itself, requiring much less outward space, making it ideal for tight spots. A sliding door is the ultimate space-saver, as it requires zero outward clearance, but these are typically found on larger rectangular enclosures.
To ensure comfortable access, the minimum entry width for a shower should be around 70-80cm. This means the door, or the opening of a screen, must provide at least this much clear space. Visually, frameless glass is the superior choice. In fact, a study shows that 75% of modern homeowners now choose frameless options because they eliminate the visual clutter of bulky frames, making the entire room feel more open. A simple, fixed glass panel—creating a ‘walk-in’ space rather than a fully enclosed cubicle—is often the most elegant and practical solution, as it has no moving parts to account for.
Wall-Hung vs Floor-Mounted Toilets: Which Saves More Space?
After the shower itself, the toilet is the fixture that dictates the layout of a small bathroom. The choice between a standard floor-mounted toilet and a wall-hung model is one of the most impactful decisions you can make for space reclamation. While a floor-mounted toilet is traditional and easier to install, a wall-hung toilet is the undisputed champion of space-saving in a compact setting. The magic lies in hiding the cistern within a stud wall or a slimline cabinet.
This single move can save you up to 200mm of floor space. That 20cm might not sound like much, but as experienced installers know, it can be the difference between a bathroom door opening fully or constantly banging into the toilet bowl—a common frustration in narrow British terraced houses. Beyond the raw dimensions, a wall-hung toilet creates a powerful visual illusion. By lifting the pan off the ground, it exposes more of the floor, making the entire room feel larger, lighter, and significantly easier to clean.
The table below breaks down the key differences, highlighting why the upfront installation complexity of a wall-hung model often pays long-term dividends in a small UK bathroom.
| Feature | Wall-Hung Toilet | Floor-Mounted Toilet |
|---|---|---|
| Cistern Depth | Hidden in wall (saves 200mm) | Standard cistern takes 200mm |
| Visual Impact | Creates ‘floating’ effect, more floor visible | Traditional appearance, less floor visible |
| UK Bathroom Suitability | Ideal for narrow rooms where door swings close | Better for standard layouts |
| Installation Complexity | Requires wall frame installation | Standard plumbing connection |
| Seat Area | Slightly smaller for very tall users | Standard comfortable size |
Of course, this solution requires a supporting frame to be installed within the wall, which is a more involved plumbing job. However, if your project involves building or altering stud walls anyway (for example, to create recessed shelving), incorporating a wall-hung toilet frame at the same time is a highly efficient use of labour and an investment in a more functional, spacious-feeling room.
The Extractor Fan Error That Leads to Peeling Paint
Installing a powerful walk-in shower in a small bathroom fundamentally changes its environment. You are introducing a huge amount of warm, moist air into a very small volume of space—many UK bathrooms measuring between 2.5-4.5 m². Without a robust strategy for vapour management, you are creating a perfect breeding ground for mould, mildew, and the number one sign of a ventilation failure: peeling paint on the ceiling and walls.
The common error is to simply replace an old, noisy fan with a new one of a similar specification, or to choose one based on noise level alone. This is a mistake. The fan’s power, measured in “extraction rate” (litres per second or metres cubed per hour), must be sized appropriately for the room’s volume and the new steam-generating shower. An underpowered fan will simply be overwhelmed, leaving moisture to condense on cold surfaces. For a small bathroom with a walk-in shower, you need a powerful centrifugal or mixed-flow fan, not a basic axial fan.
Furthermore, the fan must have a proper “run-on timer”—a feature that keeps it running for 15-20 minutes after the light is switched off to clear the residual humidity. An even better solution is a fan with a built-in humidistat, which automatically activates when it detects a rise in air moisture and switches off only when the environment is back to normal. This removes the guesswork and ensures the room is always properly vented. Finally, even with the best fan, some water can escape. As the EA Mobility Installation Guide points out, a simple addition can prevent damage outside the room:
In a tiny bathroom, water splashes everywhere. A discreet rubber or metal strip installed at the bathroom door acts as a fail-safe barrier, ensuring no water ever escapes under the door to ruin carpets.
– EA Mobility Installation Guide, Walk-In Shower Layouts for Small Bathrooms
How to Recess Shelves into Stud Walls for ‘Invisible’ Storage
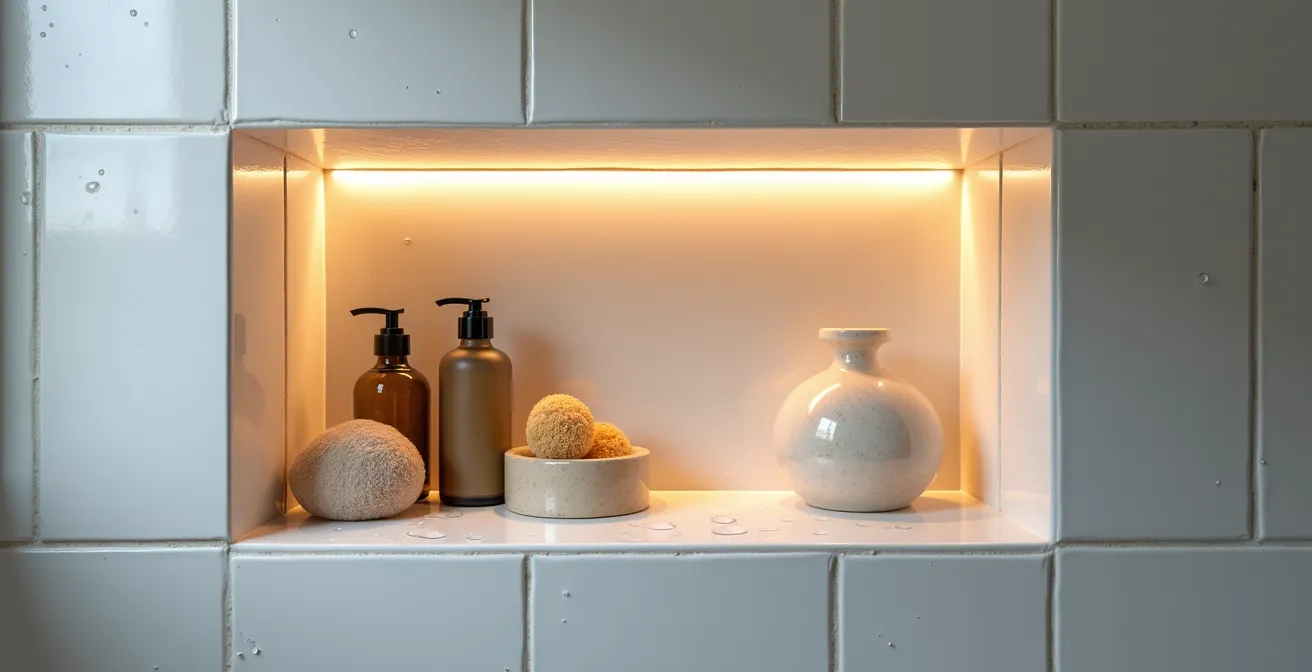
In a small bathroom, every item left on a surface adds to the visual clutter. Bottles of shampoo, soap, and conditioner sitting on the shower tray or hanging from a caddy instantly make the space feel cramped. The most elegant and effective storage solution is to make it disappear. This is achieved by recessing shelves, often called a “shower niche,” directly into the stud wall. This “invisible” storage keeps everything neatly tucked away without encroaching on your precious shower space by a single centimetre.
This technique utilises the empty space between the vertical timber studs that make up your internal walls. By cutting away a section of plasterboard and building a waterproof box within this void, you create a seamless, tiled-in storage area. When lit with a discreet waterproof LED strip, a shower niche can even become a high-end design feature. It’s a hallmark of a well-planned, custom bathroom, offering a level of finish that off-the-shelf solutions can’t match.
However, creating a shower niche is not as simple as cutting a hole. The most critical aspect is absolute waterproofing. Any failure in the membrane or sealing will lead to water penetrating the wall cavity, causing damp, rot, and structural damage over time. While it’s a job a competent DIYer can tackle, it requires meticulous attention to detail. Using a pre-fabricated, waterproof niche form (like those from Schluter) can simplify the process and offer greater peace of mind than building one from scratch with cement board.
Your Action Plan: Building a Waterproof Recessed Niche
- Position & Sizing: Locate the studs and mark out the niche opening between them, carefully checking for any hidden plumbing or wiring.
- Frame & Board: Construct a simple box frame from timber battens and line the inside of your opening with cement backer board.
- Sealing the Seams: Apply alkali-resistant fibreglass mesh tape to all internal corners and joints, embedding it in a layer of thin-set mortar.
- Waterproofing Membrane: Apply a liquid or sheet membrane (like a Schluter-KERDI kit) to the entire niche surface, ensuring it overlaps onto the main wall area.
- Tiling & Sloping: Tile the niche, ensuring the bottom shelf is installed with a slight forward slope to allow water to drain out effectively.
Why Timber Floors Move and How That Cracks Grout
We now arrive at the single most critical structural consideration for a walk-in shower in a typical British home: the timber floor. Unlike a concrete slab, a suspended timber floor made of joists and floorboards has a natural degree of flex, or “deflection.” When you stand on it, it moves, even if only by a fraction of a millimetre. While this is perfectly normal for a bedroom or living room, it is the enemy of a tiled shower floor. Tile and grout are rigid; when the floor beneath them flexes, they crack. These cracks, however small, break the waterproof seal and become pathways for water to seep into the floor structure, leading to rot and catastrophic failure.
The weight of the shower tray, tiles, tile adhesive, and a person is substantial. If the floor joists are not strong enough or adequately supported, the deflection will be significant. A professional case study documented a common but critical oversight where a supporting floor joist was not directly under the shower wall, leaving it unsupported. The solution involved installing a double header and double floor joists under the pony wall to provide the necessary rigidity. This kind of reinforcement is essential to prevent movement.
For floors with less substantial joists (e.g., 2x10s instead of 2x12s), additional support is required. This is achieved by fitting “blocking” (also known as noggins or dwangs) between the joists. These short pieces of timber, fitted perpendicularly, tie the joists together and prevent them from twisting or flexing independently. Under a shower pan, blocking should be installed every 2-3 feet to create a rock-solid sub-base. Failing to address floor deflection is not an option; it is the primary cause of grout failure and subsequent leaks in timber-floor bathrooms.
Wood-Effect Porcelain vs Real Wood: Can You Tell the Difference?
With the subfloor made rigid and secure, the focus shifts to the surface. While real wood flooring is completely unsuitable for a wet area, the desire for a warm, natural aesthetic remains strong. This is where wood-effect porcelain tiles come in. Modern manufacturing techniques have become so advanced that high-quality porcelain planks can convincingly replicate the grain, texture, and colour variations of real wood, while offering superior performance in a bathroom environment.
Porcelain is the ideal material for a shower floor. It is incredibly dense and has an extremely low water absorption rate, making it virtually waterproof. It’s also exceptionally hard-wearing and resistant to scratches and stains. In a comparison of popular flooring materials, porcelain tile is the top choice for its durability and water resistance. It provides the perfect combination of aesthetics and the robust performance needed to work with a reinforced timber subfloor.
| Material Type | Popularity | Best For | Key Advantage |
|---|---|---|---|
| Porcelain Tile | 39% of homeowners | Shower floors requiring durability | Superior water resistance |
| Ceramic Tile | 26% of homeowners | Budget-conscious renovations | Cost-effective and versatile |
| Natural Stone | Data varies | Luxury installations | Authentic texture and appearance |
| LVT (Luxury Vinyl) | Growing trend | Warm underfoot feel needed | Comfort and easier installation |
Beyond material, the tile shape itself plays a role in safety. As experts at Pristine Kitchen & Bath note, the pattern of grout lines is a key factor in performance:
Rectangular tiles (29%), hexagonal (26%), and square (22%) are the most popular choices because the grout lines provide natural slip resistance—crucial for a wet surface.
– Pristine Kitchen & Bath, Walk-In Shower Ideas for Your Boise Bathroom
Therefore, choosing a wood-effect porcelain plank not only delivers the desired look but also contributes to a safer, more durable shower floor. The combination of a robust, water-resistant material with ample grout lines for grip makes it the technically superior choice.
Key Takeaways
- A walk-in shower can increase value in a small UK home if it’s well-executed and improves functionality.
- Structural reinforcement of timber floors with extra joists and blocking is non-negotiable to prevent cracks and leaks.
- Vapour management through a correctly sized, timed extractor fan is as important as the plumbing itself.
Wet Room Installation: How to Avoid Leaks on Timber Floors?
A true wet room, where the entire floor is waterproofed and slopes gently to a drain, represents the pinnacle of the walk-in shower concept. It offers ultimate accessibility and a seamless, minimalist aesthetic. However, it is also the most technically demanding and highest-risk installation, especially on a suspended timber floor. Success depends entirely on creating a flawless, continuous waterproof “tanking” system—an impermeable envelope that contains all water.
The process begins with the floor structure. As previously discussed, the floorboards must be removed. After reinforcing the joists with noggins, the original boards should be replaced with a minimum of 25mm WBP (Water and Boil Proof) plywood to create a stable, solid deck. Onto this deck, a “wet room former” is installed. This is a pre-fabricated tray with the correct drainage gradient already built in, which provides a reliable base for tiling and ensures water flows correctly to the drain.
Next comes the most critical stage: tanking. This involves applying a complete waterproofing kit over the floor and up the walls in the shower area. This typically consists of a liquid-applied membrane, reinforced with special tape at all the corners and joints where walls meet floors. Every square inch must be covered to create a seamless tank. Any gap, pinhole, or poorly sealed joint is a potential leak. This is not a step where corners can be cut. Following the manufacturer’s instructions for the tanking kit to the letter is paramount for a long-lasting, leak-free installation.
Checklist for a Leak-Proof Wet Room on Timber
- Structural Prep: Remove old floorboards and fit noggins between all joists for maximum stability.
- Subfloor Installation: Lay a new floor deck using 25mm WBP plywood, screwed down securely.
- Former and Gradient: Install the wet room former, ensuring it is level and properly supported, creating the slope to the drain.
- Tanking Application: Apply a complete waterguard or tanking kit to the entire floor and up the walls in the wet zone, paying special attention to sealing all joints.
- Final Sealing: After tiling, add a final bead of high-quality silicon sealant along the bottom of any glass screens and around the drain for an extra layer of protection.
By focusing on these structural and technical foundations first, you can ensure your stylish new walk-in shower is not just a beautiful addition, but a robust, reliable, and valuable improvement to your home. To put these concepts into practice, the logical next step is to create a detailed project plan that incorporates these technical checks from the very beginning.