True balcony privacy comes from system-level design, not just buying a screen; it’s about mastering the technical constraints of your space.
- Most privacy solutions fail because they ignore critical factors like building codes, wind forces, and structural weight limits.
- The key is to use layered elements—plants, lightweight screens, and smart furniture placement—to strategically interrupt sightlines without creating a solid, light-blocking wall.
Recommendation: Start by auditing your balcony’s structural and regulatory constraints before choosing any solution. Understanding your limits is the first step to creative freedom.
Living in an apartment often means trading privacy for a view. That “goldfish bowl” feeling, where neighbours’ windows seem just a little too close, is a common frustration for city dwellers. The default solutions are often disappointing. Flimsy reed screens can look cheap and disintegrate in the weather, heavy fabric curtains block precious sunlight and become sails in the wind, and generic plastic panels can cheapen your outdoor oasis. These fixes treat the symptom—the feeling of being watched—but ignore the root cause: a lack of thoughtful design.
The real challenge of creating balcony privacy is not just about blocking a view. It’s a complex design problem that involves balancing light, wind, water, and weight. To succeed, you must think less like a decorator and more like an urban landscape architect. This means understanding the non-negotiable rules of your building, the physics of wind on a high-rise, and the horticultural science of keeping plants alive in challenging conditions. It’s about creating an engineered microclimate that feels like a secluded retreat.
Forget the quick fixes. This guide will walk you through the professional’s approach. We’ll explore the structural reasons you can’t just attach things to the facade, how to select and secure plants that thrive in high-wind conditions, and how to use materials and seating to sculpt your space. By embracing the constraints, you can design a private, light-filled sanctuary that is both beautiful and built to last.
This article provides a structured approach to reclaiming your outdoor space. Below is a summary of the key design challenges and solutions we will explore to transform your overlooked balcony into a private haven.
Summary: A Designer’s Guide to Balcony Privacy and Light
- Why You Cannot Attach Trellis to the Building Facade
- How to Secure Plants on a Windy High-Rise Balcony
- Composite Decking vs Tiles: Which Is Lighter for Balconies?
- The Pot Riser Mistake That Rots Decking Boards
- How to Position Seating to Frame the View and Hide the Road
- How to Zone an Open Space Using Slatted Wood Screens
- How to Choose Plants That Survive Shallow Root Systems
- How to Irrigate a Vertical Garden on a South-Facing Balcony?
Why You Cannot Attach Trellis to the Building Facade
The first impulse for creating vertical privacy is often to attach a trellis or screen directly to the building’s wall. This is almost universally a mistake, and for reasons that go far beyond a simple landlord prohibition. The facade of a modern building is a high-performance system, and penetrating it compromises its integrity in two critical ways: waterproofing and thermal performance. Every hole you drill is a potential pathway for water ingress, which can lead to costly structural damage over time. Furthermore, you risk creating a thermal bridge.
A thermal bridge occurs when a conductive material bypasses a building’s insulation layer. Metal fasteners, like bolts or screws, are excellent conductors of heat. When they penetrate the insulated wall, they can drastically reduce its effectiveness. For example, research shows that an R-21 insulation layer can be reduced to just R-7.4 when penetrated by steel studs, losing nearly two-thirds of its insulating power. This not only increases energy costs but can also lead to condensation and mould growth inside the wall assembly.
Because of these risks, most building bylaws and condominium rules strictly forbid any unauthorized penetrations of the building envelope. The solution is to think in terms of freestanding structures. Any privacy screen, planter, or vertical garden must be self-supporting or secured to the balcony slab or railings, never the wall. This respects the building’s integrity and keeps you in compliance with regulations.
Action Plan: Bylaw Compliance Audit
- Research Regulations: Search your building’s regulations or local municipal code for terms like “facade penetrations” and “alterations to common elements” to understand the explicit rules.
- Check Material Specs: Identify any “material fire-rating requirements” specific to your building type, as this applies to screens and decking.
- Understand Loads: Review the “point load vs. distributed load limits” for your balcony structure to ensure any heavy planters or structures are safe.
- Verify Integrity Clauses: Look for restrictions on creating a “thermal bridge” and any language protecting the building’s waterproofing integrity.
- Document Findings: Document any clauses related to “building envelope” modifications to guide your design choices and prove due diligence if questioned.
How to Secure Plants on a Windy High-Rise Balcony
A high-rise balcony is an extreme environment for plants. Wind is the primary challenge; it doesn’t just blow, it creates vortices and updrafts that can physically rip soil from containers and desiccate leaves in hours. Simply choosing “wind-resistant” plants isn’t enough; you need an aerodynamic planting strategy. This begins with the planters themselves. Tall, narrow pots are unstable and act like sails. Opt for low, wide, and heavy containers that have a low centre of gravity. Rectangular planters are generally more stable than round ones.
The weight of the planter is your first line of defence. Instead of lightweight plastic, consider heavier materials like concrete, thick composite, or ceramic. For very large installations, custom-built solutions can be effective. The material and shape of the plants are also crucial. Avoid plants with large, delicate leaves, as they will be shredded by the wind. Instead, choose species with small, waxy, or needle-like foliage, such as junipers or boxwoods. Ornamental grasses are excellent choices as their flexible stems and leaves bend with the wind rather than breaking.
Case Study: Toronto High-Rise Wind-Proofing
Design specialists at Box Design/Build, working on exposed Toronto high-rise balconies, developed a successful system using custom 22-inch deep planters made from high-density foam with a concrete skin. This combination provides weight for stability while the foam offers insulation, allowing the soil to stay frozen in winter and preventing root damage from freeze-thaw cycles. After observing wind literally whipping soil out of containers, they implemented a twice-daily watering program and used specialized planting mediums containing SoilSponge to maximize moisture retention against constant wind-driven evaporation.
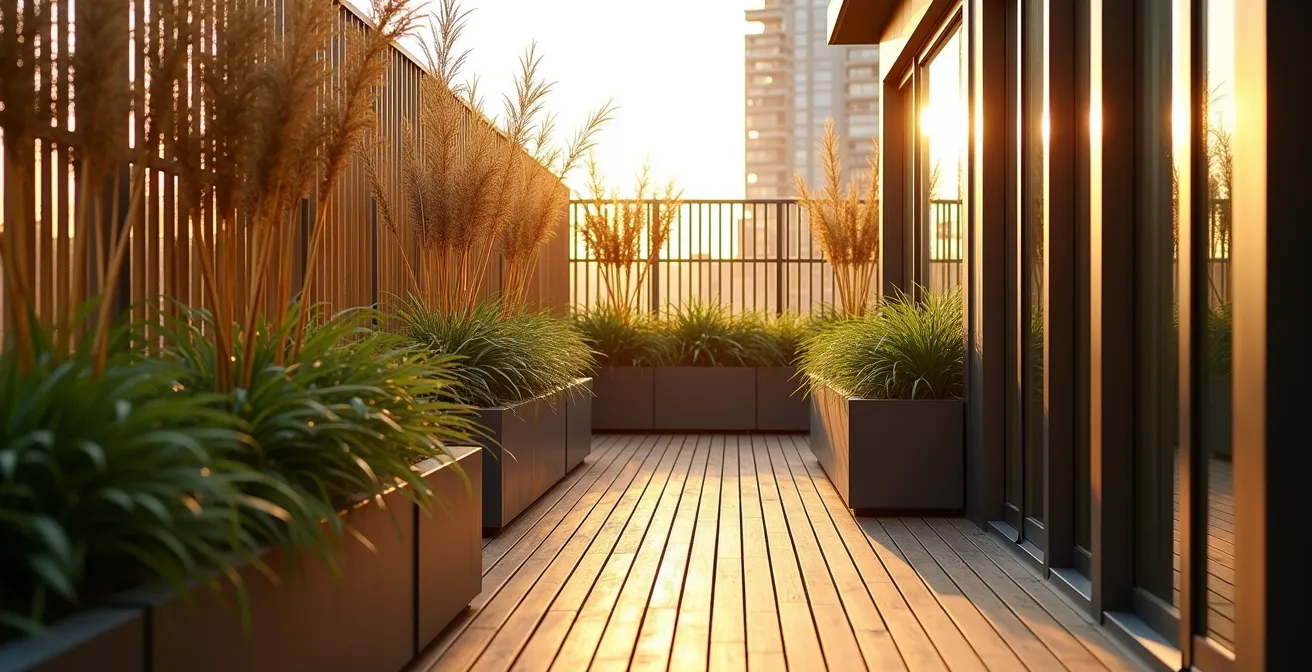
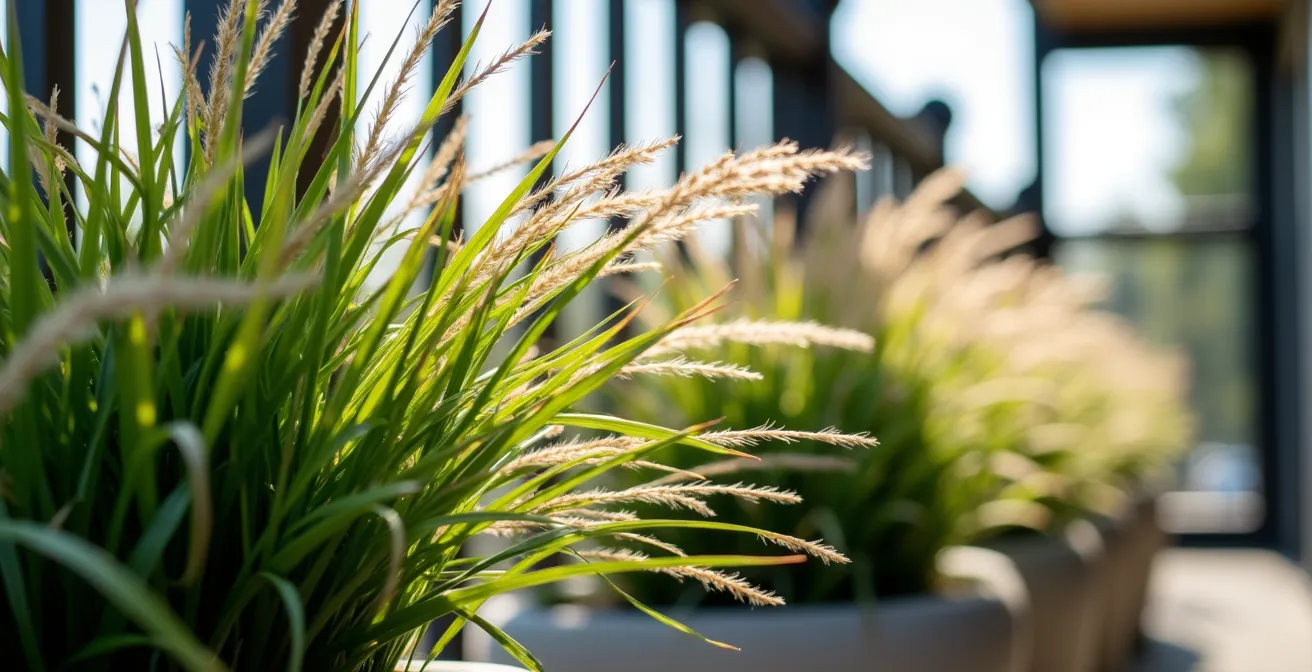
This image demonstrates the principle of aerodynamic planting. Notice how the low-profile, rounded planters present a minimal surface area to the wind, while the flexible ornamental grasses are designed to move with the air currents rather than resist them.
Grouping planters together creates a heavier, more stable mass. You can also use tension cables or sturdy zip ties to discreetly secure tall planters or small trees to the balcony railings. This provides an anchor point without violating rules about attaching to the building facade. Finally, ensure your soil mix is heavy and has good water retention to combat the drying effects of the wind.
Composite Decking vs Tiles: Which Is Lighter for Balconies?
Flooring is a foundational element that can transform the look and feel of a balcony, but the choice is governed by a critical, unseen factor: load-bearing capacity. Balconies are not designed to support unlimited weight, and your flooring choice contributes significantly to the total load. The two most popular upgrade options, composite decking and porcelain tiles, have vastly different weight profiles. Understanding this difference is key to a safe and compliant installation.
Porcelain or stone tiles are significantly heavier. A standard 20mm thick porcelain paver can weigh between 8 to 10 pounds per square foot (approx. 39-49 kg/m²). When you factor in the mortar or pedestal system used for installation, the total dead load increases further. While incredibly durable and low-maintenance, tiles may push the limits of an older balcony’s structural capacity, especially when combined with heavy planters and furniture.
Composite decking, especially modern hollow-core or scalloped-profile boards, is the lighter option. These boards typically weigh between 2 to 4 pounds per square foot (approx. 10-20 kg/m²). They are installed on a lightweight sleeper system, often made of aluminium or composite material, which distributes the load evenly across the balcony slab. This makes composite decking a much safer choice for balconies where weight is a primary concern. It provides the warm look of wood without the maintenance or the heavy load of stone.
Ultimately, the decision comes down to your balcony’s specific engineering. Before purchasing any materials, you must verify your balcony’s maximum distributed load capacity, usually found in the building’s architectural plans or by consulting with a structural engineer. Always choose the system that leaves the most capacity available for plants, furniture, and people.
The Pot Riser Mistake That Rots Decking Boards
Once you have beautiful new decking, the last thing you want is to damage it. One of the most common and destructive mistakes balcony gardeners make is placing pots directly on a wood or composite deck surface. This traps moisture underneath the pot, creating a perfect, dark, and damp environment for mould, mildew, and eventually, rot. Even composite decking, which is rot-resistant, can become permanently stained and discoloured from the constant dampness. The trapped water prevents the deck boards from drying out, leading to material degradation.
The simple solution is to elevate your pots, but even here, a common mistake can undermine your efforts. Using small, individual “pot feet” is not enough. While they lift the pot slightly, they create isolated microclimates between the feet where moisture remains trapped and air cannot circulate effectively. In fact, some research on balcony gardening shows that these small, enclosed zones can increase fungal growth by up to 300% compared to an open, well-ventilated surface.
The correct approach is to create an engineered microclimate that promotes constant airflow. This means using risers that allow for cross-ventilation across the entire base of the pot. To do this effectively, follow these principles:
- Use open-grid or linear-style risers that are at least 2 inches high to ensure a significant air gap.
- Ensure the riser design has at least 50% open space to maximize airflow.
- For very heavy planters, place a waterproof membrane or a sacrificial tile underneath the riser to provide an additional layer of protection.
- Choose non-porous glazed pots over terracotta, as terracotta can wick moisture through its base and contribute to the problem.
- Rotate pot positions monthly during the growing season to allow any damp spots to dry out completely.
By ensuring complete air circulation under every pot, you protect your investment in your decking and prevent the slow, silent damage that trapped moisture can cause.
How to Position Seating to Frame the View and Hide the Road
Privacy isn’t always about building walls; sometimes, it’s about clever misdirection. The placement of your seating is one of the most powerful and overlooked tools for creating a sense of seclusion. Instead of focusing on what you want to block, focus on what you want to see. This concept, known as strategic sightlines, allows you to use your furniture to frame desirable views while simultaneously editing out undesirable ones, like a busy road or a neighbour’s window.
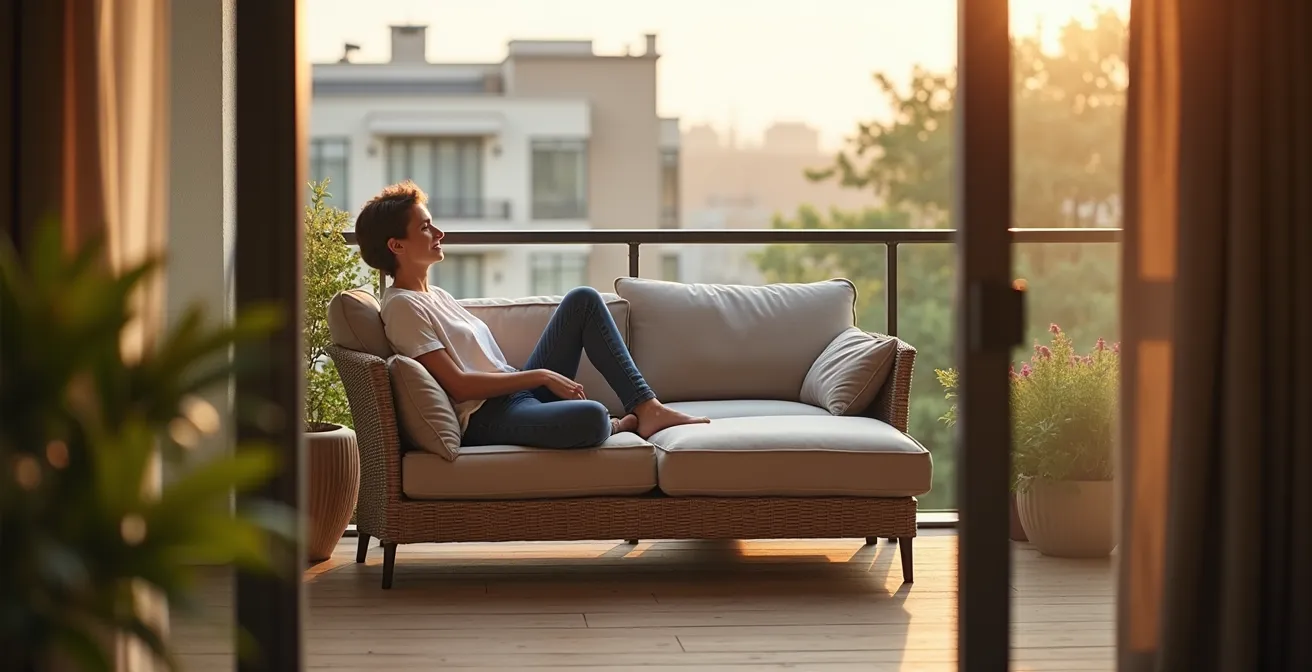
Start by identifying the best view from your balcony—be it a sliver of park, a distant skyline, or even just a beautiful corner of your own container garden. Position your primary seating, such as a sofa or a pair of comfortable chairs, to face this focal point. An L-shaped outdoor sofa is particularly effective; its high back can be positioned to create a physical and psychological barrier, turning its back on the exposed side of the balcony and carving out an intimate conversational nook.
This strategy creates a private zone without adding a single screen. When you are seated, your world shrinks to the comfortable space you’ve created, and your gaze is naturally directed towards the pleasant view. The high back of the furniture acts as a visual shield at the critical seated eye-level (around 1.2 meters), blocking direct sightlines from adjacent buildings or the street below.
Case Study: Reverse “Shakkei” on Urban Balconies
The design firm The Brownstone Boys adapted the Japanese principle of Shakkei (borrowed scenery) for pre-war building balconies. Instead of borrowing a beautiful distant view, they used a “reverse Shakkei” approach. By installing antique-style iron railings and strategically placing furniture, they framed desirable “micro-views” (like a flowering plant or architectural detail) while using the solid backs of sofas and high-backed chairs to completely block the view of the street level from a seated position. This created harmony with the building’s aesthetic while providing highly effective, targeted privacy.
How to Zone an Open Space Using Slatted Wood Screens
For more direct screening, freestanding slatted wood screens offer the best balance between privacy and light. Unlike solid panels, which create harsh shadows and block airflow, slatted screens dapple the light, creating a gentle, filtered effect. This maintains a bright, airy feel on the balcony while effectively obscuring direct views from the outside. The key to their success lies in the precise relationship between the slats and the gaps.
The goal is to achieve visual occlusion without total light obstruction. From an architectural perspective, this is about the angle of view. When someone is looking at your balcony from a distance, the gaps between the slats visually disappear, presenting a nearly solid surface. However, for you on the balcony, the ambient light still passes through. The optimal balance is a matter of geometry, and architectural studies on screening elements reveal a specific ratio. A 70:30 slat-to-gap ratio (e.g., 2.5-inch slats with a 1-inch gap) has been shown to provide an ideal balance, offering significant privacy while still allowing up to 85% of ambient light to transmit through.
The orientation of the slats also has a psychological effect on the perception of space. Vertical slats draw the eye upward, making a small balcony feel taller and more spacious. Horizontal slats can make a narrow balcony feel wider and more expansive. You can leverage this to enhance the sense of space on your balcony.
For ultimate flexibility, consider modular screens. A case study of a DIY implementation showed great success using premade diamond lattice trellis boards mounted on heavy-duty casters. This created a dynamic privacy solution that could be reconfigured seasonally—pushed together for an intimate morning coffee or moved apart to open up the space for a party. This modular approach allows you to adapt your privacy levels on demand.
How to Choose Plants That Survive Shallow Root Systems
Many of the most attractive and lightweight planters suitable for balconies are also quite shallow. This presents a major horticultural challenge: most plants need deep soil to establish a healthy root system. To succeed in shallow containers (less than 12 inches deep), you must select plants that are naturally adapted to these conditions. The best place to look for inspiration is in alpine environments and on green roofs, where plants thrive in just a few inches of soil.
These plants have evolved fibrous, spreading root systems rather than deep taproots. This allows them to anchor themselves securely and draw moisture and nutrients from a wide, shallow area. Succulents are the champions of shallow-root planting. Their ability to store water in their leaves makes them incredibly drought-tolerant and resilient. Key varieties to look for include:
- Sedum (Stonecrop): Many varieties, like Sedum ‘Angelina’ or ‘Dragon’s Blood’, can survive and spread in as little as 2-4 inches of soil, creating a lush, colourful groundcover.
- Sempervivum (Hens and Chicks): These form beautiful, geometric rosettes and are exceptionally hardy, requiring minimal soil and water.
- Alpine Plants: Species like Rock Jasmine (Androsace) or certain varieties of Thyme are naturally adapted to rocky, shallow soil and perform beautifully in containers.
Your soil mix is just as important as your plant selection. A standard potting mix will hold too much water and be too dense for these plants. You need to create a custom blend that prioritizes drainage. According to specialists in green roof planting, an ideal mix for shallow containers is approximately 40% potting mix, 30% perlite, 20% pumice, and 10% compost. This creates a lightweight, airy medium that gives roots oxygen and prevents rot, mimicking the gritty soils of their native habitats.
Key Takeaways
- Respect the building: Never attach anything to the facade. All privacy solutions must be freestanding to protect structural and thermal integrity.
- Design for the elements: Use weight and wind as design constraints, not obstacles. Choose low-profile, heavy planters and flexible plants that can withstand high-rise conditions.
- Control sightlines, don’t block light: Privacy is achieved through the strategic layering of plants, semi-transparent screens, and furniture to interrupt specific lines of sight, not by building a solid wall.
How to Irrigate a Vertical Garden on a South-Facing Balcony?
A vertical garden is a fantastic solution for maximizing green space and privacy on a balcony, but on a hot, south-facing exposure, it becomes an irrigation puzzle. The combination of intense sun, reflected heat from the building, and drying winds creates an environment of extreme evapotranspiration, where water evaporates from soil and leaves at a rapid rate. Manual watering is often insufficient and impractical. A well-designed drip irrigation system is not a luxury; it is a necessity for success.
Drip irrigation delivers water directly to the plant’s root zone, minimizing waste from evaporation and runoff. For a vertical garden, this is particularly important as overhead watering can fail to penetrate the dense foliage of lower pockets. The table below, based on data from irrigation experts at leading suppliers like Rain Bird, compares common systems suitable for balcony applications.
| System Type | Water Efficiency | Installation Cost | Best For | Maintenance |
|---|---|---|---|---|
| Drip Emitters | 80% reduction vs overhead watering | $50-150 | Precise per-plant control | Check monthly for clogs |
| Soaker Hose | 65% water savings | $30-80 | Small vertical gardens | Replace every 2-3 years |
| Closed-loop Recirculating | 90% water conservation | $200-500 | Large installations | Clean pump quarterly |
| Pulse Timer System | 70% efficiency gain | $75-200 | Hot, dry locations | Adjust seasonally |
For a south-facing wall, a system with drip emitters connected to a pulse timer is often the most effective strategy. Instead of watering once for a long period, pulse irrigation delivers water in several short bursts throughout the hottest part of the day (e.g., 5 minutes, 3 times daily). This allows the soil to absorb the water fully between cycles, preventing runoff and ensuring consistent moisture without waterlogging the roots. One successful case study involved a 2×3 ft vertical system on a south-facing balcony that thrived using this method, combined with polymer moisture-retaining additives in the soil and a layer of light-colored mulch to reduce surface evaporation.
By applying these design-led principles—respecting structural integrity, engineering for the elements, and strategically managing sightlines and resources—you transform a simple privacy problem into a comprehensive design project. The result is not just a screen, but a resilient, living ecosystem that provides the seclusion you crave while enhancing your connection to the outdoors. Begin by auditing your space’s constraints, as this is the first step toward creating your personal, light-filled sanctuary in the city.