The fear of losing your deposit shouldn’t mean living with bare walls; mastering the *method* of temporary installation is the key to bold, damage-free decorating.
- Adhesive solutions fail from improper use, not poor quality. Wall preparation and respecting weight limits are non-negotiable.
- The weight of your art is critical. Unframed canvases are significantly lighter than glazed prints, making them ideal for adhesive hanging.
Recommendation: Always start by deep-cleaning the wall area with isopropyl alcohol and choosing a hanging solution rated for at least double your artwork’s weight for a completely secure, deposit-safe result.
For tenants across the UK, the desire to make a rental feel like home often clashes with the cold, hard reality of the tenancy agreement. You want to hang that stunning canvas that would transform your living room, but the fear of a nail hole, a paint chip, or a mysterious stain costing you your deposit is paralysing. That dreaded end-of-tenancy inspection looms large. Many guides will simply list damage-free products, but this approach misses the point. It’s not the tools, but the technique that matters.
The secret to successful, deposit-safe decorating isn’t about avoiding big art; it’s about understanding the simple physics of temporary hanging and making informed choices. It’s about knowing why landlords despise Blu-Tack (it’s the oil stains it leaves behind) and what makes an adhesive strip fail (it’s almost always user error). This guide moves beyond a simple product list. It’s a stylist’s handbook on methodology, empowering you to analyse your space, choose the right type of art, and hang it with the confidence that you’ll get your full deposit back.
We’ll delve into the science of adhesion for heavy pieces, solve common aesthetic problems like empty-looking high ceilings, and explore the economics of curating your art collection. By mastering these principles, you can stop living in a sterile white box and start creating a home that truly reflects your personality, all while keeping your landlord happy.
This article provides a complete roadmap, from the foundational rules of adhesion to advanced styling and sourcing strategies. Explore the sections below to gain the expertise needed to transform your rental property with confidence.
Summary: A Renter’s Guide to Statement Art Without Wall Damage
- Why Most Landlords Ban Blu-Tack and What to Use Instead
- How to Hang Heavy Canvases Using Adhesive Strips Safely
- Canvas vs Framed Prints: Which Is Lighter for Temporary Hanging?
- The Scale Error That Makes High Ceilings Look Empty
- How to Create a Leaning Art Shelf Layout
- Paint or Wallpaper: Which Best Highlights Original Cornicing?
- Why Renting a Sofa Costs More After 18 Months
- Renting vs Buying Furniture: Is the Circular Economy Cheaper?
Why Most Landlords Ban Blu-Tack and What to Use Instead
Every tenant has been tempted by the deceptive simplicity of Blu-Tack. It seems like the perfect, harmless solution for posters and prints. However, landlords across the UK ban it for a very good reason: it leaves greasy, blue-tinted stains on paintwork that are almost impossible to remove without repainting. Over time, the oils in the putty leach into the wall surface, creating a blemish that spells trouble for your deposit. Furthermore, its holding power is minimal and degrades over time, leading to fallen frames and potential damage.
The good news is that modern material science has provided a wealth of superior, truly damage-free alternatives. The market is led by adhesive strips, but also includes solutions like nano tape and museum putty for different applications. The key is understanding which product is right for which job, based on weight, surface, and artwork type. Choosing the correct alternative isn’t just about avoiding damage; it’s about ensuring your art stays securely on the wall. The following comparison, based on data from decor experts like a recent renter’s guide, breaks down the most popular options.
| Solution | Weight Limit | Best For | Removal Ease |
|---|---|---|---|
| Command Strips | Up to 16 lbs | Frames & Canvas | Easy, damage-free |
| Museum Putty | Light items | Shelf objects | Moderate |
| Nano Tape | Up to 2 lbs | Lightweight posters | Very easy |
| Artist’s Tape | Very light | Paper prints | Easy, no residue |
For any serious art, adhesive picture hanging strips are the gold standard. They are designed for one purpose: to hold significant weight and then be removed flawlessly. However, their effectiveness is entirely dependent on correct application. Failure to follow the instructions is the number one reason these products fail.
Action Plan: Flawless Adhesive Strip Application
- Surface Preparation: Clean the wall surface with rubbing alcohol on a lint-free cloth. Never use household cleaners or water, as they leave behind slippery residue that prevents a strong bond.
- Strip Pairing: Separate the strips and press two together until they make a distinct ‘click’ sound. This ensures the hook-and-loop fasteners are fully engaged.
- Frame Application: Remove the liner from one side and press the paired strip firmly onto the back of your frame, typically at the corners. Hold for 30 seconds.
- Wall Mounting: Remove the remaining liners and press the frame firmly against the prepared wall spot. Hold for another 30 seconds to secure the bond.
- Proper Removal: To remove, never pull the strip out towards you. Instead, slowly stretch the pull-tab straight down, parallel to the wall, until the strip releases. It needs to stretch to at least 15 inches to disengage cleanly.
How to Hang Heavy Canvases Using Adhesive Strips Safely
The biggest anxiety for a renter is hanging something with significant weight, like a large canvas. This is where understanding the physics of adhesion becomes crucial. An adhesive strip’s bond relies on two forces: the adhesive force to the wall and frame, and the internal shear strength of the strip itself. Most failures occur when the weight of the object exceeds the strip’s capacity, or when the surface wasn’t properly prepared, compromising the bond.
When hanging a heavy canvas, always use more strips than you think you need, distributing the load evenly. For a large canvas, this means placing pairs of strips not just at the top corners but also along the sides and bottom. This prevents the canvas from torquing or peeling away from the wall over time. It’s also vital to check the specific product guidelines. For example, some dedicated canvas hangers hold up to 3 lbs for a canvas measuring up to 18″x24″, according to the manufacturer’s own data. Exceeding this is a gamble.
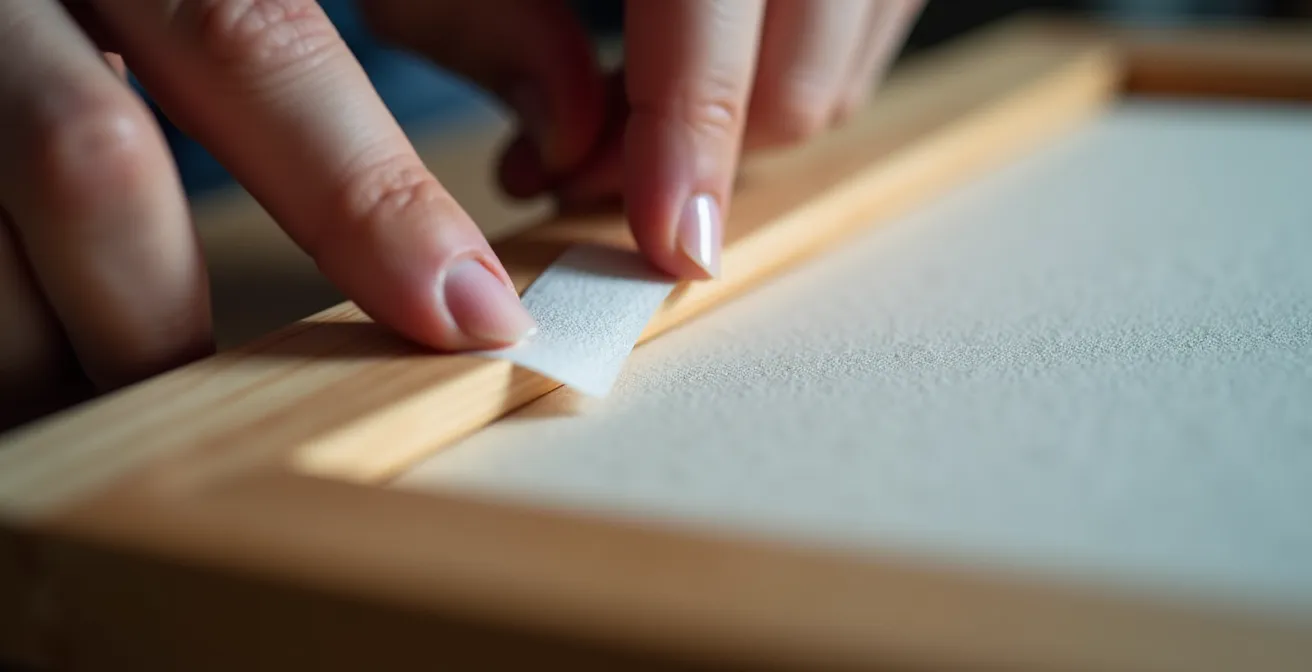
As shown in the image, applying firm, even pressure is key. After placing the canvas on the wall, press firmly over the area of each strip for at least 30 seconds. This step, often rushed or skipped, is what activates the pressure-sensitive adhesive and creates a secure, lasting bond. A trick every stylist knows is to then carefully lift the canvas off the wall, leaving the wall-side strips in place. Let these strips cure on the wall for an hour before re-attaching the canvas. This allows the adhesive to achieve maximum strength before it has to bear any weight.
Canvas vs Framed Prints: Which Is Lighter for Temporary Hanging?
When choosing statement art for a rental, the physical weight of the piece is your most important consideration. This is where the debate between a canvas and a framed print becomes critical. While a large, glass-fronted framed print can look incredibly sharp, it introduces significant weight and rigidity—two enemies of adhesive hanging. The glass alone can double the weight of the piece, immediately pushing it outside the safe limits of most damage-free solutions.
An unframed, gallery-wrapped canvas is, by a huge margin, the lighter and more renter-friendly option. It consists only of the canvas material and a lightweight wooden stretcher frame. This dramatically reduces the overall load on the adhesive strips. For context, while a heavy framed print might require professional installation, a large canvas often falls well within the limits of consumer-grade adhesive hangers. Industry advice on canvas size recommendations show that even a substantial piece up to 16×20 inches can often be hung securely with standard strips, provided the weight is respected.
The structure of a canvas also presents a challenge that requires careful thought. As experts in the field note, the design can impact adhesive performance:
The wooden stretcher bar or frame shifts the center of gravity, causing adhesives to lose grip
– Buy Wall Art Editorial Team, Buy Wall Art Canvas Hanging Guide
This highlights why proper strip placement is so crucial. By positioning the adhesive strips on the solid wood of the stretcher bar, you are connecting to the most stable part of the artwork. This provides a solid anchor and counteracts any tendency for the canvas to peel away from the wall due to a shifted center of gravity. For renters, the conclusion is clear: for large-scale impact with minimal risk, canvas is the undisputed champion.
The Scale Error That Makes High Ceilings Look Empty
Many UK rental properties, especially in converted Victorian or Georgian buildings, are blessed with beautifully high ceilings. While a luxury, this feature can create a major design dilemma: the “floating art” phenomenon. Hanging a standard-sized piece of art at a normal eye-level (around 1.5m from the floor) can leave a vast, empty expanse of wall above it, making the art look small and the room feel unbalanced. This is the most common scale error renters make.
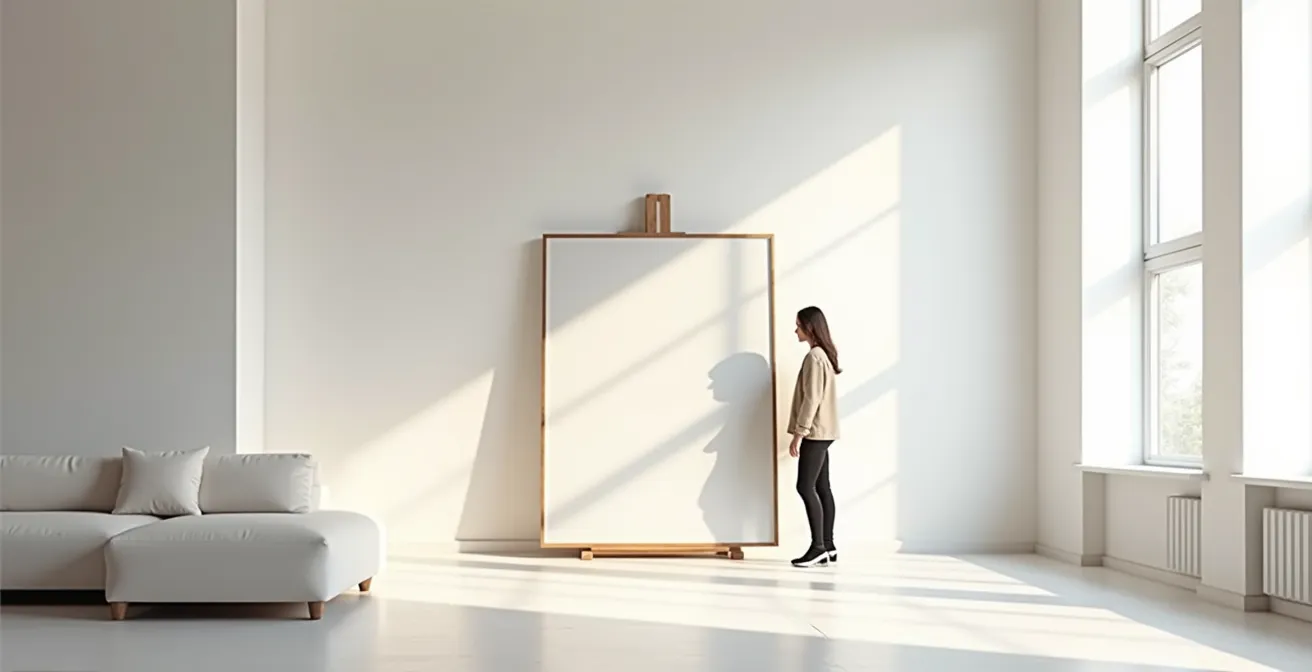
The solution is to think about filling the “vertical volume” of the room without putting a single hole in the wall. Instead of hanging one small piece, consider a vertical gallery wall using multiple lightweight canvases connected by adhesive strips. This draws the eye upward. Another powerful, zero-damage technique is to use a large floor easel. Placing an oversized, yet lightweight, canvas on an easel immediately adds a dramatic vertical element to the room, breaking up the wall space and creating an intentional, artistic focal point. It feels less like temporary decor and more like a curated studio space.
Similarly, leaning a very large, oversized mirror against the wall achieves a similar effect. It not only fills the vertical space but also reflects light and any art on the opposite wall, making the entire room feel larger and more dynamic. For a truly bold move, consider a single feature wall with high-quality, removable peel-and-stick wallpaper. This can serve as a backdrop for a smaller piece of art, making the entire wall the “statement” and preventing the art itself from looking lost.
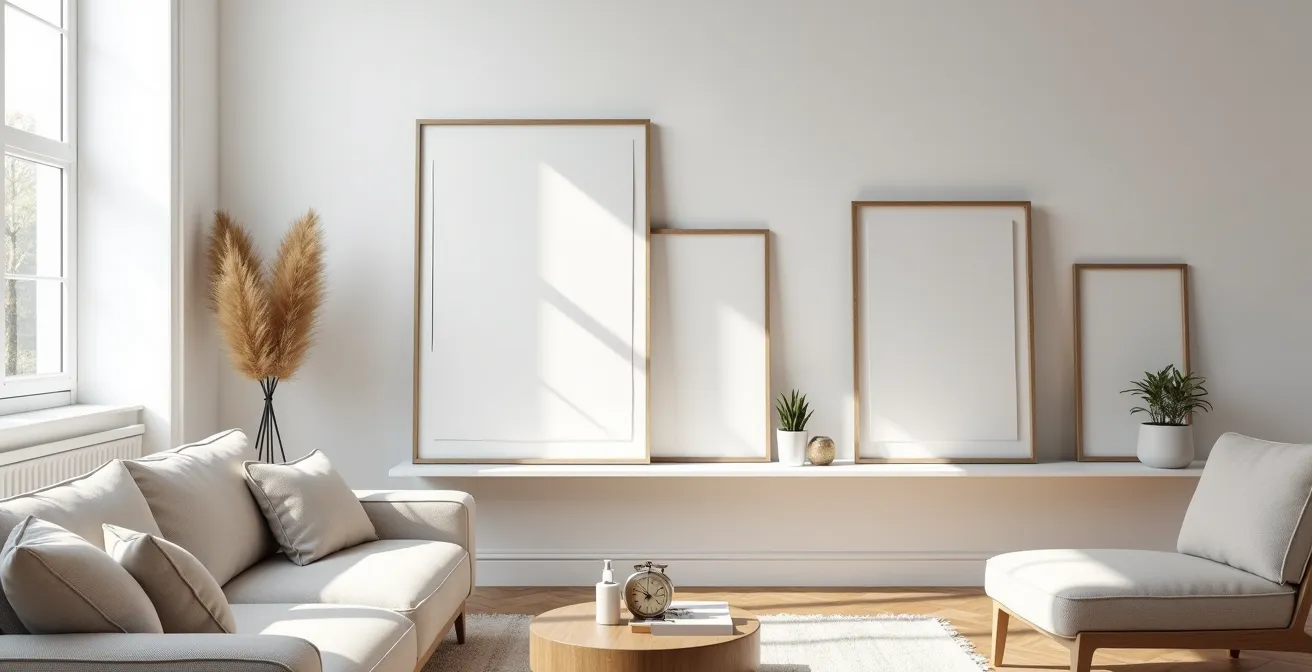
How to Create a Leaning Art Shelf Layout
One of the most sophisticated and versatile damage-free techniques is the leaning art display. This method goes far beyond simply propping a frame against a wall. When done correctly, it creates a layered, dynamic, and effortlessly stylish look that can be easily changed and updated. The key is “intentional leaning,” which relies on composition and layering to look deliberate, not accidental. This works beautifully on a mantlepiece, a deep windowsill, a console table, or a wide, stable bookshelf.
The secret to a successful leaning arrangement is to create depth and visual interest through careful layering. This isn’t about lining things up; it’s about building a small, curated scene. By following a few simple rules of composition, you can create a display that looks like it was styled by a professional:
- Start with an Anchor: Place your largest frame against the wall first. This is your anchor piece and will form the backdrop for the entire composition.
- Layer Forward: Place medium-sized frames in front of the anchor, slightly off-centre and at a gentle angle. Don’t be afraid to let frames overlap.
- Create Depth: Add the smallest frames or even small, three-dimensional objects (like a small vase or sculpture) at the very front to create a sense of foreground, mid-ground, and background.
- Mix Orientations: Combine portrait and landscape-oriented frames to create a more dynamic and less static arrangement. This contrast adds visual energy.
- Secure with Wax: A crucial tip for renters is to use a small, removable dot of museum wax or putty under the bottom edge of each frame. This is invisible but will prevent the frames from sliding or being knocked over easily—a small step for big peace of mind.
This technique allows you to display a collection of art, photos, and objects without a single nail. It’s a fluid, adaptable system that makes your space feel curated and personal, and it is 100% deposit-safe.
Paint or Wallpaper: Which Best Highlights Original Cornicing?
Older rental properties often come with stunning period features like original cornicing, ceiling roses, or picture rails. The challenge is how to highlight these architectural details without making permanent alterations forbidden by your lease. While paint is the traditional choice, it’s a messy, time-consuming project that most tenancy agreements strictly prohibit. Even if you get permission, you’ll likely have to paint it back to neutral before you leave—a significant hassle.
This is where high-quality, removable wallpaper emerges as a transformative, renter-friendly tool. Forget the frustrating wallpapers of the past; modern peel-and-stick products are designed for easy application and, more importantly, clean removal. They leave no residue and won’t pull off paint if applied to a properly prepared, well-cured wall. Using a bold geometric print or a rich, textural wallpaper on the main wall area can create a beautiful contrast that makes white or cream cornicing “pop” in a way that neutral paint simply can’t.
By stopping the wallpaper just below the cornicing, you create a sharp, clean line that draws the eye directly to the detailed plasterwork. It frames the feature. This is particularly effective for creating a feature wall behind a bed or sofa. You can achieve a dramatic, high-design look that feels completely custom in a single afternoon. When it’s time to move out, you simply peel it off, leaving the wall exactly as you found it. It offers maximum visual impact with zero risk to your deposit, making it one of the most powerful tools in a tenant’s decorating arsenal.
Why Renting a Sofa Costs More After 18 Months
While this article focuses on art, the principle encapsulated in the title—the rent-vs-buy breakeven point—is directly applicable to curating your art collection. The question of whether to rent or buy furniture often comes down to how long you intend to use it. After a certain period, typically around 18 months for a large item like a sofa, the total rental costs can exceed the purchase price. A similar calculation applies when you decide to invest in statement art for your rental home.
Art rental services have become increasingly popular, offering tenants a way to enjoy high-quality, original art without the commitment of a large purchase. For a rotating collection or for short-term tenancies, this can be a fantastic option. According to market analysis, art rental services typically charge between $38 and $148 per month, depending on the value of the artwork. This allows you to live with a piece, see how it works in your space, and simply swap it out when you want a change.

However, it’s crucial to do the maths. If you rent a piece for $75 a month, after one year you will have spent $900. If you stay in your property for two years, that’s $1800. For that price, you could have potentially purchased a significant original piece from an emerging artist. Many rental services understand this and offer a “rent-to-own” model, where a portion of your rental fee goes towards the purchase price. This offers a great middle ground, but it’s essential to be strategic. Rule of thumb: if you think you’ll love a piece for more than a year and a half, buying often makes more financial sense.
Key Takeaways
- Your deposit is safest when you master the *method* of damage-free hanging, not just buy the products.
- For large art, lightweight, unframed canvases are vastly superior to heavy, glass-fronted prints for adhesive hanging.
- Fill the “vertical volume” of rooms with high ceilings using floor easels or vertical gallery walls to avoid the “floating art” effect.
Renting vs Buying Furniture: Is the Circular Economy Cheaper?
The question of renting versus buying art isn’t just about the breakeven point; it’s part of a larger conversation about sustainability and smart consumption. The title’s focus on furniture highlights a broad trend that is just as relevant for art: the rise of the circular economy. For a renter, who may be moving every few years, participating in this economy isn’t just an ethical choice—it’s often the most financially savvy and creatively rewarding way to decorate a home.
Instead of a binary choice between expensive rental services and buying new from a gallery, the circular economy offers a world of alternatives for sourcing unique, affordable, and statement-making art. This approach is about giving pre-loved pieces a new life, supporting local artists directly, and building a collection with character and history. It’s the ultimate deposit-safe strategy because the initial investment is often lower, reducing the financial anxiety associated with your decor choices. This is “Circular Economy Curation.”
Adopting this mindset opens up a treasure trove of possibilities for finding art that no one else has. It moves you away from mass-produced prints and into a world of authentic, character-filled pieces. Here are some key channels in the art circular economy:
- Facebook Marketplace & Local Groups: An excellent resource for finding local artists selling work directly or people moving house and selling unique pieces.
- Estate Sales and Auctions: A fantastic way to find vintage framed art with beautiful, time-worn character.
- Thrift Stores and Charity Shops: Don’t overlook these. You can find incredible, unique frames that can be repurposed, or stumble upon a hidden gem of a painting for a tiny fraction of its value.
- Art Swaps: Look for local groups where you can temporarily or permanently swap pieces with other art lovers, keeping your collection fresh and dynamic.
By sourcing your art this way, you’re not just decorating; you’re curating. You’re building a personal collection that tells a story, all while making economically and environmentally sound choices.
By combining a deep understanding of damage-free hanging techniques with smart sourcing from the circular economy, you can finally decorate your rental property with the freedom and confidence you deserve. Begin today by assessing your walls, choosing your first lightweight canvas, and creating a space that is truly yours.