In summary:
- The key to a durable lime wash finish is understanding it’s a chemical reaction (carbonation), not a simple drying process. Proper humidity is essential.
- Chalking and dusting are failures of carbonation, often preventable with the right surface preparation and the use of natural binders like casein.
- Wet lime wash is highly caustic (pH 12.4) and requires strict safety protocols, including nitrile gloves and eye protection, but is completely safe once cured.
- Achieving the signature ‘cloudy’ look depends on a specific multi-directional brush technique applied quickly to maintain a wet edge.
There is a unique frustration reserved for the DIY enthusiast who has lovingly applied a lime wash, only to find it dusting off like chalk on a sleeve weeks later. You followed the tutorials, bought the special brush, and aimed for that soft, cloudy texture seen in heritage homes and high-end design magazines. Yet, the result is a powdery mess that spells failure. Many guides offer simplistic advice: dampen the wall, apply thin coats, and hope for the best. This approach treats lime wash like a modern latex paint, which is the fundamental mistake.
The truth is, a successful lime wash application has less to do with painting technique and more to do with chemistry. It is not a film that dries on a surface; it is a living finish that must undergo a chemical transformation called carbonation to become one with the plaster. Understanding this process is the line that separates a dusty, ephemeral coating from a permanent, stone-like finish that will last for generations. This is not about simply avoiding a chalky surface; it’s about embracing a thousand-year-old technology that offers unparalleled beauty and breathability for your walls.
This guide moves beyond the superficial tips. We will first delve into the science of why lime wash must ‘cure’ and not just ‘dry’. From there, we will explore how to manage pigments for consistent colour, the role of traditional additives in making the finish wipeable, and the non-negotiable safety measures required. Finally, we will detail the specific techniques to achieve that coveted textured effect and broaden our scope to understand how these principles of breathability apply to other aspects of decorating older homes, ensuring a cohesive and healthy living environment.
This article provides a detailed roadmap for mastering lime wash, from the chemical principles to the final brushstroke. The following sections will guide you through each critical stage of the process, ensuring a beautiful and durable result.
Summary: Mastering the Art and Science of Traditional Lime Wash Finishes
- Why Lime Wash Needs to ‘Cure’ Rather Than Just Dry
- How to Pigment Lime Wash for a Consistent Colour Batch
- Casein vs Tallow: Which Additive Makes Lime Wash Wipeable?
- The Caustic Burn Danger of Wet Lime You Must Know
- How to Create the ‘Cloudy’ Effect with Brush Technique
- Why Modern Vinyl Wallpaper Causes Blown Plaster in Old Homes
- How to Create a Cohesive Colour Palette with 5+ Hues
- Maximalism in Small Spaces: How to Layer Without Cluttering?
Why Lime Wash Needs to ‘Cure’ Rather Than Just Dry
The most common misconception about lime wash is treating it like a modern paint. We expect it to ‘dry’ by evaporation. In reality, lime wash ‘cures’ through a chemical process called carbonation. The ‘paint’ is a suspension of calcium hydroxide in water. For it to become a durable finish, the calcium hydroxide must react with carbon dioxide (CO₂) from the air. This reaction transforms it back into calcium carbonate (CaCO₃), which is essentially limestone—the same material it came from. This is not just a coating; it’s a new, thin layer of stone crystallising on your wall.
This chemical reaction requires a specific environment. Crucially, it needs moisture. Water is the medium that allows the CO₂ to be absorbed and react with the lime. If the wall is too dry or the environment has low humidity, the water evaporates too quickly, halting the carbonation process before it’s complete. The result? The calcium hydroxide is left on the wall in its original, unstable state—a fine, chalky powder that easily rubs off. This explains why traditional painters mist walls between coats and avoid working in direct, hot sun. A slow, humid cure is the secret to a rock-hard finish.
The process is also defined by a significant chemical change. Wet lime wash is a highly alkaline substance. An analysis of limewater confirms that lime wash maintains a highly alkaline pH of 12.4, which gives it natural bactericidal and fungicidal properties. As carbonation occurs, the pH level gradually neutralises, and the material becomes chemically stable and completely safe. This transformation is what gives lime its ‘self-healing’ properties; the dissolved lime can flow into microscopic cracks in the plaster and re-solidify, sealing them over time. It’s a dynamic, breathing finish unlike any static, modern paint film.
How to Pigment Lime Wash for a Consistent Colour Batch
Colouring lime wash is an art form rooted in natural chemistry. Unlike modern paints that use synthetic tints, traditional lime wash achieves its subtle, varied tones using natural earth and mineral pigments. These are finely ground clays and oxides—ochres, umbers, and siennas—that are chemically stable and will not fade in the high-alkaline environment of the lime. Attempting to use modern liquid tints can result in failure, as the caustic lime can bleach or alter the synthetic colours, leading to a blotchy, uneven finish that fades over time.
Achieving a consistent colour across a large project requires a disciplined process. The cardinal rule is to never work directly from the main bucket. Pigments are heavier than the lime putty and will inevitably settle at the bottom. To ensure an even distribution, the entire batch must be thoroughly stirred before decanting a smaller amount into a larger working vessel. This provides room for continuous stirring, which must be done every few minutes while painting. This constant agitation is non-negotiable to prevent the pigment from settling and causing visible shifts in colour on the wall.

It’s also important to manage expectations during application. A key insight from professionals is to trust the process. As noted in a guide on lime washing from Jenna Sue Design, the first coat will almost always look uneven and semi-transparent. This is normal. The true, final colour only reveals itself as the lime cures and lightens significantly. To select a colour, experts recommend studying real-life examples on social media or in brand galleries rather than relying on small swatches. This allows you to see how the colour and texture interact with light in a real space, leading to a more predictable and satisfying result.
Casein vs Tallow: Which Additive Makes Lime Wash Wipeable?
A pure lime wash finish is beautiful but delicate. Because it’s designed to be vapour-permeable, it can be susceptible to water, meaning it isn’t truly ‘washable’ in the modern sense. Wiping a pure lime wash wall with a damp cloth can reactivate the lime and leave a chalky residue. To overcome this, traditional painters have for centuries used natural binders and additives to improve durability and water resistance. The most common and effective of these is casein, a protein derived from milk.
When added to lime wash, casein acts as a powerful binder, creating a tougher, more resilient finish often referred to as ‘milk paint’. This addition dramatically improves its wipeability without compromising the crucial breathability of the wall. The amount of casein added can be varied to achieve different levels of washability, making it a versatile solution for different areas of a home. Other historical additives include linseed oil, which was often used for exterior applications to increase weather resistance, or even tallow (animal fat). However, for interior use where a balance of durability and a matte finish is desired, casein remains the superior and most common choice.
Case Study: The Historic Building Preservation Approach
In the restoration of historic masonry buildings, maintaining permeability is paramount to prevent trapped moisture. According to experts at Lancaster Lime Works, basements were traditionally limewashed every one to two years precisely for their moisture-wicking and anti-mold properties. For interior living spaces where more durability was needed, lime wash with a casein additive was the standard. This ‘milk paint’ provided a wipeable surface suitable for daily life while still allowing the solid masonry walls to breathe, a critical function that modern, non-porous paints would block, leading to structural damage.
For applications demanding the highest level of water-resistance, such as in bathrooms or kitchens, a different technique known as Tadelakt is used. This involves applying a specific type of lime plaster and then polishing it with a hard stone while treating it with black olive oil soap. An analysis of traditional binders shows this soap reacts with the lime to create a chemical bond that forms a waterproof, soap-like layer. The table below compares the properties of these different approaches.
| Binder Type | Properties | Application Method | Washability |
|---|---|---|---|
| Casein | Variable washability levels depending on amount added | Added right before applying limewash | Moderate to High |
| Black Olive Oil Soap | Reacts with lime creating waterproof surface | Applied as lime plaster is initially setting | Very High (Tadelakt finish) |
| Linseed Oil | Traditional exterior additive | Mixed into recipe | High |
| No Binder | Dissolves when damp, not washable like modern coatings | Pure lime wash | Very Low – clean with dry cloth only |
The Caustic Burn Danger of Wet Lime You Must Know
While cured lime wash is as harmless as stone, its wet form is a different story. Wet lime wash is highly caustic due to its high alkaline content. It has a pH of around 12.4, similar to that of oven cleaner or bleach. This is not a material to be treated casually. Direct, unprotected contact with skin or eyes can cause serious chemical burns. The danger is insidious because it doesn’t always burn immediately like an acid; the alkaline reaction can take time to develop, meaning you might not realize the extent of the damage until it’s too late. This is a non-negotiable safety reality that must be respected by every user, from beginner to professional.
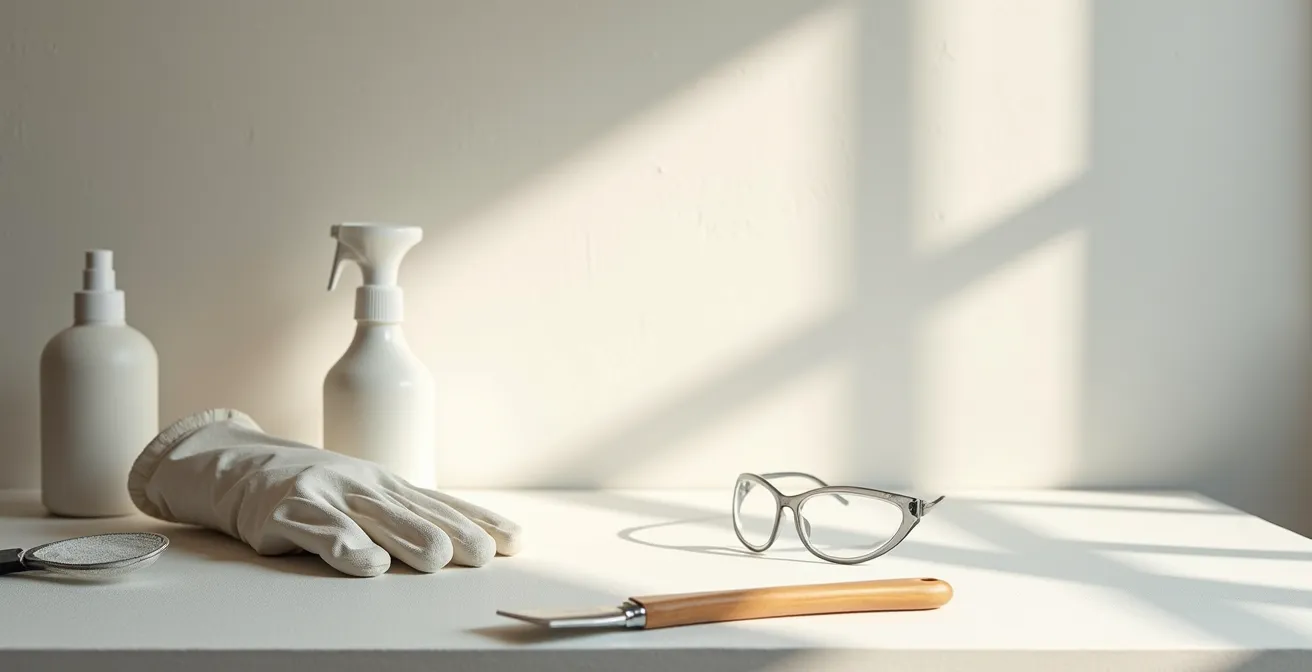
Proper Personal Protective Equipment (PPE) is therefore not a suggestion, but a requirement. The minimum protocol involves full-wrap safety glasses to protect from splashes, which can easily happen when mixing or applying with a block brush. For hand protection, nitrile gloves are essential. Latex gloves are not sufficient as they can degrade when exposed to the highly alkaline lime. Long sleeves and full-coverage clothing are also strongly recommended to protect your skin from accidental contact. It’s a wise practice to cover all floors and surfaces not being painted, as the caustic mixture can damage wood, metal, and other finishes.
In case of accidental skin contact, you cannot simply wash it off with water. Because the lime is alkaline, it must be neutralized. According to safety guidance from specialists at The Mud Home, having a neutralizing solution on hand is a critical part of the safety setup. A simple mixture of vinegar (a mild acid) and water in a spray bottle is the perfect antidote. If a splash occurs, immediately flush the area with the vinegar solution to neutralize the alkalinity before rinsing thoroughly with clean water. Once the lime wash has fully cured on the wall and converted to calcium carbonate, it becomes completely inert and safe to the touch.
Your Essential Lime Wash Safety Checklist
- Dress for the Job: Before starting, put on full protective clothing, including long sleeves and pants.
- Protect Your Hands: Wear chemical-resistant nitrile gloves. Do not use latex gloves as they can degrade.
- Guard Your Eyes: Use full-wrap safety glasses or goggles to protect against splashes from all angles.
- Prepare for Emergencies: Keep a spray bottle filled with a vinegar-water solution nearby to immediately neutralize any skin contact.
- Secure the Area: Cover all floors, furniture, and adjacent surfaces with protective sheets to prevent damage from spills or splatters.
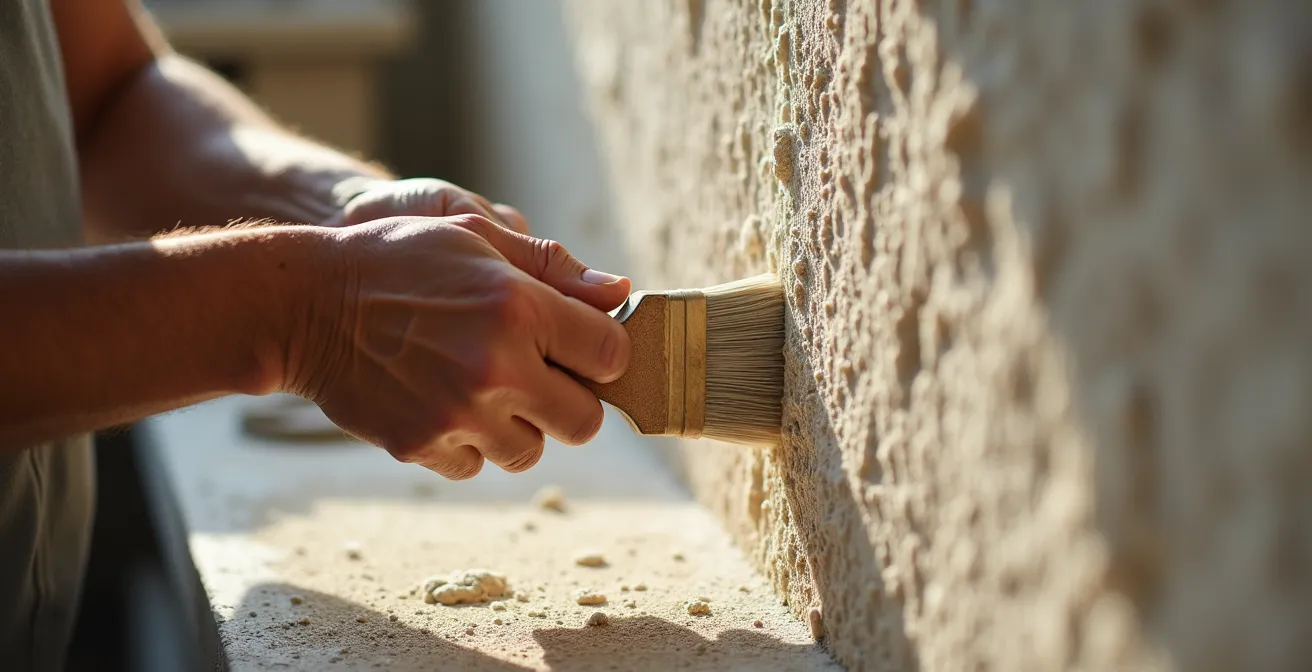
How to Create the ‘Cloudy’ Effect with Brush Technique
The signature ‘cloudy’ or mottled appearance of lime wash is not an accident; it’s the intentional result of a specific brush technique. Unlike standard painting where the goal is a uniform finish, lime washing celebrates subtle variations in tone and texture. The effect is created by the way the brush deposits the lime and pigments onto the wall, and how the light catches the microscopic calcite crystals that form during curing. The key to achieving this look is to use random, multi-directional strokes and to work quickly to maintain a ‘wet edge’.
Using a large, natural-bristle block brush is standard. Instead of methodical up-and-down or side-to-side motions, the technique involves creating overlapping, organic patterns. Many professionals recommend starting in a section and working outwards with a series of short, curved, or ‘X’ shaped strokes. The goal is to avoid uniformity. Working quickly is crucial because if an edge of a painted section dries before you blend the next section into it, you will create a hard, visible line. On very absorbent surfaces like fresh plaster, some painters keep a spray bottle of water handy to lightly mist an edge that is drying too fast, allowing for a seamless blend.
The intensity of the cloudy effect can be controlled. For a more dramatic, textured look, the brushstrokes can be more distinct and varied. For a subtler, softer appearance, the strokes should be more thoroughly blended and feathered into each other. The number of coats also plays a significant role. A minimum of two coats is almost always necessary, as the first coat acts as a primer and will appear patchy. A second, and sometimes a third, coat builds the depth of colour and allows the cloudy effect to fully develop. On highly textured walls, a dabbing or stippling motion may be required in addition to strokes to ensure the lime wash gets into all the grooves and bumps for full coverage.
Why Modern Vinyl Wallpaper Causes Blown Plaster in Old Homes
Understanding the benefits of lime wash requires understanding what happens when we use the wrong materials on old walls. Historic homes, typically built with solid masonry (brick or stone) and lime-based mortars and plasters, are designed to ‘breathe’. This means they are vapour-permeable, allowing moisture that enters the wall structure—from the ground or from driving rain—to naturally evaporate out through the surface. This is a slow, continuous cycle that keeps the wall dry and healthy. Lime wash is the perfect finish for this system because it is also highly breathable.
The problem arises when we apply modern, impermeable materials to these old walls. The most common culprit is vinyl wallpaper or non-breathable vinyl-based paint. These materials act like a plastic sheet, trapping moisture inside the wall. The trapped water has to go somewhere. As it builds up, it can cause the lime plaster to lose its cohesion and ‘blow’ or detach from the masonry behind it. It can also lead to the build-up of salts (efflorescence) which crystallize and physically push the plaster off the wall. The result is peeling wallpaper, bubbling paint, and crumbling plaster—all symptoms of a wall that can no longer breathe.
This is precisely why there has been a resurgence in the use of traditional materials. Using a finish like lime wash on a historic wall isn’t just an aesthetic choice; it’s a technical requirement for the long-term health of the building. By applying a porous coating, you are allowing the wall to function as it was designed to. If you are restoring a wall where modern wallpaper has been removed, the first step is always to let the wall dry out completely. Any new coating applied must be as porous as possible to allow any residual moisture to escape. Applying a fresh coat of lime wash is often part of this restoration process, as its high alkalinity helps prevent mold growth while its breathability aids in drying out the damp wall structure.
How to Create a Cohesive Colour Palette with 5+ Hues
While lime wash offers a beautiful finish for a single room, its unique properties can be leveraged to create a sophisticated and cohesive colour palette that flows throughout an entire home. The key is to think in terms of tone and texture, not just colour. Because lime wash reflects light in a soft, diffused way, even a palette with multiple distinct hues can feel harmonious. The secret lies in using a consistent finish and relying on the natural compatibility of earth pigments.
When working with more than five hues, it’s best to stick to a family of colours derived from natural sources. Natural earth pigments like ochres, umbers, and siennas share an organic origin that makes them inherently compatible. You can create a palette ranging from warm yellows to deep browns and muted greens that feel connected because they share the same textural and mineral base. One designer successfully used a tone-on-tone approach by pairing limewashed walls with a slightly darker, complementary conventional paint (Sherwin Williams Moth Wing) on the trim and doors, creating a layered yet unified look. Because lime wash is cost-effective, using a single large bucket can be enough for multiple rooms, encouraging colour consistency.
However, it’s important to know the limits. While you can experiment with adding natural colorants like turmeric or even tea to a lime wash mix for unique tones, strong or vibrant colours are difficult to achieve and maintain. The high alkalinity of the lime will always have a whitening effect as it cures, meaning bold pigments will dry to a much paler, chalkier version of their wet colour. This inherent softening effect is part of the charm and what helps a multi-hued palette remain cohesive and not overwhelming.
The table below provides a general guide to the compatibility of different pigment types with a lime base, a crucial reference when planning a broader color scheme.
| Pigment Type | Color Result | Lime Compatibility | Notes |
|---|---|---|---|
| Natural Earth Pigments | Ochres, Umbers, Siennas | Excellent | Stable in high-alkaline environment |
| Turmeric | Yellow-gold | Good | Tested successfully for wheaty color |
| Turkish Tea | Warm brown | Very Good | Works best for natural tones |
Key Takeaways
- Embrace Chemistry: A successful lime wash finish depends on managing the chemical carbonation process, which requires moisture and time, not just quick drying.
- Performance Through Additives: The durability and washability of lime wash are not inherent; they are controlled by using traditional binders like casein (milk protein).
- Safety is Paramount: Wet lime wash is a caustic substance requiring full PPE, including nitrile gloves and eye protection, to prevent chemical burns.
Maximalism in Small Spaces: How to Layer Without Cluttering?
The term ‘maximalism’ often conjures images of rooms filled with objects, patterns, and bold colours. In a small space, this can easily lead to a feeling of clutter and chaos. However, there is a more subtle form of maximalism that focuses on layering texture and depth rather than ‘stuff’. This is where a finish like lime wash excels. It allows you to create immense visual interest and a sense of history on a single surface—the walls—freeing up precious floor and surface space.
In a small room, a plain white wall can feel sterile and boxy. By introducing the soft, velvety texture and cloudy variation of lime wash, you break up the monotony and add a layer of sophistication. The imperfect, hand-brushed quality of the finish gives the space character and a story, something that a flat, uniform paint colour could never achieve. As one homeowner noted when transforming a small office nook, the textured finish provided a high-end, timeless aesthetic and made the space feel curated and intentional without a large financial investment. The natural, sueded appearance creates a soothing, enveloping atmosphere that makes a small room feel like a cozy jewel box rather than a cramped closet.
The technique for this textural maximalism involves embracing the artistry of the application. Using a cross-hatching or multi-directional brushstroke technique in small, controlled patterns creates a distinctive, sueded look. The goal is to avoid giant, uniform swaths of paint and instead build up layers of subtle variation. This approach provides a rich, tactile backdrop that works in both modern and traditional interiors. It proves that you can achieve a maximalist feel—rich, layered, and full of interest—without adding a single piece of clutter. The walls themselves become the primary decorative element, a testament to the idea that sometimes, the most impactful design move is the one that’s built right in.
Now that you understand the science, safety, and artistry behind this timeless finish, the next logical step is to choose a small, manageable project and begin your own journey. Start with a single wall or a small room to build your confidence and master the technique.