The choice between herringbone and chevron is not about trends; it’s an architectural decision that dictates spatial flow, installation integrity, and long-term performance.
- Chevron patterns create strong directional lines ideal for guiding movement in open-plan spaces, but incur higher material waste (15-30%) and labor costs.
- Engineered oak is the only truly stable and recommended option for use with underfloor heating, regardless of pattern, due to its cross-laminated construction.
Recommendation: Base your decision on the specific layout of your extension and your subfloor’s condition, prioritizing engineered oak if underfloor heating is a factor.
When planning a high-end kitchen extension, the flooring is the foundation upon which the entire design rests. It’s the largest surface, the one that ties everything together. For homeowners seeking a timeless yet contemporary finish, the conversation inevitably turns to two classic parquet patterns: herringbone and chevron. The immediate debate often focuses on aesthetics—the traditional zigzag of herringbone versus the clean, continuous ‘V’ of chevron. This initial discussion, however, barely scratches the surface of what should be a far more comprehensive decision-making process.
While many sources will outline the basic visual differences, they often neglect the critical engineering and design implications that separate these two styles. Choosing the right pattern is less a matter of simple preference and more a strategic choice that impacts budget, installation complexity, compatibility with modern amenities like underfloor heating, and even how you perceive and move through the space. This isn’t just wood on a floor; it’s a significant architectural element. The real key to a successful, lasting installation lies not in which pattern is more fashionable, but in understanding the technical demands and design potential of each.
This guide moves beyond the superficial to provide a designer’s perspective. We will dissect the crucial factors—from the hidden installation costs and subfloor preparation nightmares to material science and the future of kitchen layouts—to empower you to make an informed, investment-grade decision for your home.
To help you navigate these critical considerations, we’ve structured this guide to address every key stage of the decision-making process. The following sections will provide a clear, in-depth analysis of the technical and aesthetic factors you need to master.
Summary: The Definitive Guide to Selecting Parquet for Modern Kitchens
- Why Chevron Installation Costs 30% More Than Herringbone
- How to Prepare a Concrete Subfloor for Solid Oak Parquet
- Solid Oak vs Engineered Oak: Which is Safe for Underfloor Heating?
- The Acclimatization Error That Causes Parquet to Buckle
- How to Repair Scratches in Oiled Parquet Without Sanding the Whole Floor
- Why the ‘Kitchen Triangle’ Is Outdated for Modern Families
- Wood-Effect Porcelain vs Real Wood: Can You Tell the Difference?
- Porcelain Tiles: The Best Choice for High-Traffic Family Kitchens?
Why Chevron Installation Costs 30% More Than Herringbone
The most immediate shock for many homeowners is the significant price difference between a herringbone and a chevron installation, even when using the exact same wood. While chevron’s clean, arrow-like aesthetic is highly sought after, it comes at a premium that can be 30-40% higher than its counterpart. This isn’t arbitrary pricing; it’s rooted in two fundamental factors: material waste and labor complexity. Herringbone uses simple rectangular planks, allowing offcuts from one end of a room to be used to start the next row, keeping waste relatively low at around 10-15%.
Chevron, by contrast, requires each plank to be cut at a precise angle (typically 45 or 60 degrees) to form its signature ‘V’. As flooring installation experts confirm, this process inherently generates more unusable offcuts, pushing material wastage to between 15% and 30%. This means you must purchase significantly more raw material to cover the same square footage. The labor costs are also substantially higher due to the precision required. Each mitred cut must be perfect, and laying the pattern requires meticulous alignment to maintain the central point, making the installation process slower and more skill-intensive.
This detailed cost breakdown illustrates the financial implications of choosing a chevron pattern. The increased labor and material waste are not minor considerations but a substantial part of the overall project budget, as this comparative analysis of installation quotes highlights.
| Factor | Herringbone | Chevron |
|---|---|---|
| Installation Labor | $3-$6 per sq ft | $6-$12 per sq ft |
| Material Waste | 10-15% | 15-30% |
| Total Cost Range | $11-$23 per sq ft | 30-40% higher |
| Installation Time | Standard | Longer due to precision |
How to Prepare a Concrete Subfloor for Solid Oak Parquet
A premium parquet floor is only as good as the subfloor it’s laid upon. For kitchen extensions built on a concrete slab, this preparation phase is the single most critical factor in preventing future issues like buckling, gapping, or lifting. Any flooring designer or reputable installer will insist that the subfloor is perfectly clean, dry, and level before a single piece of oak is brought into the room. Ignoring this step to save time or money is the fastest way to catastrophic floor failure.
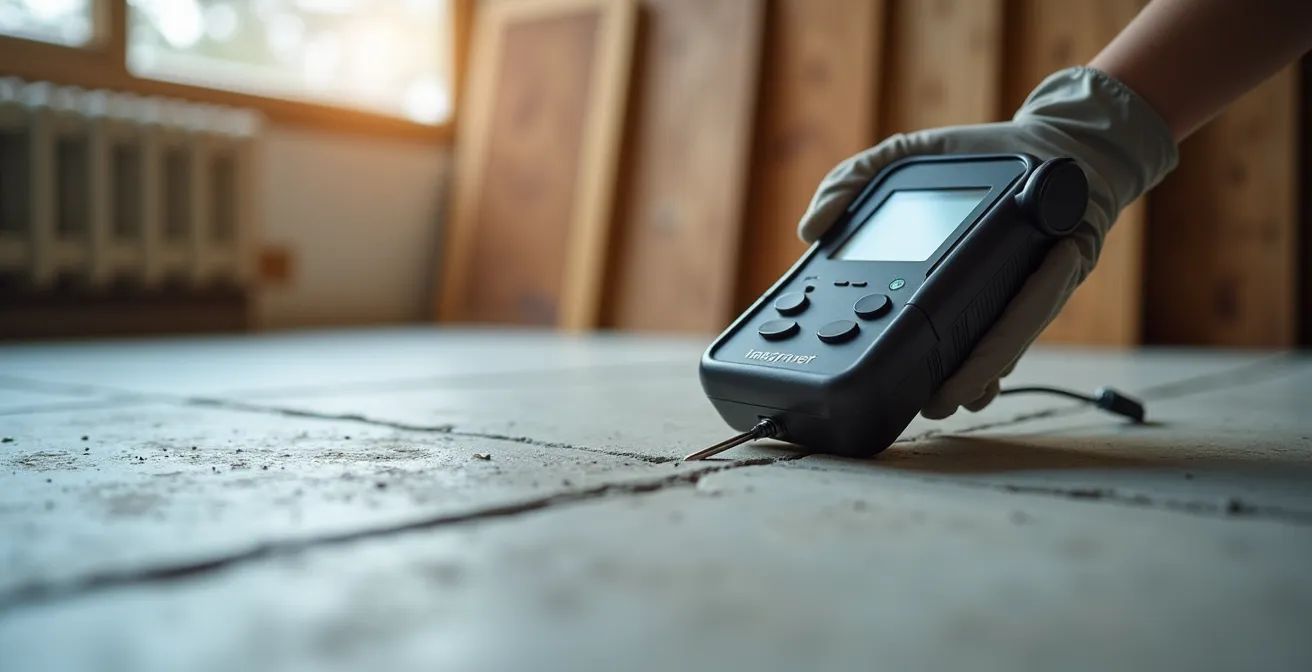
The primary enemy is moisture. Concrete is porous and can hold a surprising amount of water. Before installation, the moisture content must be rigorously tested with a professional hygrometer. A reading above 2.5% CM (Carbide Method) is an absolute red flag. Additionally, the subfloor must be perfectly flat. Any deviation greater than 2mm over a 3-meter span must be corrected with a self-leveling compound. For ground-floor extensions, applying a liquid Damp Proof Membrane (DPM) is non-negotiable to block moisture migration from the ground up.
This meticulous preparation process ensures the stability and longevity of your investment. It involves several key steps that cannot be rushed:
- Test moisture content: Using a hygrometer, ensure the reading is below 2.5% CM. Concrete must be allowed to dry at a rate of approximately 1mm per day for its thickness (e.g., a 50mm screed needs about 50 days).
- Level the subfloor: Correct any unevenness to a tolerance of 2mm over a 3-meter span using a quality self-leveling compound.
- Apply a Damp Proof Membrane (DPM): For all ground-floor concrete subfloors, apply a liquid DPM as a barrier against rising damp.
- Prime the surface: After leveling and DPM application, a primer ensures a strong bond for the parquet adhesive.
- Address imperfections: Fix any cracks or damage before proceeding. This preparatory work is a project in itself.
Solid Oak vs Engineered Oak: Which is Safe for Underfloor Heating?
The desire for the warmth of underfloor heating (UFH) in a modern kitchen extension presents a significant challenge for wood flooring. Wood is a natural, hygroscopic material that expands and contracts with changes in temperature and humidity. Solid oak, being a single piece of timber, is particularly susceptible to this movement. When placed over a UFH system, the constant heating and cooling cycles can cause solid wood planks to warp, cup, or create unsightly gaps. While it is technically possible to use solid oak with UFH, it’s a high-risk strategy that requires specialist installation, very narrow boards (under 70mm), and specific quarter-sawn cuts to minimize movement.
For this reason, engineered oak flooring has become the industry standard for UFH applications. Unlike solid wood, an engineered board is constructed from multiple layers. A top layer of real oak (the ‘wear layer’) is bonded to a core of cross-laminated plywood. This layered structure acts as a reinforcement, restricting the natural tendency of the wood to move. The plies are laid in opposing directions, effectively canceling out expansion and contraction forces, which provides the dimensional stability needed to handle temperature fluctuations from a UFH system.
Case Study: The Engineered Advantage with UFH
Leading flooring suppliers consistently advocate for engineered hardwood in heated environments. As demonstrated by reports from specialists like Havwoods, the cross-laminated core of engineered flooring provides the perfect balance of authentic wood aesthetics and structural integrity for UFH installations. This construction minimizes the expansion and contraction that can plague solid wood, making it the ideal and safest choice for laying intricate parquet patterns like herringbone or chevron over a modern heating system.
Ultimately, while the allure of “solid” wood is strong, its performance with underfloor heating is demonstrably inferior and riskier than its engineered counterpart. For a kitchen extension, where UFH is a common feature, opting for engineered oak isn’t a compromise; it’s the correct engineering choice for a beautiful and long-lasting floor.
The Acclimatization Error That Causes Parquet to Buckle
One of the most devastating and entirely preventable failures in a new parquet floor is buckling, where the floor lifts and deforms dramatically. This is almost always caused by a misunderstanding of one crucial step: acclimatization. Many homeowners and even some inexperienced fitters believe acclimatization is simply about leaving the wood in the room for a set period, like 48 hours, before installation. This is a dangerous oversimplification. The process is not about time; it’s about physics.
Wood flooring, delivered from a warehouse, will have a certain moisture content. The air in your home, especially a newly built and drying extension, will have a different ambient moisture content and relative humidity. If you install the wood before it has reached a state of equilibrium with its final environment, it will continue to adjust *after* it has been fixed to the floor. If the wood is too dry and the room is humid, the planks will absorb moisture, expand, and press against each other with immense force, causing the floor to buckle upwards. If the wood is too moist and the room is dry, it will shrink, creating ugly gaps between the planks.
The correct procedure involves unboxing the parquet, stacking it in the installation room with air gaps between layers, and allowing it to sit until its moisture content matches the room’s long-term average. This could take a few days or over a week, depending on the conditions. As one expert succinctly puts it:
The goal of acclimatization is not about time but equilibrium – the moisture content of the wood must match the average ambient moisture content of the room in its final, lived-in state
– Flooring Installation Expert, Professional Installation Guidelines
This principle of material equilibrium is paramount. It means the heating should be on and the room should be at its normal “lived-in” temperature and humidity for the entire acclimatization period. Rushing this step to meet a deadline is a false economy that puts the entire investment at risk.
How to Repair Scratches in Oiled Parquet Without Sanding the Whole Floor
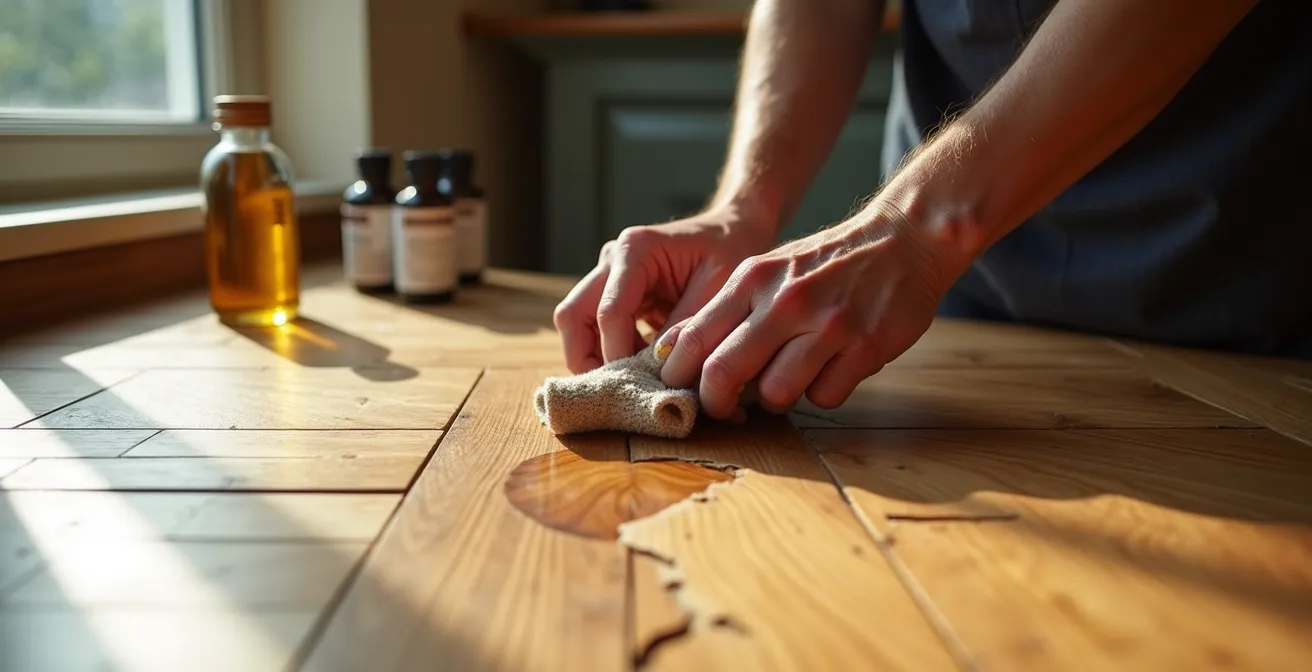
An oiled finish is a popular choice for high-end parquet as it penetrates the wood, enhancing the natural grain and providing a beautiful matte look. Unlike a lacquered or varnished surface which sits on top of the wood like a plastic film, an oiled finish becomes part of the wood itself. This has a major advantage when it comes to dealing with the inevitable scratches and scuffs of daily life in a busy kitchen: you can perform localized, “spot” repairs without needing to sand and refinish the entire floor.
Attempting to repair a scratch on a lacquered floor often results in a visible patch that never quite blends in. With an oiled floor, a targeted repair can be virtually invisible if done correctly. The process involves gently cleaning the affected area, lightly abrading only the scratch to open up the wood grain, and then carefully re-applying a maintenance oil. The key is to feather the oil outwards from the scratch and then buff away all excess to prevent a shiny “halo” effect around the repair. This allows the new oil to blend seamlessly with the existing finish.
This ability to maintain the floor over time is a significant selling point for oiled finishes, preserving the beauty of your investment for years. However, it requires a precise method to achieve a flawless result. Following a professional process is essential.
Your Essential Spot-Repair Checklist: Oiled Parquet
- Clean the Area: Use a dedicated wood soap diluted in water to thoroughly clean the specific scratched area, removing any dirt or grime from the grain.
- Lightly Abrade: Use an ultra-fine grit sanding pad (or fine steel wool) to gently rub along the grain *only on the scratch itself* to open the wood pores.
- Apply Maintenance Oil: Apply a small amount of the original maintenance oil to the scratch, using a soft, lint-free cloth to work it into the wood. Feather the application slightly outwards.
- Buff Excess Oil: Immediately and thoroughly buff the area with a clean, dry cloth to remove all excess oil from the surface. This is crucial to avoid a shiny patch.
- Allow Drying Time: Let the repaired area dry completely for at least 24 hours before allowing any foot traffic.
Why the ‘Kitchen Triangle’ Is Outdated for Modern Families
For decades, kitchen design was dominated by the “work triangle”—the concept of an efficient layout between the sink, refrigerator, and cooker. This model was developed in the 1940s for a single person working in a closed-off room. Today’s reality is entirely different. The kitchen is the heart of the home, an open-plan social hub for cooking, dining, working, and entertaining. The rigid triangle has been replaced by the concept of “zones” and “flow,” and parquet flooring patterns are a powerful tool for defining these areas without walls.
This is where the choice between herringbone and chevron becomes a strategic design decision. A chevron pattern, with its strong, continuous ‘V’ shapes, is exceptionally effective at creating directional flow. It acts as a visual pathway, subtly guiding the eye and foot traffic through an open space. For example, a chevron pattern can lead from the main kitchen work area towards garden doors or a dining space, making the extension feel longer and more connected to the outdoors.
Using herringbone patterns under dining areas creates a grounded ‘rug’ effect that defines the space, while chevron in transitional areas provides directional flow. This approach replaces the outdated triangle concept with flexible zones that adapt to how modern families actually use their kitchens.
– Interior Designer, Havwoods
Herringbone, with its interlocking, non-directional zigzag, works differently. It creates a sense of texture and stability. It is often used to create a “rug” effect, where the pattern is contained within a border under a dining table or island. This technique performs zonal demarcation, anchoring a specific area within the larger open-plan room and giving it a distinct identity. By thoughtfully combining these patterns or choosing one that best suits the desired flow, a designer can craft a sophisticated and intuitive layout that supports the multi-functional nature of the modern family kitchen.
Wood-Effect Porcelain vs Real Wood: Can You Tell the Difference?
The advancements in high-definition digital printing have made wood-effect porcelain tiles incredibly realistic. For a busy kitchen extension, they present a compelling alternative to real wood, offering superior durability and near-zero maintenance. From a distance, high-quality porcelain can be almost indistinguishable from oak parquet. However, upon closer inspection, a trained eye can usually spot the difference. The challenge for manufacturers is replicating the infinite, unique variation of natural timber.
Real wood possesses a depth, warmth, and subtle light refraction that is difficult to mimic with a printed surface. Each plank of real oak has a unique grain pattern, knots, and figuring; no two are ever identical. While premium porcelain tile manufacturers use multiple different “prints” to reduce the sense of repetition, over a large area, you can often spot identical patterns if you look closely. The feel underfoot is another giveaway; porcelain is colder and harder than wood.
An expert knows exactly what to look for when distinguishing high-end porcelain from the real thing. These details are often subtle but become more apparent once you know where to focus your attention.
The key telltale signs for spotting porcelain include pattern repetition even on high-end tiles, printed grout lines on porcelain parquet panels, and the lack of depth and light refraction that real wood grain possesses
– Flooring Design Expert, Professional Assessment Guide
Ultimately, the choice comes down to priorities. If absolute authenticity and the unique character of a natural material are paramount, real engineered wood is the only answer. If you prioritize bulletproof durability, water resistance, and minimal upkeep in a high-traffic area, modern wood-effect porcelain is a technologically superior and highly convincing alternative.
Key Takeaways
- The cost difference between chevron and herringbone is driven by higher material waste and more intensive labor for chevron’s angled cuts.
- Subfloor preparation is non-negotiable; concrete must be perfectly level and have a moisture content below 2.5% CM to prevent wood floor failure.
- For installations with underfloor heating, engineered oak’s cross-laminated structure offers essential stability that solid oak cannot reliably provide.
Porcelain Tiles: The Best Choice for High-Traffic Family Kitchens?
After exploring the complexities of real wood parquet—from subfloor moisture to acclimatization and scratch repair—it becomes clear that while beautiful, it is a demanding material. For homeowners prioritizing absolute durability and peace of mind in a high-traffic, spill-prone family kitchen, wood-effect porcelain tile emerges as a powerful and practical alternative. It offers the aesthetic of herringbone or chevron without the inherent vulnerabilities of wood. It is impervious to water, incredibly scratch-resistant, and requires no specialist cleaning or maintenance beyond regular mopping.
However, choosing porcelain is not without its own technical considerations. To ensure it performs as expected in a demanding kitchen environment, you must look beyond the pattern on the surface. Key technical specifications determine a tile’s suitability. The PEI rating, for example, measures a tile’s resistance to abrasion and wear; a rating of 4 or 5 is essential for a busy residential kitchen. Likewise, the slip-resistance rating (or ‘R’ value) is a critical safety consideration, with R10 or higher being the recommended standard for kitchen floors.
Another crucial factor is choosing “through-body” or “full-body” porcelain. In these tiles, the color and pattern run through the entire thickness of the tile, so if it does chip, the damage is far less noticeable than on a glazed tile where the clay body underneath is exposed. While porcelain is a fantastic choice for durability, it’s important to select the right product and plan for its characteristics, such as its coldness underfoot (often addressed with UFH) and its acoustic properties in an open-plan space.
Now that you have a comprehensive understanding of the materials and patterns, the next logical step is to evaluate these options against the specific demands of your project. Start by assessing your subfloor’s condition and confirming your plans for underfloor heating to determine the most viable path forward.
Frequently Asked Questions on Parquet and Underfloor Heating
Can solid oak be used with underfloor heating?
Yes, but it is a high-risk application. It should only be attempted with narrow-width boards (under 70mm) that have quarter-sawn cuts to minimize movement. This requires a specialist installer and specific types of UFH systems designed for wood.
Why is engineered wood preferred for UFH?
Engineered wood’s core is made of cross-laminated plywood. This structure provides exceptional dimensional stability, counteracting the wood’s natural tendency to expand or contract when exposed to the temperature changes of an underfloor heating system, thus preventing warping.
Does the parquet pattern affect UFH compatibility?
No, the pattern itself (herringbone or chevron) does not impact compatibility with underfloor heating. The critical factor is the type of wood used. Both patterns will perform equally well when laid with a suitable engineered wood product.