The true value of a fitted wardrobe isn’t about choosing between expensive bespoke or budget IKEA; it’s about the quality of the craftsmanship that makes it look truly built-in.
- Bespoke joinery adds significant long-term property value by perfectly solving awkward architectural spaces.
- A well-executed IKEA hack, using scribing techniques and custom fronts, can achieve 90% of the look for a fraction of the cost.
- Details like a professional paint finish and proper ventilation are non-negotiable and what truly separates a quality installation from a cheap-looking one.
Recommendation: Focus your budget on the skill of the installer and the quality of the finish, not just the brand of the wardrobe carcass.
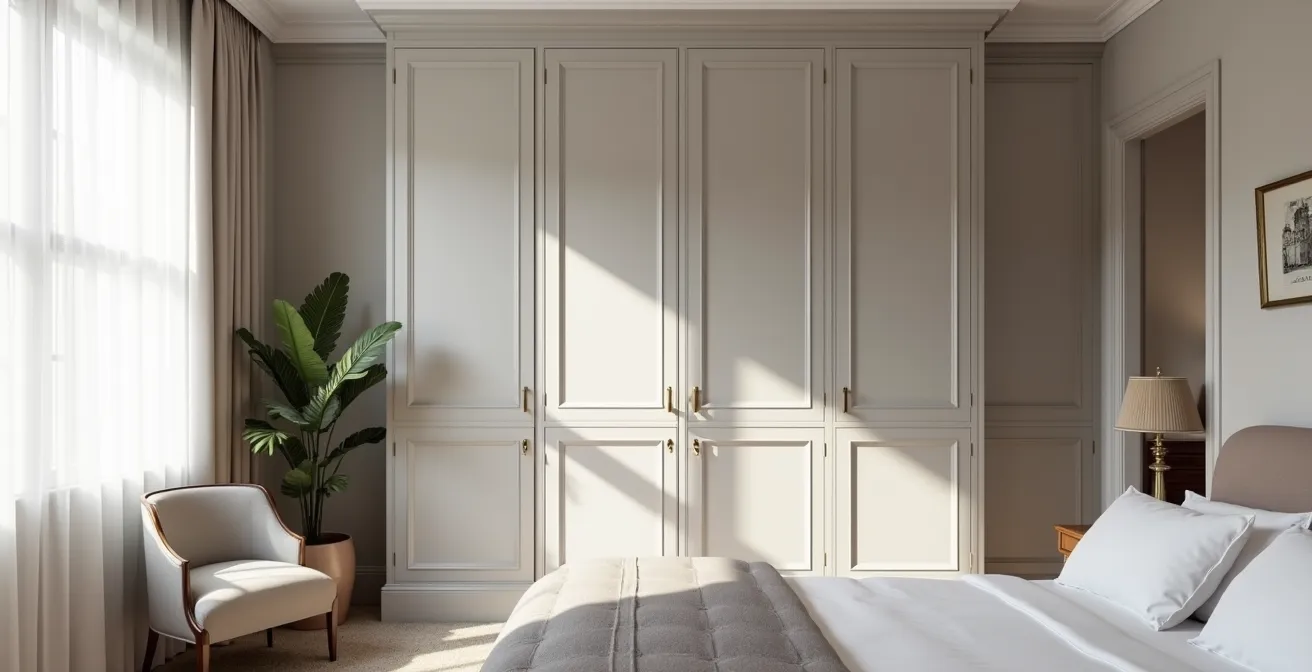
Every period home has them: those awkward, frustrating alcoves on either side of a chimney breast. They’re too shallow for most freestanding furniture, yet too prominent to ignore, often becoming magnets for clutter. The default solution is a fitted wardrobe, but this immediately raises the daunting question: is it worth splashing out thousands on bespoke joinery, or can a clever IKEA hack do the job? The debate often boils down to a simple, unhelpful dichotomy of expensive-but-good versus cheap-but-compromised.
As a carpenter who has built both, I can tell you this is the wrong way to look at it. The value of a fitted wardrobe isn’t in the brand name on the carcass, but in the skill and precision of its execution. A £3,000 bespoke unit that’s poorly finished or ignores vital details like ventilation can be a terrible investment. Conversely, a well-planned IKEA PAX system, masterfully scribed to the wall and fitted with custom doors, can add immense value and functionality for under £1,000. The investment is only ‘worth it’ if the final result solves your specific spatial problem with seamless, lasting quality.
This guide cuts through the noise. We’ll move beyond the simplistic cost debate and focus on the elements of craftsmanship that truly create value. We will explore how a professional finish is achieved, why material choice matters for longevity, and the critical design details—from internal storage to all-important ventilation—that deliver a return on your investment, whether you opt for full bespoke or a savvy high-street hack.
To help you make the most informed decision for your home and budget, we have structured this guide to cover every critical aspect, from the fundamental value proposition of bespoke work to the specific high-end finishes that genuinely make a difference.
Summary: A Carpenter’s Breakdown of Fitted Wardrobe Value
- Why Bespoke Joinery Adds More Value Than Freestanding Furniture
- How to Hand-Paint MDF Joinery for a Professional Finish
- MDF vs Birch Ply: Which Is Best for Painted Wardrobes?
- The Ventilation Mistake Behind Mouldy Fitted Wardrobes
- How to Design Wardrobe Internals for Max Shoe Storage
- How to Fake High-End Joinery with IKEA Hacks and Custom Fronts
- Open Shelving vs Closed Cabinetry: Which Maintains Minimalism?
- Which High-End Finishes Actually Add Value to a London Flat?
Why Bespoke Joinery Adds More Value Than Freestanding Furniture
The primary value of bespoke joinery isn’t just about storage; it’s about solving architectural problems permanently. A freestanding wardrobe, no matter how stylish, will always look like an object placed in a room. It creates awkward dust-traps on top and at the sides, highlighting—rather than hiding—the imperfections of an alcove. Bespoke, floor-to-ceiling wardrobes do the opposite: they integrate into the architecture, making the room feel larger, calmer, and more intentional. This seamlessness is what property buyers notice, as it signals a well-maintained, thoughtfully designed home.
This isn’t just a feeling; it translates into tangible buyer appeal. When a home has had its storage problems ‘solved’, potential buyers can more easily imagine themselves living there without clutter. They see a finished product, not a project they will have to tackle themselves. This psychological advantage can be a powerful negotiating tool in a competitive market.
Case Study: The London Home Where Wardrobes Sealed the Deal
A semi-detached home in London, featuring bespoke fitted wardrobes in all its alcoves, was listed during a competitive period. The sellers received multiple offers above the asking price. Crucially, feedback from viewings revealed that several buyers specifically mentioned the quality of the fitted furniture as a significant factor in their decision, demonstrating the direct impact of well-executed joinery on buyer appeal and the final sale price.
The key takeaway is that true built-in furniture doesn’t just add storage; it enhances the perceived quality and functionality of the space itself. It’s an investment in the room’s architecture as much as in a piece of furniture.
How to Hand-Paint MDF Joinery for a Professional Finish
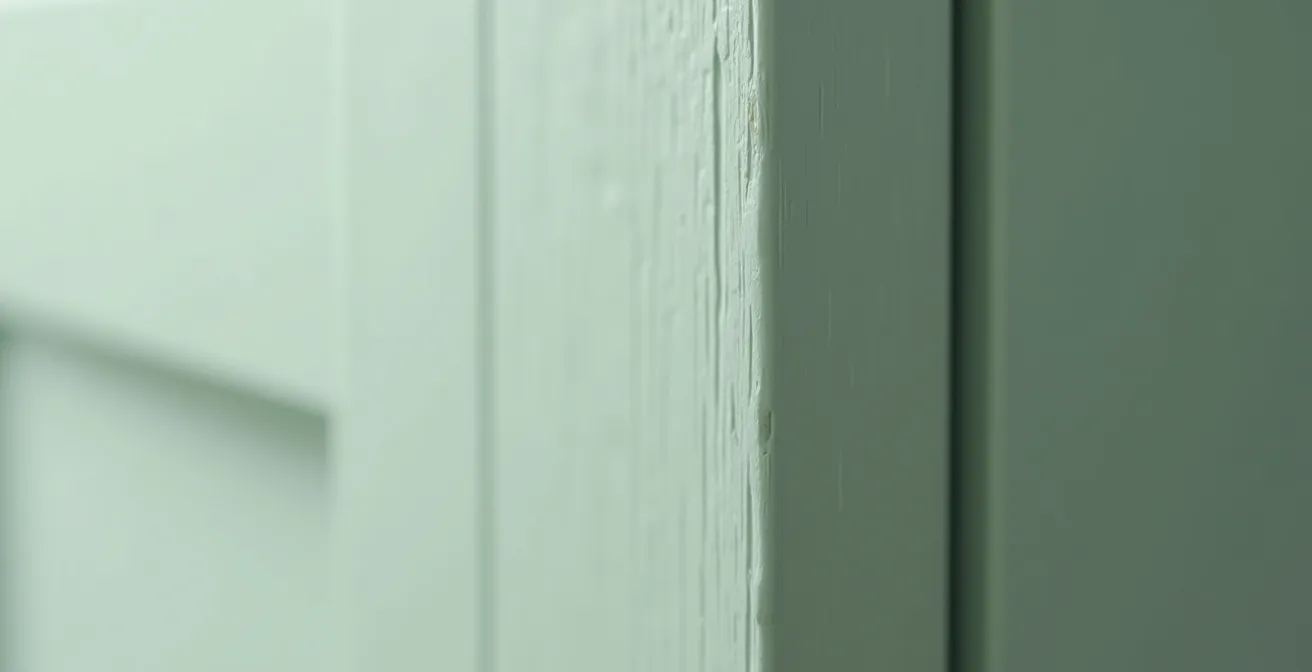
Nothing screams ‘bad DIY’ like a poorly painted MDF wardrobe. The difference between a high-end, spray-shop look and a blotchy, amateur attempt lies entirely in the preparation and process. As a carpenter, I can tell you that a flawless paint finish is achievable by hand, but it’s 90% prep and 10% application. The goal is to completely seal the porous material, especially the fluffy edges, so the topcoat sits perfectly flat and smooth, just as it would on solid wood.
The secret weapon is the right primer. A shellac-based primer, like Zinsser B-I-N, is non-negotiable for doors and any exposed MDF edges. It creates an impermeable barrier that stops the paint from soaking in and the fibres from swelling. For the internals of the wardrobe, a cheaper water-based primer is usually sufficient. Once primed correctly, the choice of topcoat determines the durability and aesthetic. An eggshell or satinwood finish is ideal as it offers a subtle sheen that’s durable, wipeable, and easy to touch up—unlike high-gloss, which shows every imperfection.
A particularly effective modern design trend is ‘colour drenching’, where the wardrobe, walls, and even skirting boards are all painted in the same shade. This technique makes the joinery recede visually, causing the awkward alcove to virtually disappear and making the entire room feel more cohesive and spacious.
Action Plan: Achieving a Professional Paint Finish on MDF
- Seal the Edges: Apply a thin layer of wood filler over all exposed, cut MDF edges. Once dry, sand it perfectly smooth. This is the most crucial step for a seamless look.
- Prime for Adhesion: Use a high-adhesion, shellac-based primer on all external surfaces, especially doors and filled edges. Use a standard water-based primer for internal carcasses to save costs.
- Choose the Right Sheen: Opt for an eggshell or satinwood paint. These sheens offer the best balance of durability, easy cleaning, and the ability to hide minor imperfections.
- Apply the Colour Drenching Effect: For a high-end, integrated look, paint the wardrobe, surrounding walls, and skirting in the exact same colour and sheen.
- Select a Durable Paint: Consider a high-quality, durable paint like Valspar’s V700 range, known for its excellent coverage and wipeable finish, ensuring longevity.
MDF vs Birch Ply: Which Is Best for Painted Wardrobes?
The debate between Medium-Density Fibreboard (MDF) and Birch Plywood is a common one in joinery. While birch ply has a beautiful edge grain and is incredibly strong, for a painted wardrobe fitted into an alcove, MDF is often the superior choice, especially for DIY projects. The reason is simple: material stability and finish. Birch ply is made of layers, and these can sometimes telegraph through a painted finish over time, creating a subtle ‘ripple’ effect. Furthermore, its exposed edge, while attractive when clear-finished, is difficult to paint to a perfectly smooth, seamless finish.
MDF, on the other hand, is completely homogenous. It has no grain and is perfectly uniform, making it the ideal substrate for a flawless, flat paint finish. Its key advantage, however, lies in how it handles being scribed. Scribing is the carpenter’s technique of cutting a panel to perfectly match the contours of an uneven wall. Old houses rarely have walls that are perfectly straight or plumb, and a fitted wardrobe needs to meet these walls without any gaps. The uniform nature of MDF makes it far easier to shape and sand to an exact profile.
This point is perfectly articulated by industry experts who work with these materials daily. As the Professional Wardrobe Building Guide from the DIY Wardrobes Information Centre notes:
MDF’s homogeneity makes it far superior for DIYers to scribe to the imperfect, non-plumb walls of a typical alcove.
– DIY Wardrobes Information Centre, Professional Wardrobe Building Guide
While a skilled joiner can work wonders with either material, for achieving that seamless, ‘part-of-the-wall’ look in a period property, MDF’s stability and workability give it a distinct edge for painted applications.
The Ventilation Mistake Behind Mouldy Fitted Wardrobes
The single biggest mistake in fitted wardrobe construction is ignoring ventilation. When you enclose an alcove, especially one on an external wall, you are creating a pocket of still, trapped air. The temperature difference between the warm room and the cold external wall can lead to condensation forming behind and inside the wardrobe. This moisture, combined with a lack of airflow and the dark environment, is the perfect breeding ground for mould and mildew, leading to musty-smelling clothes and potential damage to the wall itself.
The solution is to design for passive air circulation from the outset. This is achieved by creating a ‘chimney effect’. By installing discreet vents at the very bottom of the wardrobe (e.g., in the plinth) and at the very top (e.g., on the top panel, out of sight), you allow cool, dry air to be drawn in at the base. As this air warms slightly inside the unit, it rises and exits through the top vent, creating a continuous, slow-moving current of air. This simple step is enough to prevent most moisture build-up. Additionally, it’s crucial to leave at least a 10mm gap between the back of the wardrobe and the external wall to allow this airflow to happen.
This isn’t just theory; it’s a proven long-term solution. In a discussion on this very topic, a homeowner who followed these principles provided feedback years later.
I checked a few months back (5yrs since I built it) and no sign of mould.
– Jack from Project Number Nine
For high-risk areas or very cold walls, you can even install silent, low-power USB fans (often used for media cabinets) to create active ventilation. This small detail is what ensures your investment lasts and remains healthy.
How to Design Wardrobe Internals for Max Shoe Storage
A beautifully finished wardrobe is only half the victory; the internals must be just as thoughtfully designed. One of the biggest storage challenges for many is shoes. With research showing that the average woman owns over 24 pairs, simply lining them up on the floor of the wardrobe is a huge waste of vertical space. Custom joinery offers the perfect opportunity to create hyper-efficient storage tailored to your collection.
Instead of standard shelving, think vertically and densely. One of the most effective solutions is a pull-out vertical tower, much like a kitchen larder unit. These can be built into narrow gaps beside the main hanging sections and provide an incredible amount of storage in a small footprint. For standard shelves, adopting a ‘heel-to-toe’ alternating layout can increase storage density by up to 30%. Don’t forget the doors either; slim racks installed on the inside of wardrobe doors are perfect for flat shoes, sandals, and slippers, utilising space that is otherwise completely wasted.
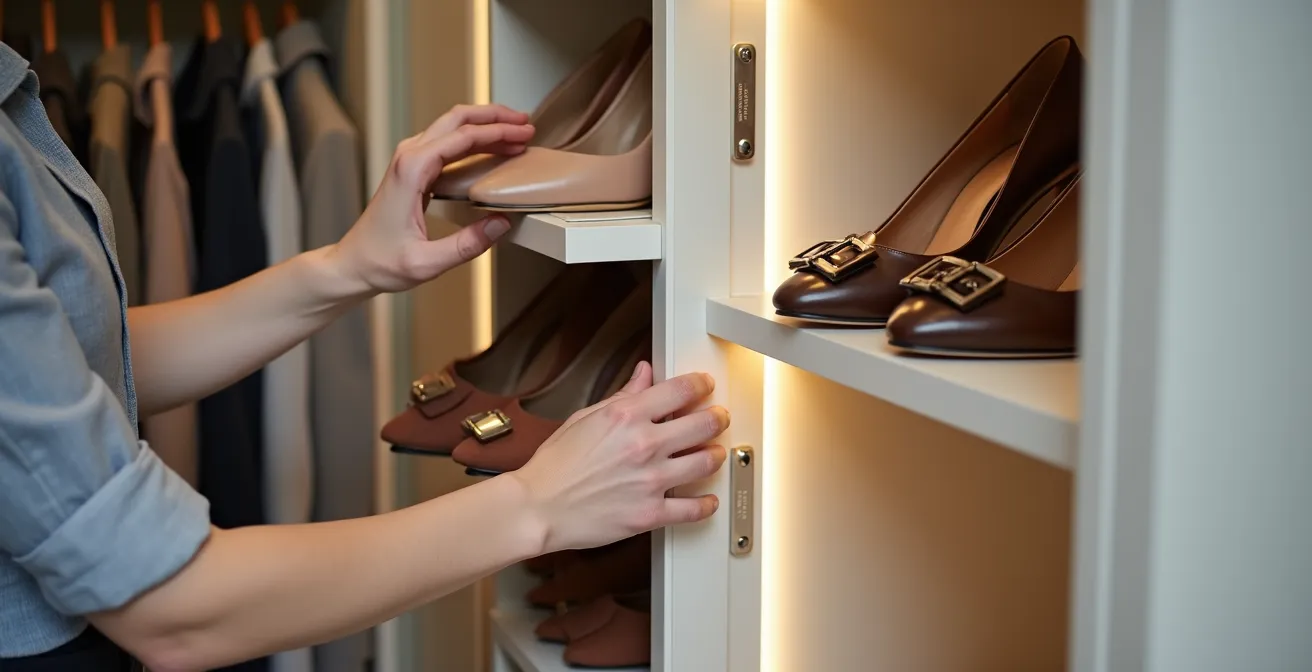
The key to maximising space is customisation. A bespoke design allows you to create adjustable shelf heights tailored to different types of footwear—taller gaps for boots, medium for trainers, and shorter for heels and flats. Using clear acrylic dividers on shelves can also help keep shoes neatly organised and prevent them from toppling over into a messy pile. These small considerations are what elevate a simple cupboard into a truly functional and satisfying storage solution.
How to Fake High-End Joinery with IKEA Hacks and Custom Fronts
For those whose budget doesn’t stretch to full bespoke, a well-executed IKEA hack can deliver a surprisingly high-end result. The key is to use IKEA’s robust and affordable cabinet systems (like PAX, METOD, or BESTA) as the ‘carcass’ and then focus your effort and budget on making it look truly built-in. This involves three main techniques: choosing the right system for your alcove depth, scribing filler panels to the walls, and investing in custom fronts.
The process starts with accurate measurement. Different IKEA systems have different depths, making them suitable for various types of alcoves. Once the carcasses are in place, the magic happens with filler panels and scribing. You’ll have gaps between the IKEA unit and the wall, and on top. These are filled with panels of MDF, which are then carefully cut (scribed) to match the exact profile of your uneven walls and ceiling. When caulked and painted the same colour as the walls, these filler panels make the flat-pack unit look like it was custom-built for the space.
Case Study: The £800 IKEA Hack That Transformed a Room
One ambitious DIYer transformed a 12-foot wide wall using two PAX wardrobes combined with three BESTA cabinets on top to reach the 9-foot ceiling. Using a jigsaw, they scribed timber and MDF filler strips to perfectly match the non-standard walls, creating a seamless, gap-free finish. By using the affordable IKEA bases and focusing on the custom-fit panels, the total project cost was kept under budget and tripled the room’s storage, achieving a look that rivals expensive custom joinery.
To help you select the right starting point for your project, here is a breakdown of which IKEA systems work best for different alcove depths.
| Alcove Depth | Recommended IKEA System | Key Modification |
|---|---|---|
| Standard (60cm+) | PAX Wardrobe | Add filler panels and scribing for perfect fit |
| Shallow (35-45cm) | METOD Kitchen Units | Use as a base, add custom doors |
| Very Shallow (30cm) | BESTA Living Room | Wall-mount with custom fronts |
Open Shelving vs Closed Cabinetry: Which Maintains Minimalism?
When designing for an alcove, especially with a minimalist aesthetic in mind, the choice between open shelving and closed cabinetry is critical. While open shelves are trendy and can be used to display curated objects, they can be a double-edged sword in an awkward space. Because an alcove already represents a break in the flat plane of a wall, filling it with visually busy open shelves can often increase the sense of clutter and chaos, undermining the goal of minimalism.
In this context, floor-to-ceiling closed cabinetry often serves minimalism far better. By creating a single, uninterrupted surface, especially when painted the same colour as the walls, the wardrobe can make the alcove ‘disappear’, creating a much calmer and more expansive feel. This sentiment is echoed by design professionals.
In the context of an already ‘awkward’ alcove, open shelving can increase visual clutter and make the space feel more chaotic, whereas floor-to-ceiling closed cabinetry painted the same colour as the walls can create a calmer, more expansive feel.
– Simon Tcherniak, Senior Designer at Neville Johnson
However, this doesn’t mean you must abandon open storage entirely. A hybrid approach can offer the best of both worlds: practical hidden storage combined with a small, curated display area. This maintains a clean look while still allowing for personal expression. Consider the following strategies:
- Design closed cabinetry for the bottom two-thirds of the unit to hide everyday clutter like clothes and shoes.
- Reserve the top third for a section of open shelving to display a few beautiful books or decorative items.
- Incorporate fluted or reeded glass doors, which obscure the contents of the wardrobe while adding texture and reflecting light.
- Use ‘pocket doors’ that slide back into the wardrobe unit itself, allowing you to have the section open for access without doors cluttering the room.
Key Takeaways
- The true value of a fitted wardrobe comes from its seamless integration into the room’s architecture, not the cost of the materials alone.
- A professional, hand-painted finish on MDF is achievable but requires meticulous preparation, especially sealing cut edges and using a shellac-based primer.
- Proper ventilation, achieved by creating a ‘chimney effect’ with top and bottom vents and a gap at the back, is essential to prevent mould in the long term.
Which High-End Finishes Actually Add Value to a London Flat?
When investing in fitted wardrobes, particularly in a competitive property market like London, certain high-end finishes can elevate the project from merely functional to a genuine asset that adds significant value. According to property experts at Foxtons, quality home improvements can result in a 15-20% property value increase, and it’s the thoughtful details in joinery that often contribute to this. These are the touches that create a sense of luxury, convenience, and superior craftsmanship.
The most impactful finishes are those that improve the daily user experience. Integrated soft LED lighting that switches on automatically when a door or drawer is opened is a prime example. It feels luxurious and is immensely practical. Similarly, incorporating hidden USB charging ports inside a bedside drawer or a cable management system for hair dryers turns a simple storage unit into a smart, modern convenience. The quality of the hardware is also paramount; using whisper-quiet, soft-close mechanisms from premium brands like Blum for all doors and drawers is a non-negotiable feature in high-end joinery.
Aesthetic finishes that create an illusion of space and light also add significant value. Using mirrored or high-gloss back panels inside the wardrobe can reflect light and make the interior feel deeper and brighter. For those seeking character, sourcing reclaimed wood from local architectural salvage yards for drawer fronts or internal detailing can add a unique story and authenticity that buyers appreciate. Finally, in an increasingly eco-conscious market, using low-VOC (Volatile Organic Compound) paints from sustainable British brands is a detail that resonates with discerning buyers, adding another layer of perceived value to your investment.
Ultimately, whether you choose a fully bespoke solution or a masterfully executed IKEA hack, the principle remains the same: the investment is justified by the quality of the execution. By focusing on a seamless fit, a flawless finish, and thoughtful details, you create a feature that not only solves your storage problems but genuinely enhances the value and enjoyment of your home. To put these principles into practice, your next step should be to get detailed quotes from a trusted local carpenter or a highly-rated handyman who specialises in these installations.