Choosing between internal and external insulation for a solid brick home is less about cost and more about correctly managing long-term moisture risk.
- Internal Wall Insulation (IWI) is disruptive and carries a significant risk of trapping damp, leading to structural rot if not executed with breathable materials and expert detailing.
- External Wall Insulation (EWI) offers superior thermal performance and protects the brickwork, but completely alters the building’s exterior, requiring careful aesthetic choices to maintain character.
Recommendation: Prioritise a ‘breathable’ insulation strategy that allows moisture to escape, and always consider your walls, roof, and heating system as one integrated unit before committing to any work.
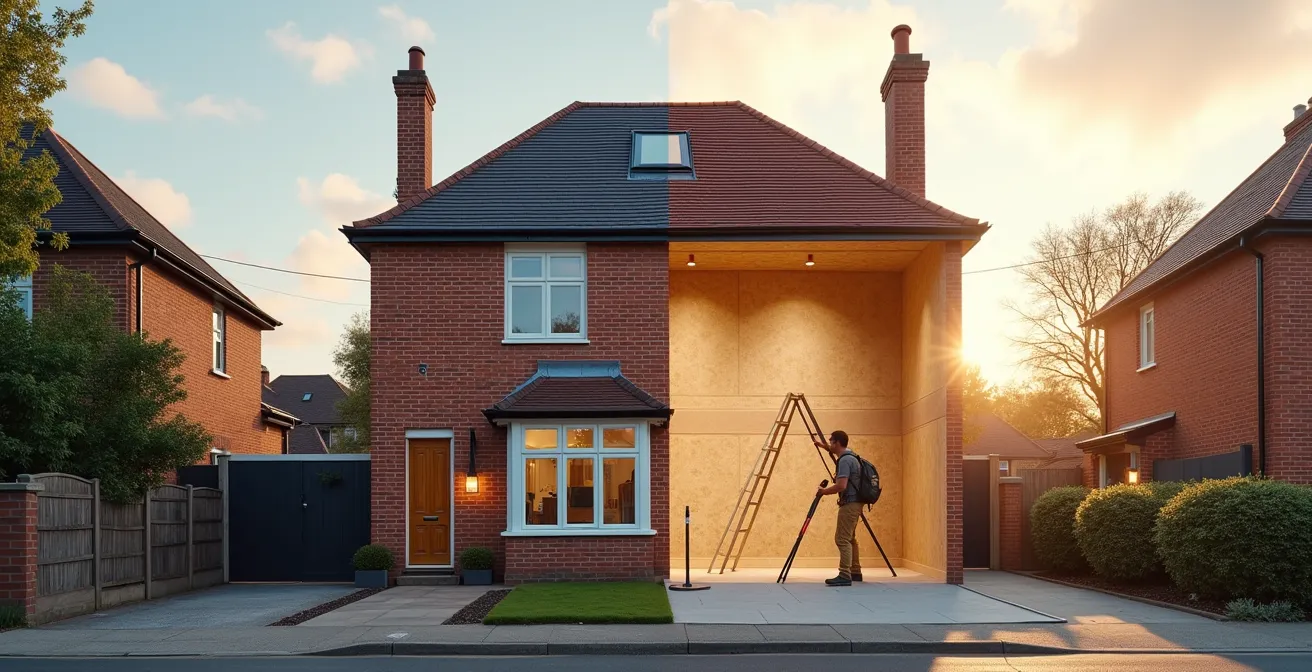
If you own a property built before the 1920s in the UK, you likely live within the charming but thermally inefficient embrace of solid brick walls. While beautiful, they are a major source of heat loss, leading to punishing energy bills and persistent chilliness, especially in upstairs rooms. The common answer is insulation, but this presents a critical dilemma: do you apply it internally (IWI) or externally (EWI)?
The standard advice often boils down to a simple trade-off: IWI is cheaper but disruptive and steals floor space, while EWI is more effective but costs more and changes your home’s appearance. This simplification is dangerously incomplete. For a period property, the wrong choice isn’t just a matter of inconvenience; it can introduce severe, long-term problems like interstitial condensation, mould, and structural timber decay.
The real key to a successful retrofit is not just adding insulation, but understanding building physics. It’s about viewing your home as a complete thermal system. The choice between internal and external insulation must be a strategic one, focused on managing moisture, preserving heritage character, and ensuring all components—from the walls to the heating system—work in harmony.
This guide moves beyond the surface-level debate. We will explore the hidden risks, the science behind breathable materials, the true impact on your living space, and how your wall insulation choice interacts with other critical elements of your home, like loft insulation and even your future heat pump.
To navigate these crucial decisions, this article is structured to guide you from the most common problems to the most advanced considerations. The following sections break down each aspect of the EWI vs. IWI debate, providing the insights of a retrofit coordinator to help you protect both your investment and your comfort.
Summary: A Strategic Guide to Insulating Your Solid Wall Home
- Why Your Upstairs Rooms Are Freezing Despite the Heating Being On
- Loft Insulation: How to Stop Losing 25% of Your Heat Through the Roof?
- Why Internal Insulation Can Cause Rot in Joist Ends
- How to Use Wood Fibre Boards for Internal Insulation
- The Floor Area You Lose with Internal Insulation Systems
- Render vs Brick Slips: Restoring the Facade After External Insulation
- How to Calculate the ROI of Wall Insulation on Your Energy Bill
- Why Heat Pumps Fail to Warm Houses with Microbore Pipework
Why Your Upstairs Rooms Are Freezing Despite the Heating Being On
It’s a frustratingly common scenario in older homes: the thermostat is on, the downstairs is reasonably warm, but the upstairs bedrooms remain stubbornly cold. This isn’t just a quirk of your house; it’s a clear symptom of significant heat loss, and the primary culprit is your uninsulated solid walls. Because warm air naturally rises, any heat generated downstairs drifts upwards, only to be rapidly conducted to the outside through the cold, solid brickwork of the upper floor.
Solid walls, unlike modern cavity walls, have no air gap to slow down this heat transfer. The brick acts like a thermal bridge, constantly pulling warmth out of your home. In fact, it’s estimated that approximately a third of all heat loss in an uninsulated home escapes directly through the walls. This effect is often more pronounced on the first floor, which is more exposed to wind and has a larger external wall area relative to its volume compared to the more sheltered ground floor.
This constant heat drain means your heating system has to work much harder to maintain a comfortable temperature, leading to inflated energy bills. The cold wall surfaces also create another problem: condensation. When warm, moist air from inside the house comes into contact with these cold surfaces, it cools, and the moisture condenses into water droplets, creating damp patches and encouraging the growth of black mould. Identifying and sealing air leaks is a crucial first step, but tackling the fundamental problem of thermal loss requires insulation.
Your Action Plan: A DIY Method for Detecting Air Leaks
- Choose Your Tool and Time: On a cold, windy day, use an incense stick or a smoke pen to make air movement visible. The bigger the temperature difference between inside and outside, the clearer the draughts will be.
- Check Openings: Slowly move the smoke source around all window and door frames, paying close attention to the joints where the frame meets the wall.
- Inspect Junctions: Test along skirting boards, especially at the corners of the room and where floors meet external walls. These are common points of air infiltration.
- Examine Ceilings: Check the perimeter of loft hatches and around any recessed spotlights or ceiling fixtures that penetrate the plasterboard. These are often poorly sealed.
- Observe and Mark: Watch for any smoke that is drawn inwards or pushed sideways. This indicates an air leak. Use a piece of masking tape to mark every leak you find for later sealing with appropriate caulk or filler.
Fixing these leaks improves comfort, but to truly solve the problem of cold rooms and high bills, you must address the poor thermal performance of the walls themselves.
Loft Insulation: How to Stop Losing 25% of Your Heat Through the Roof?
Before you commit to the significant cost and disruption of wall insulation, there’s a more fundamental and cost-effective step: checking your loft. Since heat rises, an uninsulated or poorly insulated roof is like leaving a massive window open all winter. Around 25% of your home’s heat escapes this way. Tackling this first is the ‘low-hanging fruit’ of any home energy efficiency project and provides an excellent return on investment.
For most UK homes, the target for loft insulation is a depth of at least 270mm of mineral wool insulation, as recommended by current building regulations. Many older properties may only have 100mm or less, a relic of past standards. Topping this up is a relatively simple DIY job. The standard method involves laying the first layer of insulation (typically 100mm) between the ceiling joists, and a second layer (170mm or more) at a right angle across the top of the joists to prevent ‘thermal bridging’ through the timber.
While mineral wool is the most common material, other options exist depending on your needs:
- Rigid PIR Boards: Thinner for the same performance, ideal if you want to create storage space by boarding over the insulation. They are installed between and sometimes over the rafters in a ‘warm loft’ configuration.
- Sheep’s Wool: A natural, breathable option that helps manage moisture, making it a good choice for period properties, though it is more expensive.
- Blown Cellulose: Made from recycled newspaper, this is a job for professionals who blow the material into place, making it perfect for lofts with difficult access or complex shapes.
Upgrading your loft insulation from 0 to 270mm can save a detached house hundreds of pounds per year on energy bills, making it an essential first step. Only once your roof is properly insulated should you turn your attention to the next biggest source of heat loss: the walls.
Once you’ve plugged the heat loss from above, the impact of your solid walls becomes the dominant issue to resolve.
Why Internal Insulation Can Cause Rot in Joist Ends
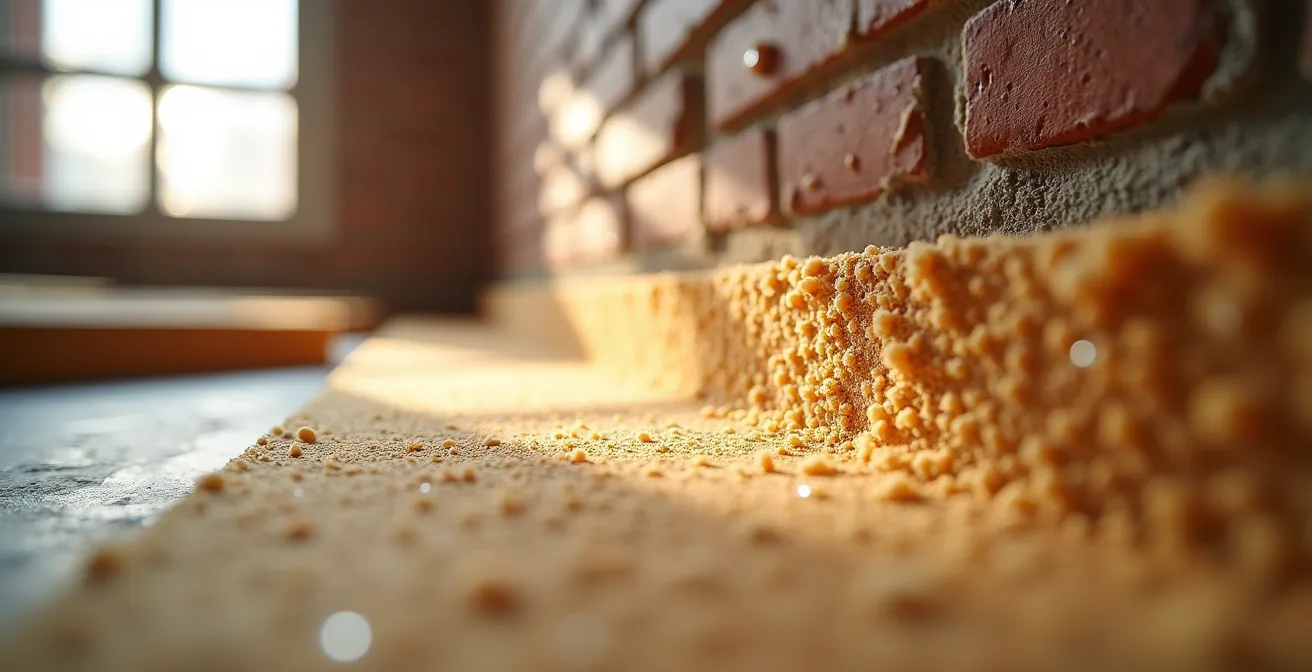
Applying insulation to the inside of a solid brick wall seems like a logical, less disruptive alternative to external cladding. However, this approach comes with a serious, often overlooked risk: interstitial condensation and subsequent rot in structural timbers. When you add IWI, you fundamentally change how your wall performs. The brickwork, which was previously kept relatively warm and dry by your home’s escaping heat, now becomes colder and wetter.
This is where the danger lies for the timber joists that support your floors and ceilings, which are often embedded directly into the brickwork in older properties. Warm, moist air from inside your home will inevitably find its way past the new insulation. When it reaches the now-cold brick wall and the embedded joist end, it hits its ‘dew point’. The moisture condenses into water, creating a damp environment that is the perfect breeding ground for mould, fungus, and wet rot. This process is hidden from view, and by the time you notice a problem (such as a sagging floor), the structural damage can be severe. Indeed, research by the Department for Energy Security and Net Zero shows that installing IWI almost always increases this moisture risk.
Preventing this requires meticulous attention to detail and a ‘breathable’ construction. The goal is not to create an impenetrable waterproof barrier (which is almost impossible to achieve perfectly and can trap moisture if it fails), but to manage moisture’s path. Key strategies include:
- Detailing around joists: Ensuring a continuous air and vapour control layer is wrapped around the joist ends.
- Treating the timber: Injecting the joist ends with a boron paste can inhibit fungal growth if they must remain embedded.
- Using vapour-permeable insulation: Choosing materials that allow moisture to pass through them and evaporate away safely is critical.
Ignoring these principles in favour of cheap, non-breathable foam insulation boards is a recipe for disaster in a period property.
This highlights the absolute necessity of choosing the right materials, a topic we will explore next.
How to Use Wood Fibre Boards for Internal Insulation
The solution to the moisture risks posed by internal insulation lies in choosing the right materials. Rather than trying to block moisture with non-breathable plastic foams like PIR or polystyrene, the safer strategy for solid walls is to manage it with a ‘diffusion open’ or ‘breathable’ system. Wood fibre insulation is a prime example of this approach.
Unlike closed-cell foams, which act as a vapour barrier, wood fibre boards are vapour permeable. They have a hygroscopic nature, meaning they can absorb moisture from the air when humidity is high and release it when humidity drops, effectively buffering moisture and preventing it from condensing into liquid water within the wall structure. This ‘breathing’ action is vital for maintaining the health of the original brick and any embedded timbers. Furthermore, wood fibre has a high thermal mass, which helps to buffer against temperature swings, keeping the house cooler in summer—a benefit foam insulations do not provide.
The installation of a breathable system is a holistic process. The wood fibre boards are typically fixed directly to the brick wall, and then finished with a compatible breathable plaster, such as lime or a specialist clay plaster. It is crucial that every layer of the system is breathable; finishing a wood fibre board with standard gypsum plaster and vinyl paint would trap moisture and defeat the entire purpose.
The table below highlights the fundamental difference in philosophy between a breathable wood fibre system and a non-breathable foam system.
| Property | Diffusion Open (Wood Fibre) | Diffusion Closed (Foam) |
|---|---|---|
| Moisture Management | Allows moisture through structure | Acts as moisture barrier |
| Breathability | High – prevents trapped moisture | Low – requires perfect vapor control |
| Summer Overheating | Prevents through thermal mass | Limited thermal mass benefit |
| Compatible Finishes | Lime plaster, intelligent VCLs | Standard plasterboard |
| Installation Risk | Lower moisture risk | Higher if vapor barrier fails |
While this approach solves the technical challenges, it does come with its own practical drawback: a reduction in room size.
The Floor Area You Lose with Internal Insulation Systems
The most immediate and tangible drawback of any internal wall insulation system is the loss of internal floor area. For the owners of smaller terraced or semi-detached Victorian properties, where space is already at a premium, losing 10-15cm from each external wall can be a significant deterrent. The exact amount of space lost depends entirely on the type of insulation material used and the thermal performance (U-value) you are trying to achieve.
High-performance, non-breathable materials like PIR foam or phenolic boards can achieve a good U-value with less thickness. However, as discussed, these carry a high moisture risk in solid wall properties. Breathable materials like wood fibre or cork are safer but are less insulating per inch, so they require a greater thickness to achieve the same level of thermal performance. This creates a direct trade-off: do you opt for a thinner, riskier system or a thicker, safer one?
The table below illustrates how much space you might lose in a typical 12’x12′ (approx. 3.6m x 3.6m) room with two external walls, depending on the material chosen to achieve a target U-value of 0.30 W/m²K (a common target for retrofits).
| Material Type | Thickness Required | U-Value Achieved | Space Lost (12’x12′ room) |
|---|---|---|---|
| High-performance PIR | 60mm | 0.30 W/m²K | 7.2 sq ft |
| Wood Fibre | 100mm | 0.30 W/m²K | 12 sq ft |
| Vacuum Insulated Panels | 40mm | 0.30 W/m²K | 4.8 sq ft |
| Aerogel | 20mm | 0.30 W/m²K | 2.4 sq ft |
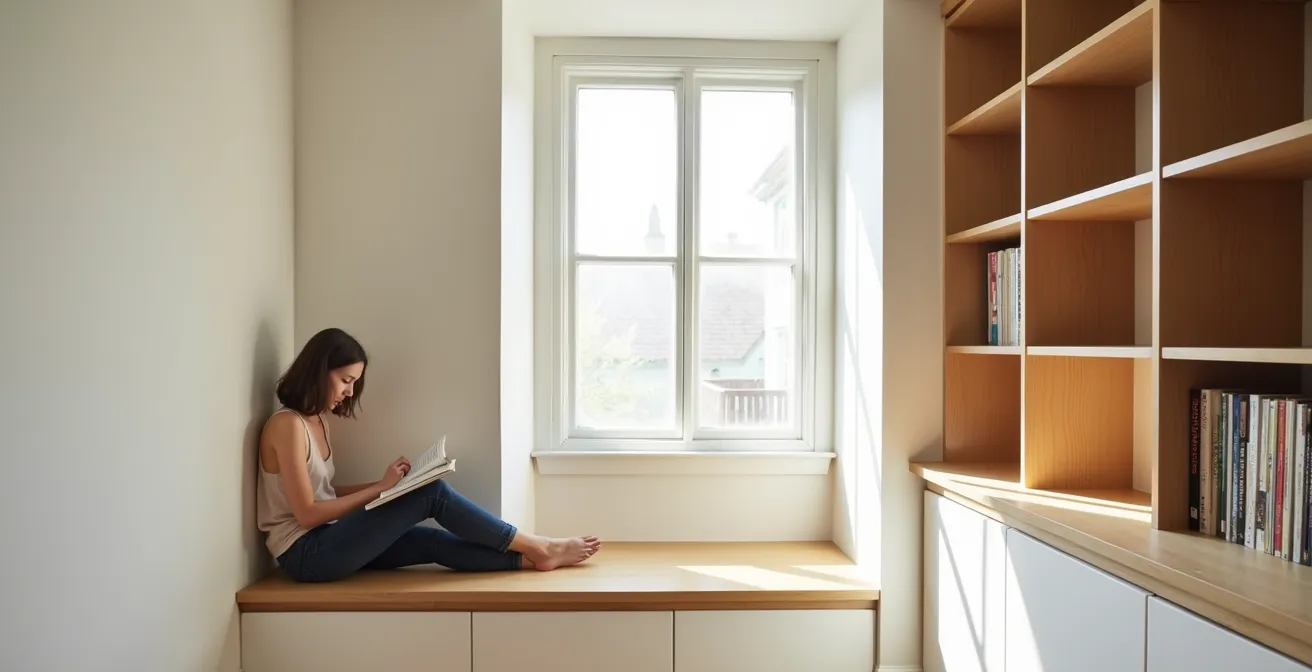
While ultra-thin, high-tech materials like Vacuum Insulated Panels (VIPs) or aerogel offer a solution with minimal space loss, their extremely high cost puts them out of reach for most residential projects. However, rather than viewing the extra wall thickness as purely a loss, it can be an opportunity for creative design. The new, deeper wall void can be used to create integrated shelving, built-in window seats, or recessed storage, turning a practical necessity into a beautiful architectural feature.
If this loss of space is simply unacceptable, the alternative is to move the insulation to the outside of the building.
Render vs Brick Slips: Restoring the Facade After External Insulation
If the risks of IWI or the loss of internal space are too great, External Wall Insulation (EWI) becomes the superior option. EWI involves fixing insulation boards to the outside of your walls and then covering them with a protective, decorative finish. This method avoids all the internal disruption and moisture risks associated with IWI. It also wraps the building in a continuous thermal envelope, which is more effective at eliminating cold bridges. However, its biggest impact is on your home’s appearance.
For a period property, particularly one with attractive original brickwork, covering the facade is a major decision. The choice of finish is therefore critical to preserving or enhancing the building’s character. The two most common options are render and brick slips. * Render: This is the most common and cost-effective finish. Modern renders are available in a vast range of colours and can be applied with different textures, from a sleek, smooth finish for a contemporary look to a more traditional textured or pebble-dashed appearance. * Brick Slips: For homeowners who want to retain the original brick aesthetic, brick slips are the ideal solution. These are thin slices of real brick that are applied to the insulation system, convincingly recreating the look of a solid brick wall. They are more expensive and labour-intensive than render but are often the preferred choice for character properties or houses in conservation areas.
Beyond these two, a variety of other cladding options can be considered:
- Timber or composite cladding for a modern, natural aesthetic.
- Tile hanging, which is common on many older UK properties and can be a sympathetic choice.
- Panels or stone-effect finishes for a more unique look.
The cost difference between EWI and IWI is significant. According to the Energy Saving Trust, typical costs for a three-bedroom semi-detached house are around £12,000 for internal insulation, whereas external insulation can be £18,000 or more, depending heavily on the chosen finish.
This significant financial outlay naturally leads to the next question: is it worth it?
How to Calculate the ROI of Wall Insulation on Your Energy Bill
Deciding to invest a five-figure sum in wall insulation is a major financial commitment. While the benefits of increased comfort and a warmer home are immediate, calculating the financial return on investment (ROI) is a crucial part of the decision-making process. The ROI depends on several factors: the cost of the installation, the amount of energy you save, and the price of that energy.
First, you need a baseline. Look at your annual energy bills (in kWh, not just pounds) before the insulation is installed. The potential savings can be dramatic; a fully insulated home can see its heating demand slashed significantly. Some studies suggest that fully insulating your home can reduce energy costs by as much as 50%, though this depends on the ‘before’ and ‘after’ state of the entire property (walls, roof, windows, and airtightness).
To get a more precise estimate, you can use the following simplified formula: Annual Saving (£) = (Annual Heating Energy Use in kWh) x (% Reduction) x (Price per kWh of Gas/Electricity)
The ‘% Reduction’ is the hardest part to estimate without a professional survey. However, we know solid walls account for roughly 35% of heat loss. Insulating them properly could therefore reduce your total heating bill by 20-30%. For example, if your annual gas usage for heating is 12,000 kWh at a price of 7p/kWh, a 25% reduction would be: 12,000 kWh * 0.25 * £0.07/kWh = £210 per year.
The payback period is then calculated by dividing the total installation cost by the annual saving. Using the Energy Saving Trust’s figures, an £18,000 EWI installation saving £210/year would have a simple payback period of over 85 years. This highlights a crucial point: solid wall insulation, on its own, often does not ‘pay for itself’ in a simple financial sense within a short timeframe. Its value is also in the vastly improved comfort, the protection of the building fabric, and the ‘future-proofing’ of your home for a low-carbon world. Savings from other measures, like loft insulation, are much quicker. For instance, in a detached house, simply adding loft insulation can save up to £390 a year.
This long-term perspective is especially important when considering how insulation interacts with modern heating systems.
Key takeaways
- Solid walls are a major source of heat loss (around 35%), making insulation a priority after the loft (25%).
- Internal Wall Insulation (IWI) is cheaper but risks causing hidden damp and rot if non-breathable materials are used.
- External Wall Insulation (EWI) is more thermally effective and safer for the building structure, but costs more and alters the home’s appearance.
Why Heat Pumps Fail to Warm Houses with Microbore Pipework
A “fabric first” approach—insulating before upgrading your heating—is the golden rule of retrofitting. A well-insulated house requires a smaller, more efficient heating system. For many, the goal is to move away from a gas boiler to a low-carbon heat pump. However, this is where another hidden legacy of older homes can cause problems: microbore pipework.
Microbore pipes, with their small 8mm or 10mm diameter, were popular in the 70s and 80s as they were cheap and easy to install. A gas boiler heats water to a very high temperature (e.g., 70°C) and forcefully pumps it through these narrow pipes. A heat pump works differently. It is a low-temperature system, most efficiently producing water at around 45-55°C. To deliver the same amount of heat to a radiator, it needs to circulate a much larger volume of this cooler water. In fact, heat pumps run at up to 4 times the flow rate of a gas boiler. Microbore pipes create high resistance and simply cannot handle this required flow rate. The result is a heat pump that struggles, fails to heat the house effectively, and runs inefficiently, costing you more money.
While the ‘gold standard’ solution is a full re-plumb with standard 22mm and 15mm pipes, this is hugely disruptive and expensive. Fortunately, there are strategies to make a heat pump work with a microbore system, but they require careful design:
- System Matching: First, an installer can try to match the heat pump’s operating conditions to the existing system’s parameters as closely as possible.
- Radiator Upgrades: The most effective step is to replace existing radiators with much larger, oversized ones. These have a greater surface area to release heat into the room, compensating for the lower water temperature.
- Increase System Volume: Installing a buffer tank or volumiser adds more water to the overall system, which can help the heat pump operate more smoothly and reduce on/off cycling.
- Adjusting the Delta T: As a last resort, an installer can increase the ‘Delta T’ (the temperature difference between water entering and leaving the radiator). This reduces the required flow rate but also slightly lowers the radiator’s heat output, further reinforcing the need for oversized radiators.
Now that you understand the full system, from the building fabric to the pipework, the logical next step is to seek a professional, whole-house assessment to determine the most suitable and cost-effective strategy for your unique property.